
This is our story of rebuilding a 1954 vintage brick home. Not content with merely rebuilding one house after Katrina, Winnie convinced me to purchase and rebuild another house several years later. These photos tell the story. It was one year’s hard work, but we gave a worn-out house new life.
Photo Collection
This is a photo collection of the house as we renovated it in 2008 to 2009.
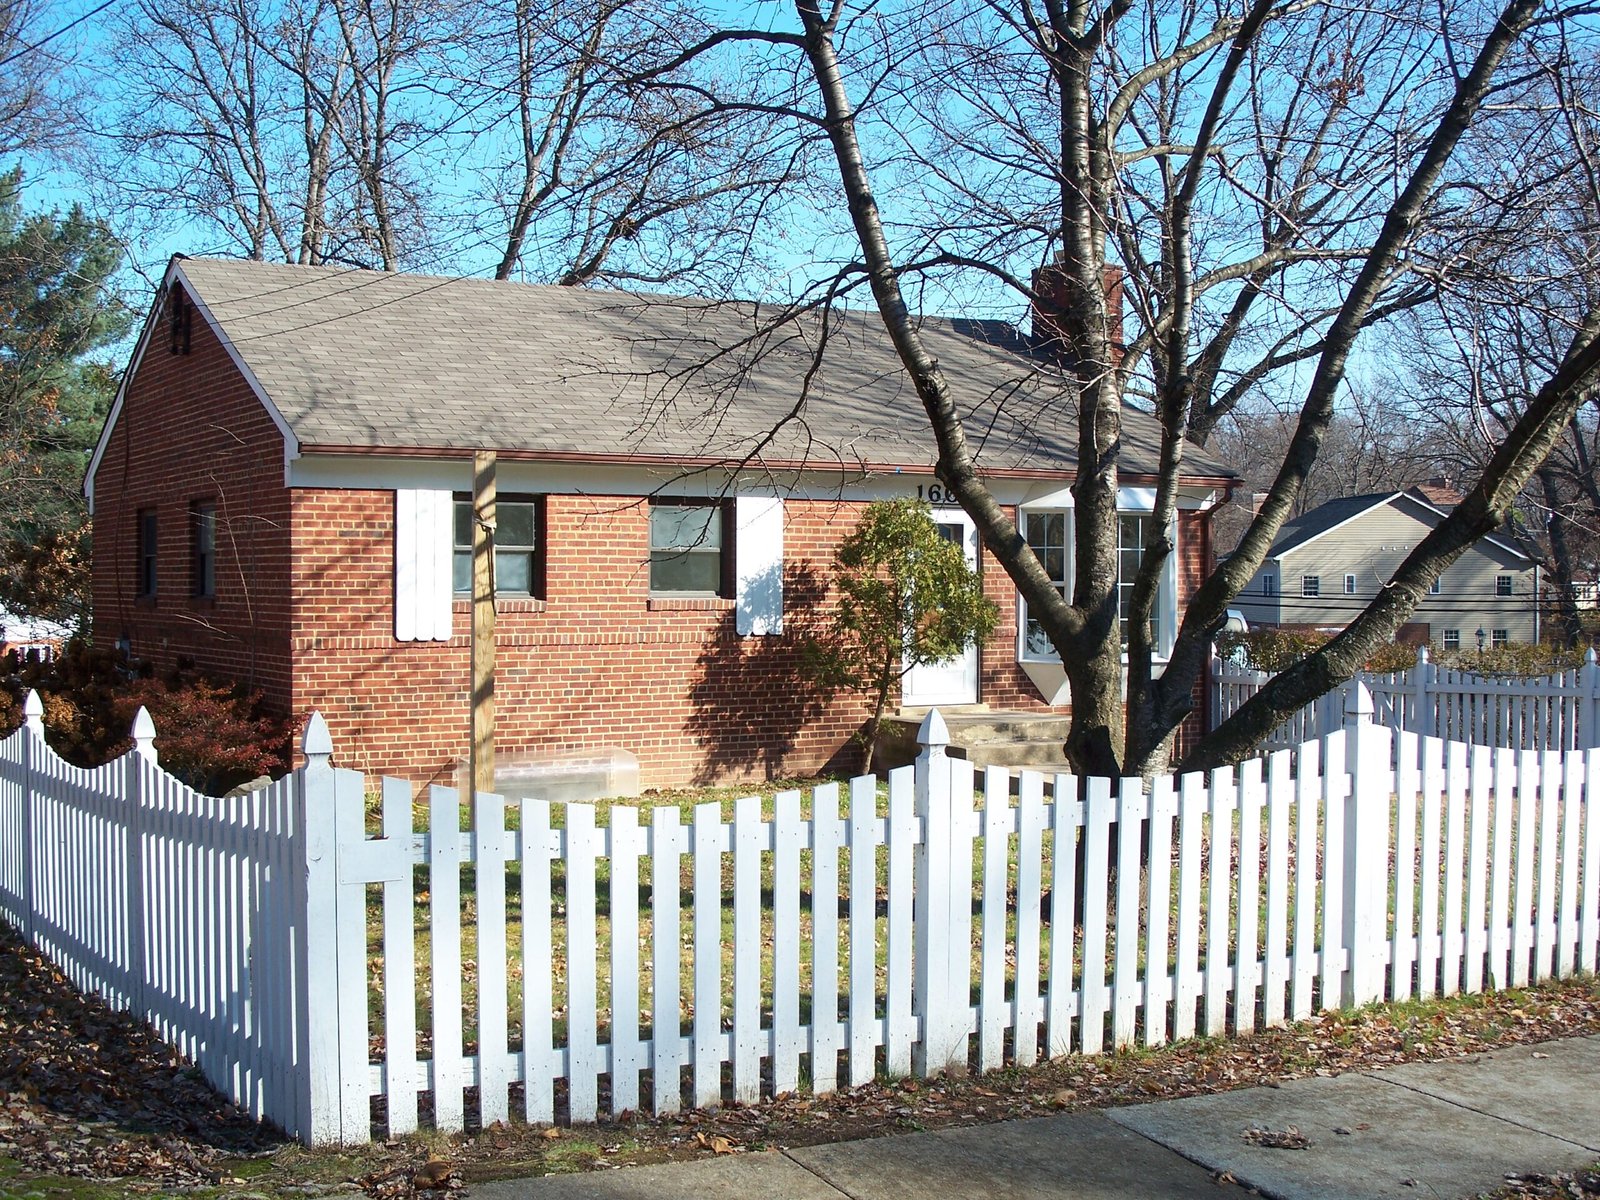
Front of House 01
Photo taken December 13, 2008
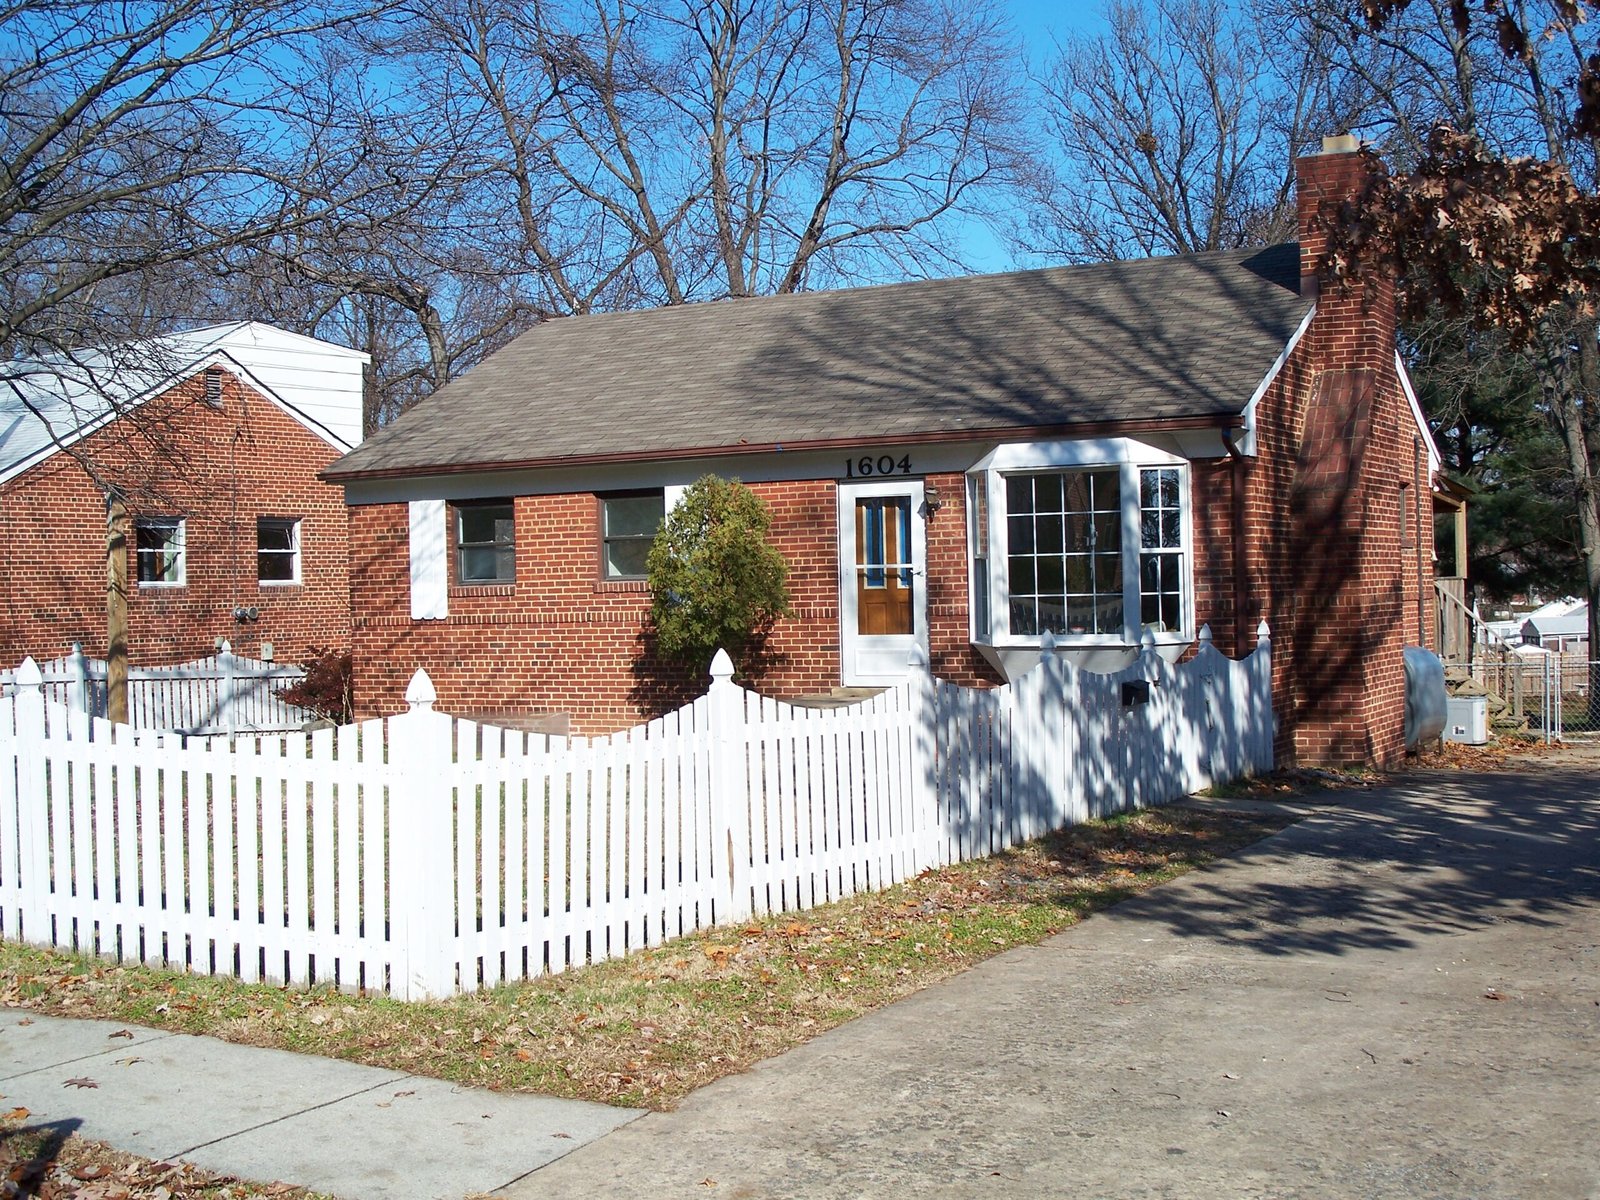
Front of House 02
Photo taken December 13, 2008
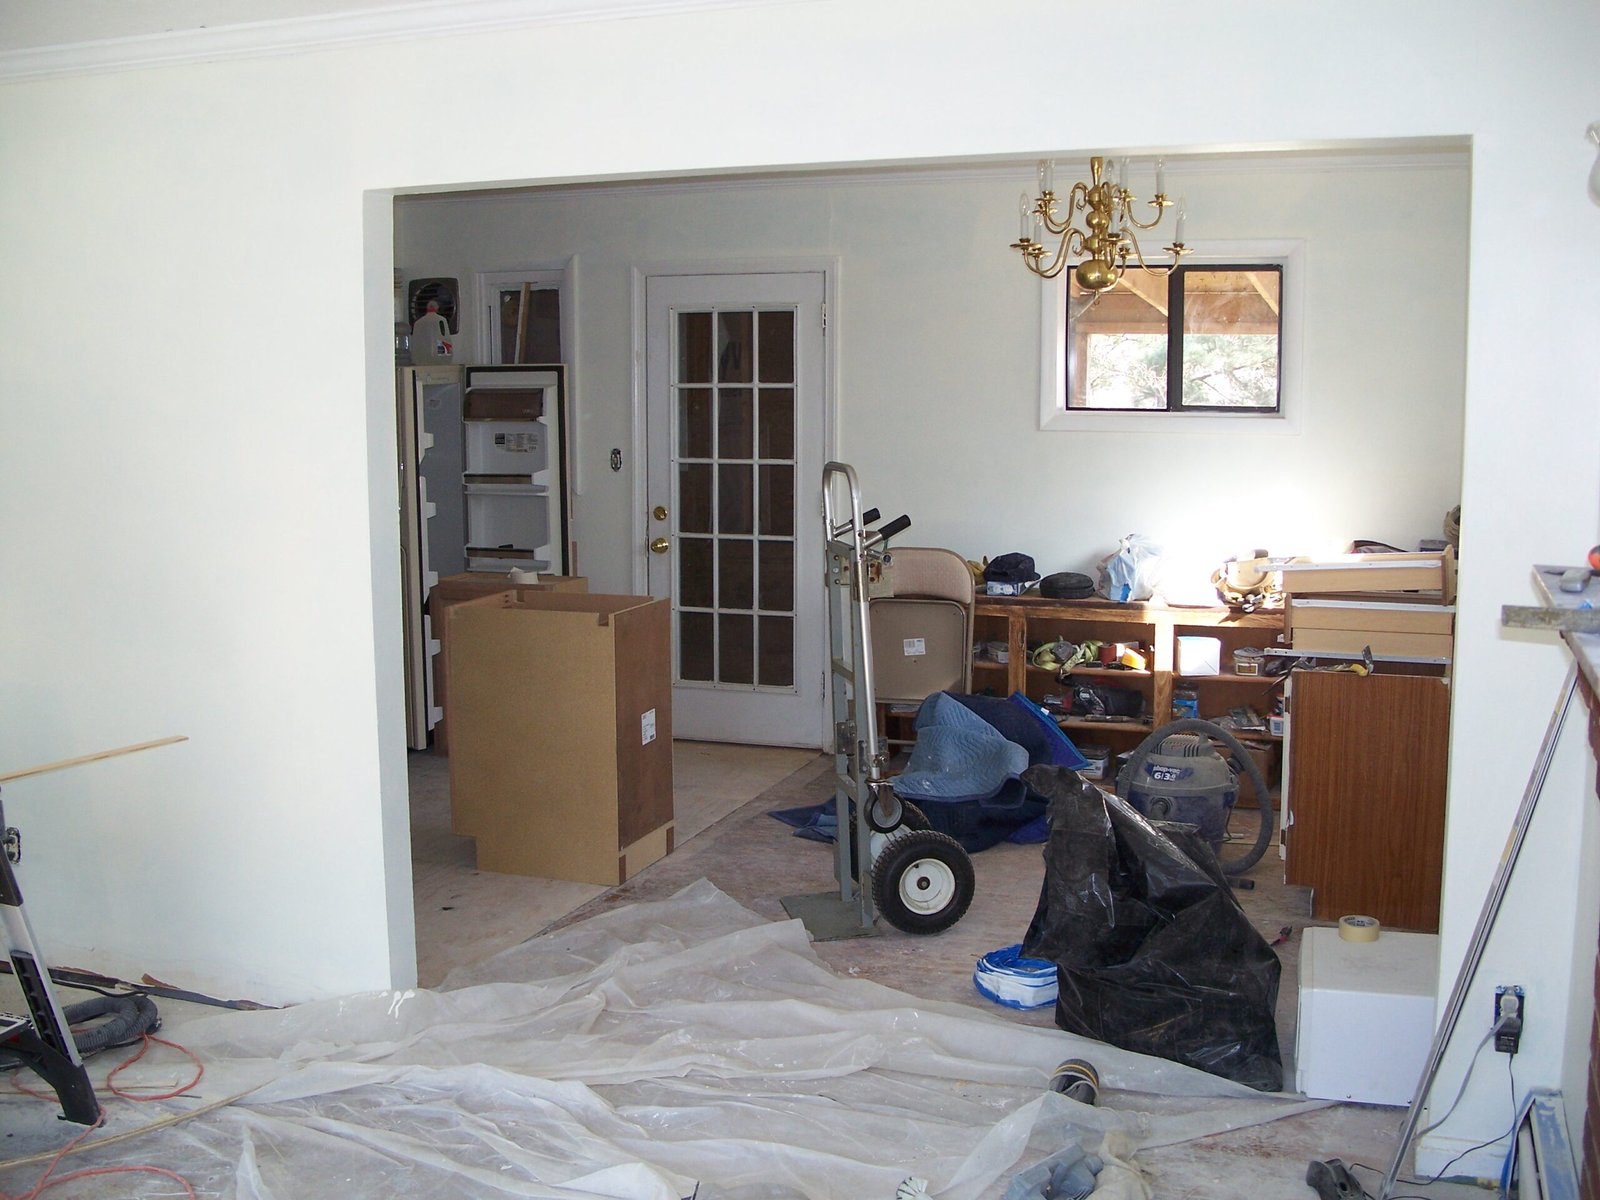
Work in Progress
Photo taken December 13, 2008. Interior already repainted, plastic on floor a lame attempt to protect the wood.
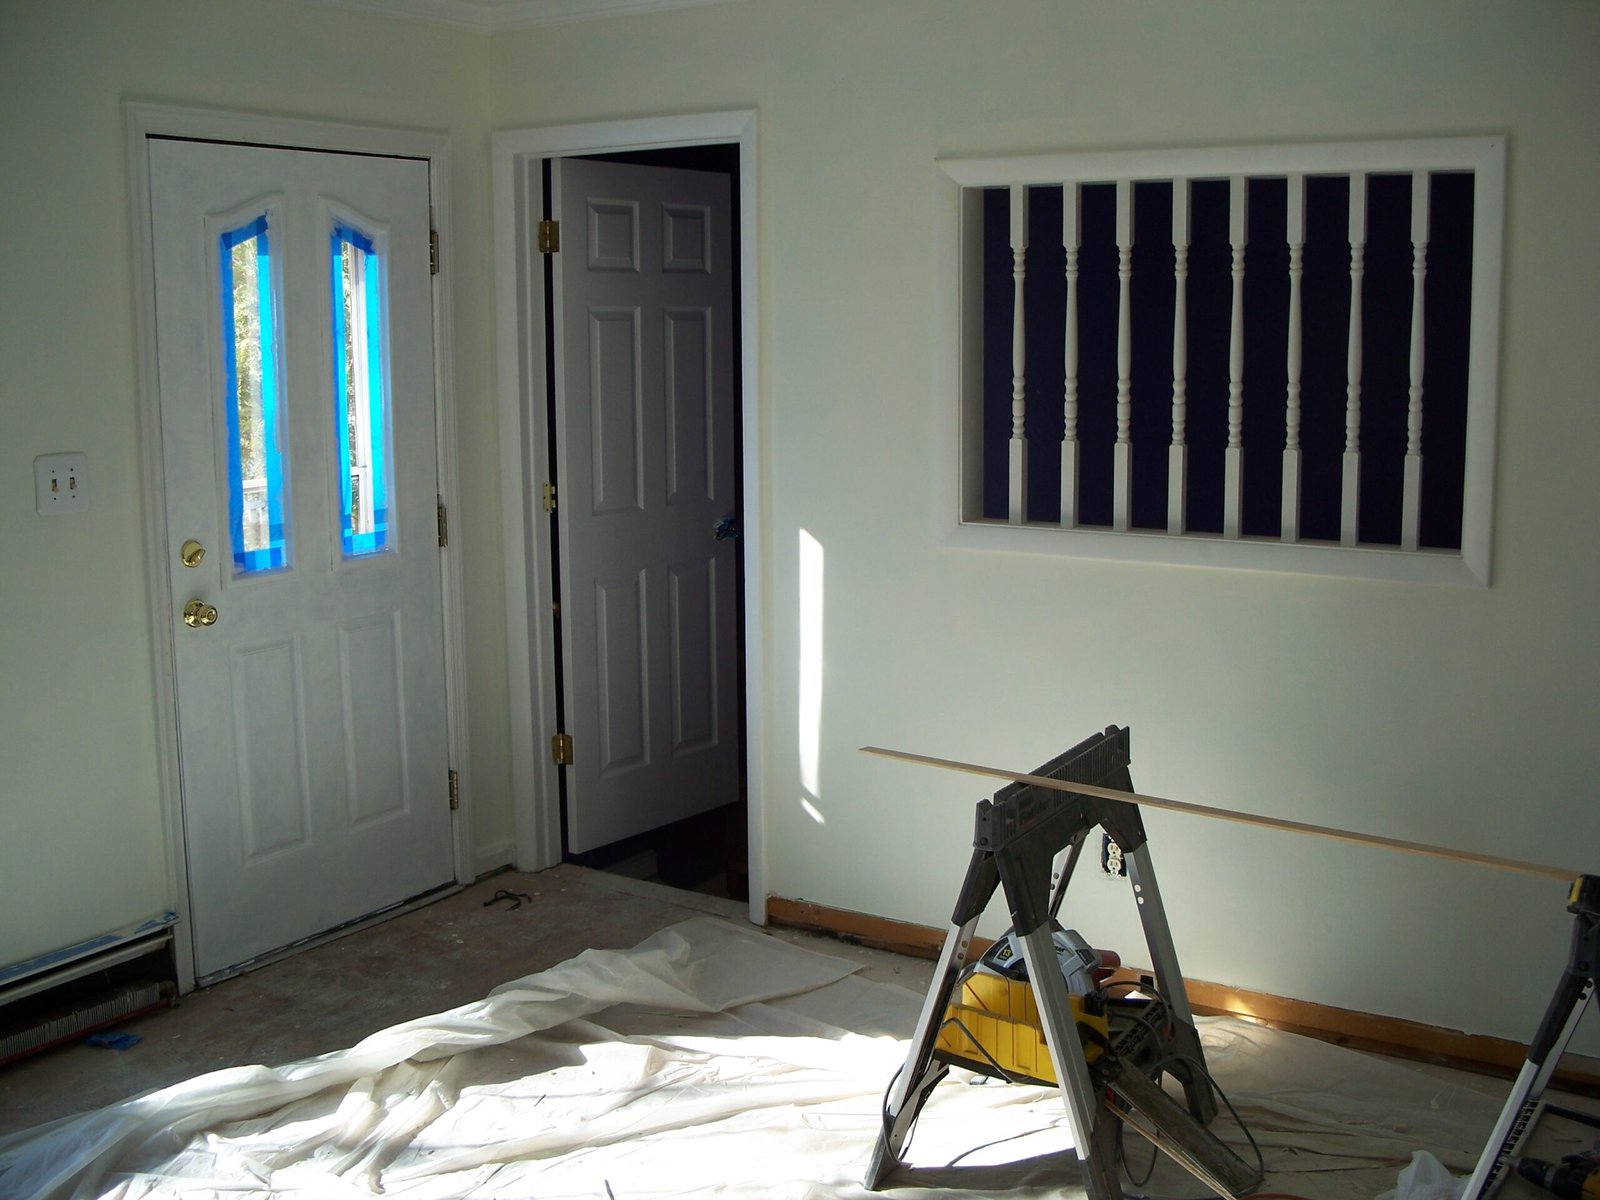
Work in Progress
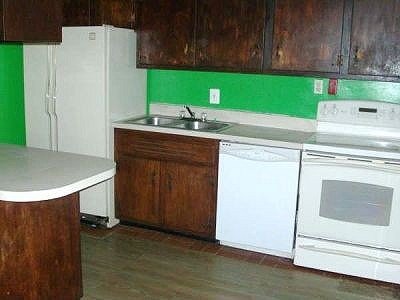
The Kitchen - Before
This photo was taken by the Realtor and used for their on-line listing. Photo taken sometime in May, 2008

The Kitchen - Being Rebuilt
Photo Taken December 12, 2008. Drywall already replaced and new wiring installed.
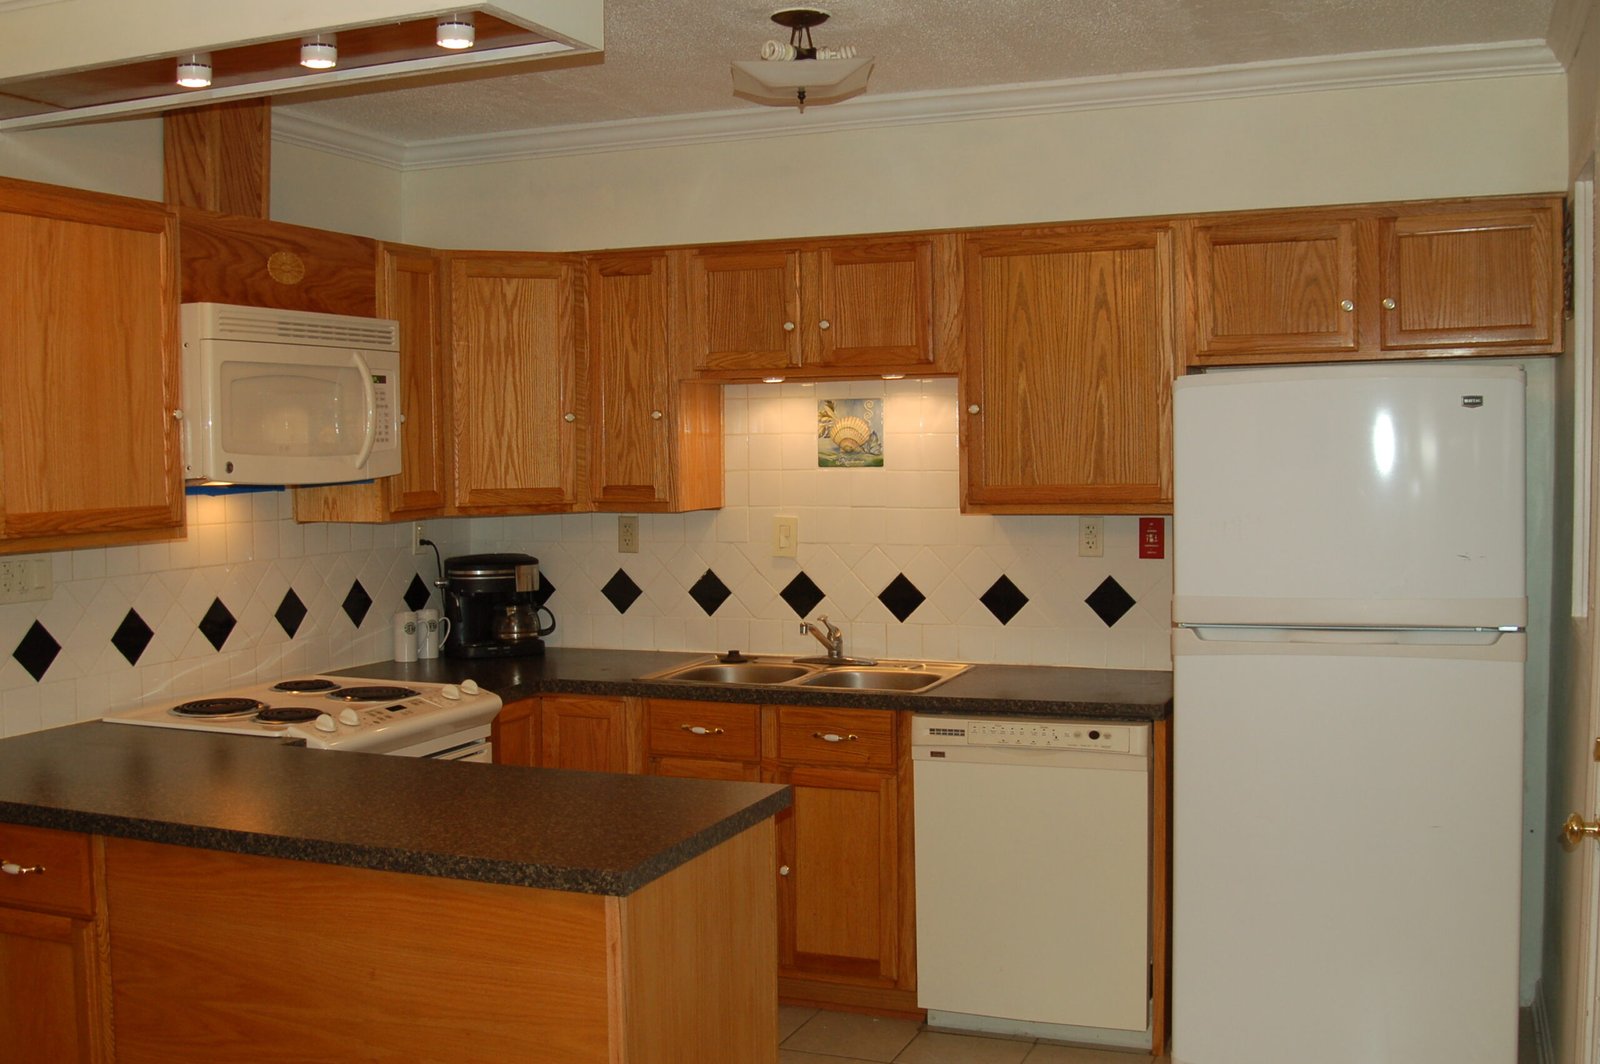
The Kitchen - After
We also replaced the original refrigerator with a new Maytag unit. Good Times!
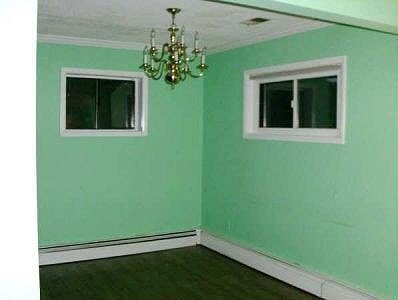
The Dining Room - Before
The dining room. This photo was taken by the Realtor and used for the on-line listing. Photo taken about May, 2008. Note the floor. As shown there was a layer of glued-down vinyl tile a layer of 1/8 inch plywood stapled and nailed down to the original
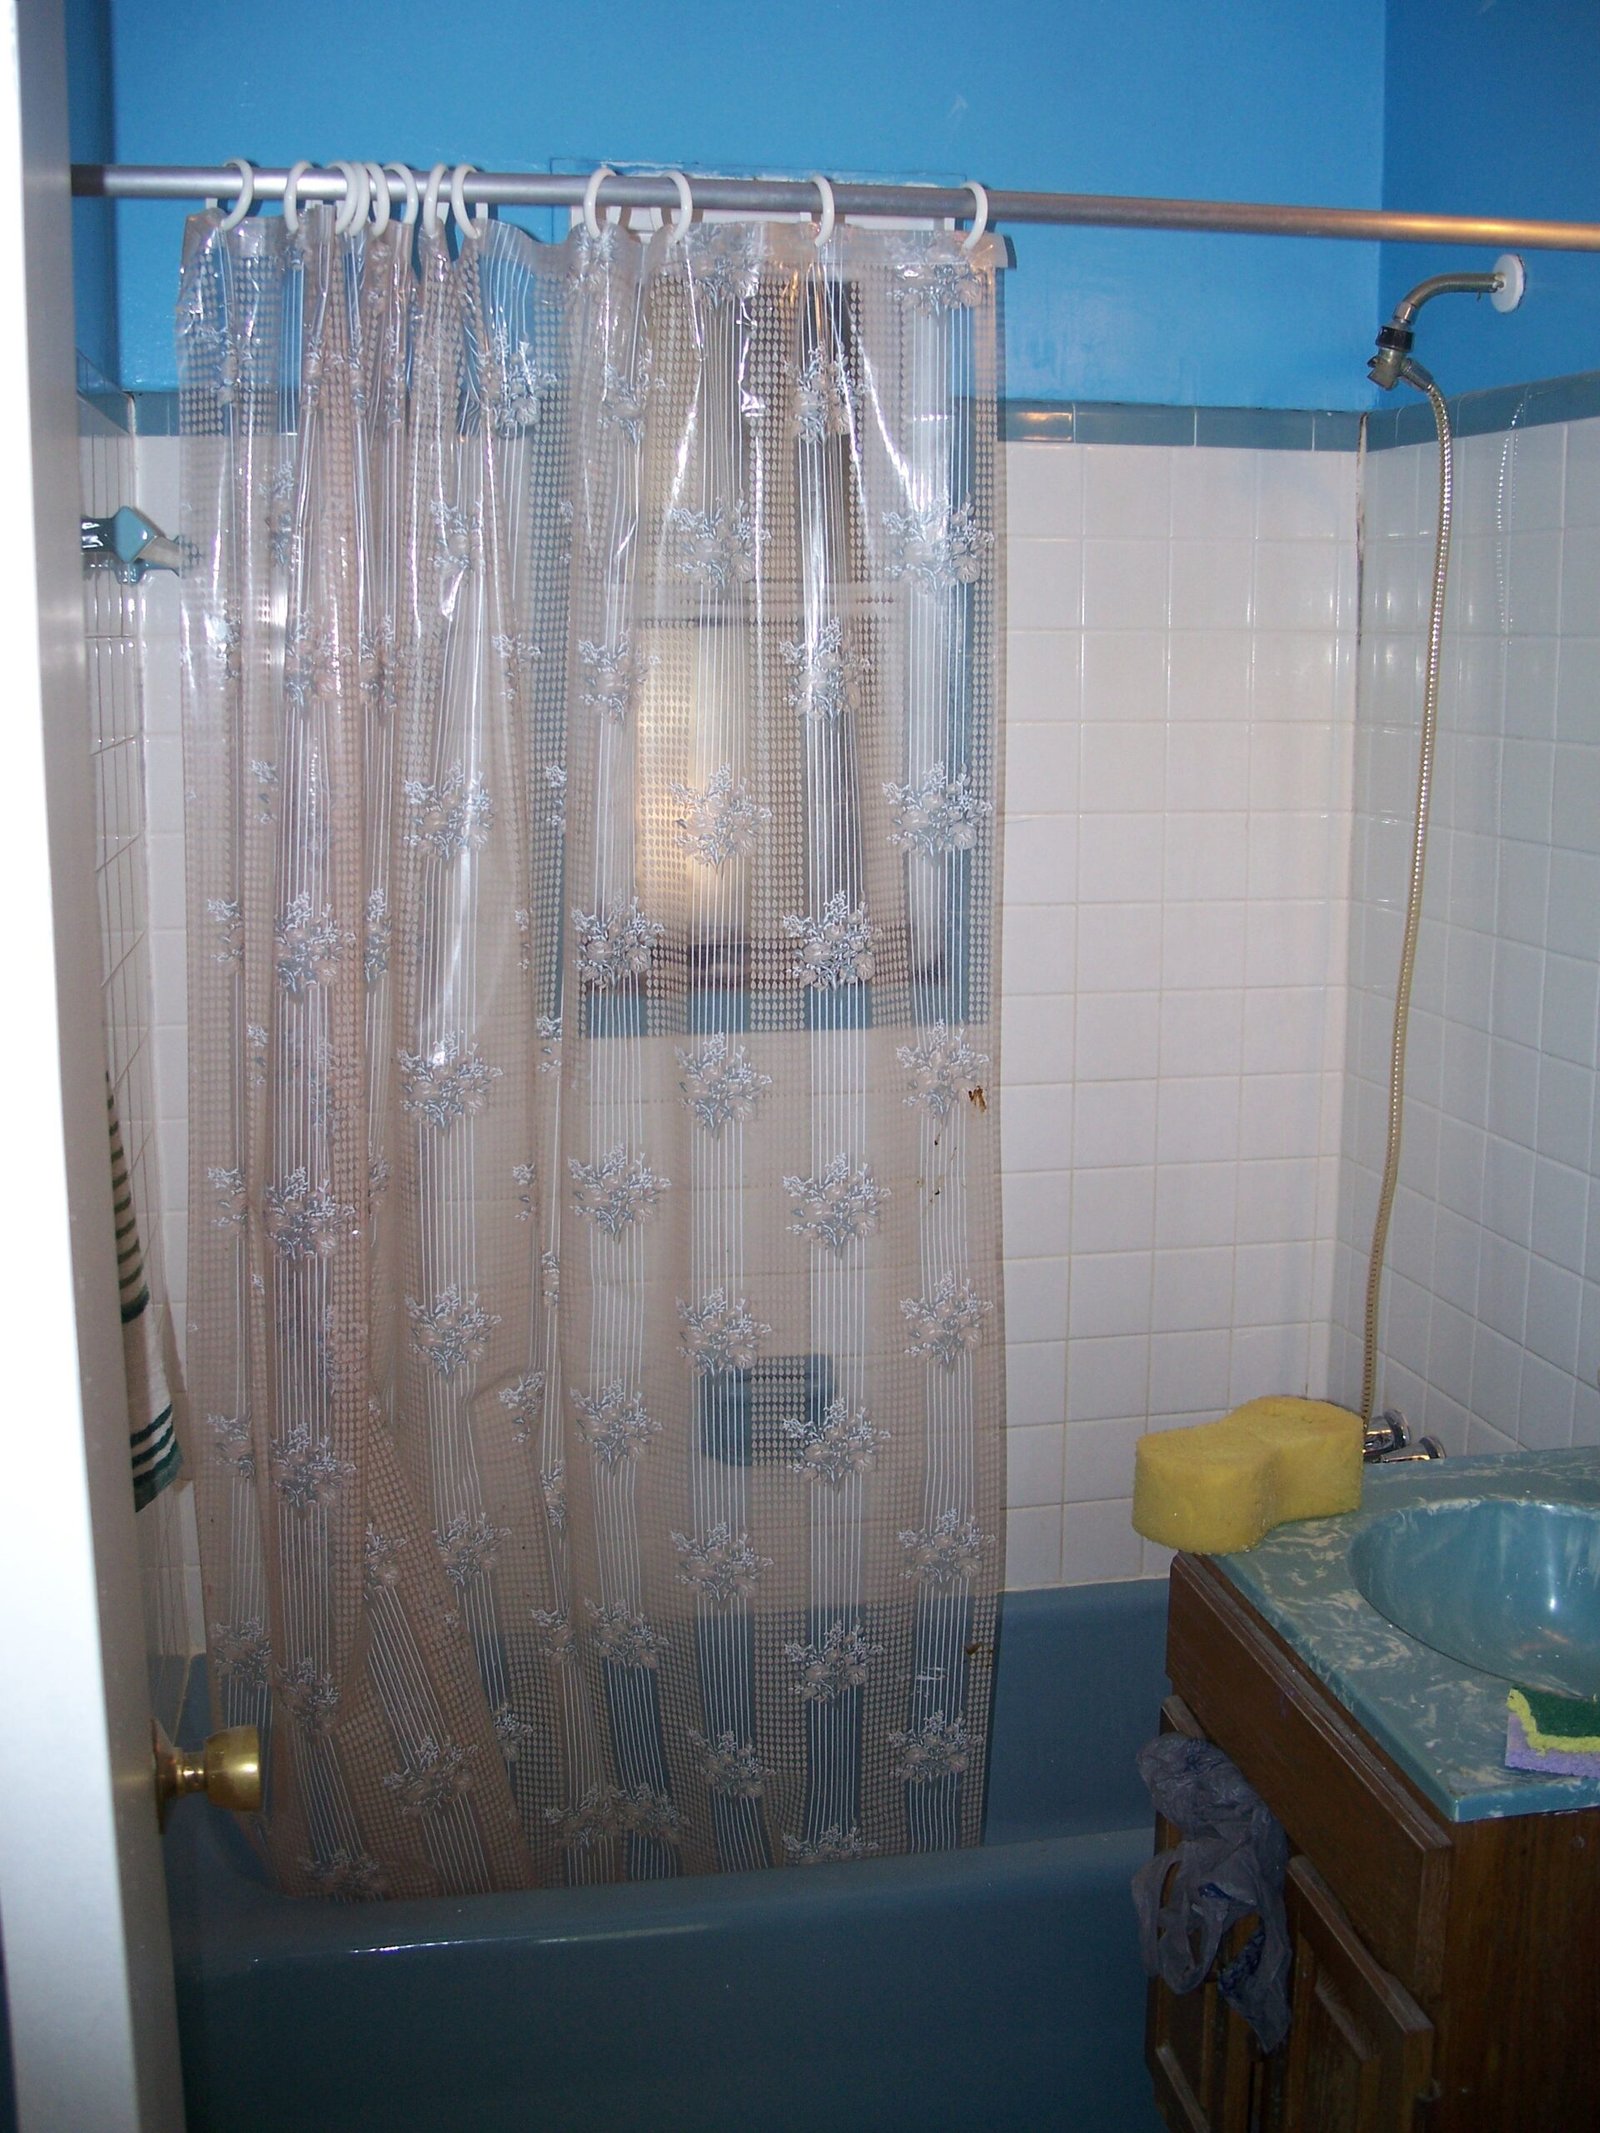
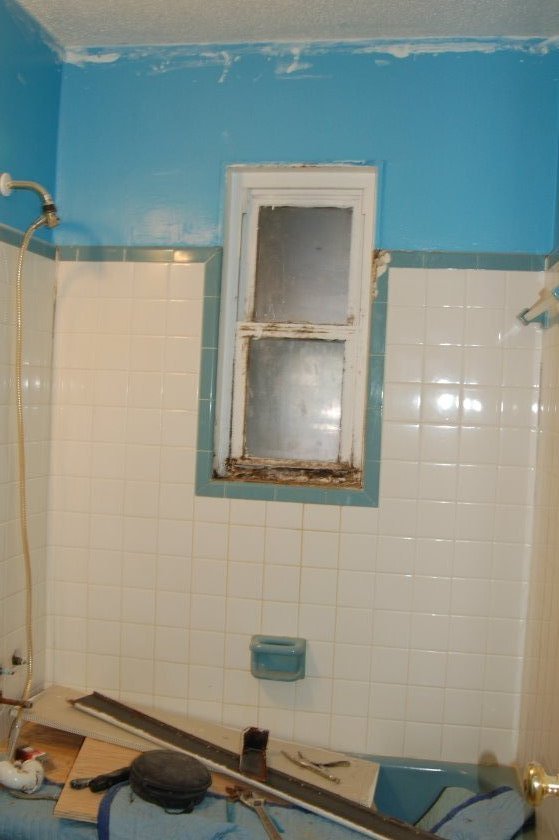
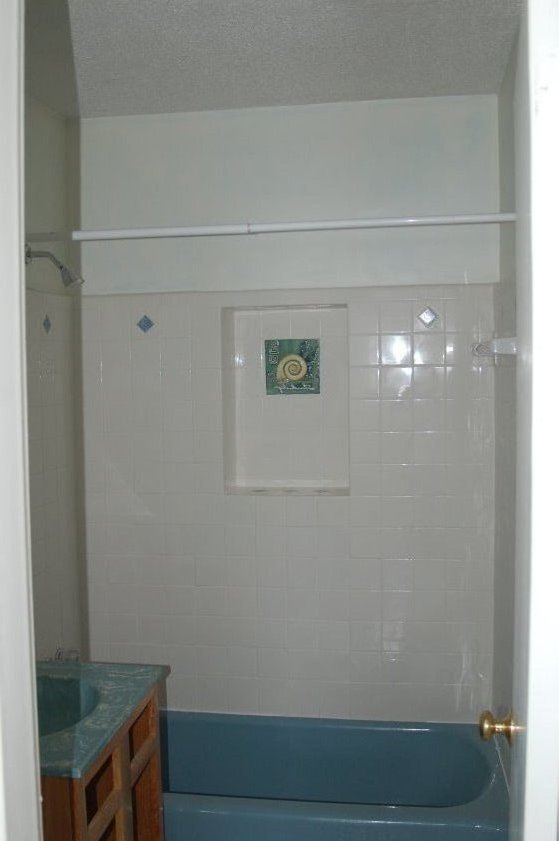
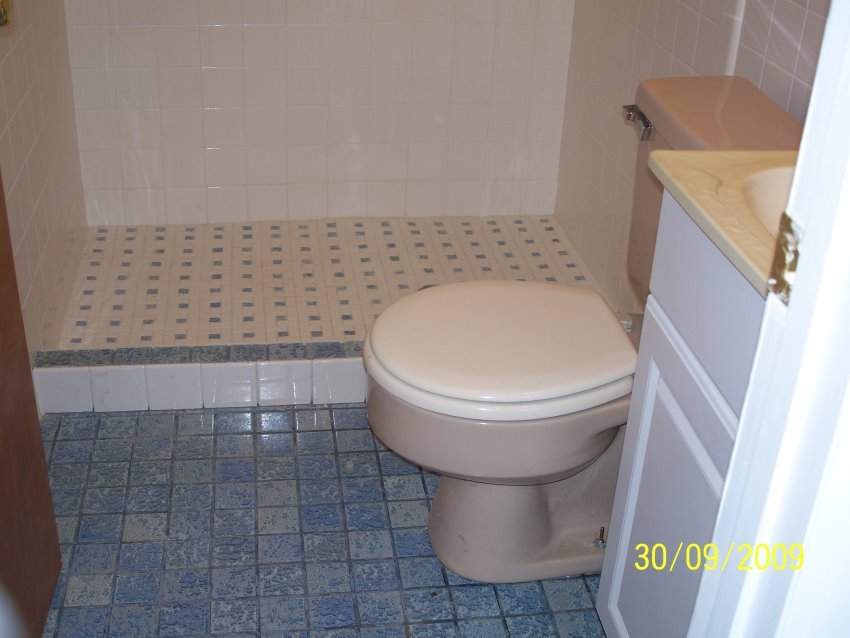
The Bathroom - Before
Photo taken December 13, 2008. The bathroom before remodeling.
The Bathroom - Starting Renovation
Photo taken January 21, 2009. Detail view of the rusted out steel-framed bathroom window before removal. Bath vent already installed.
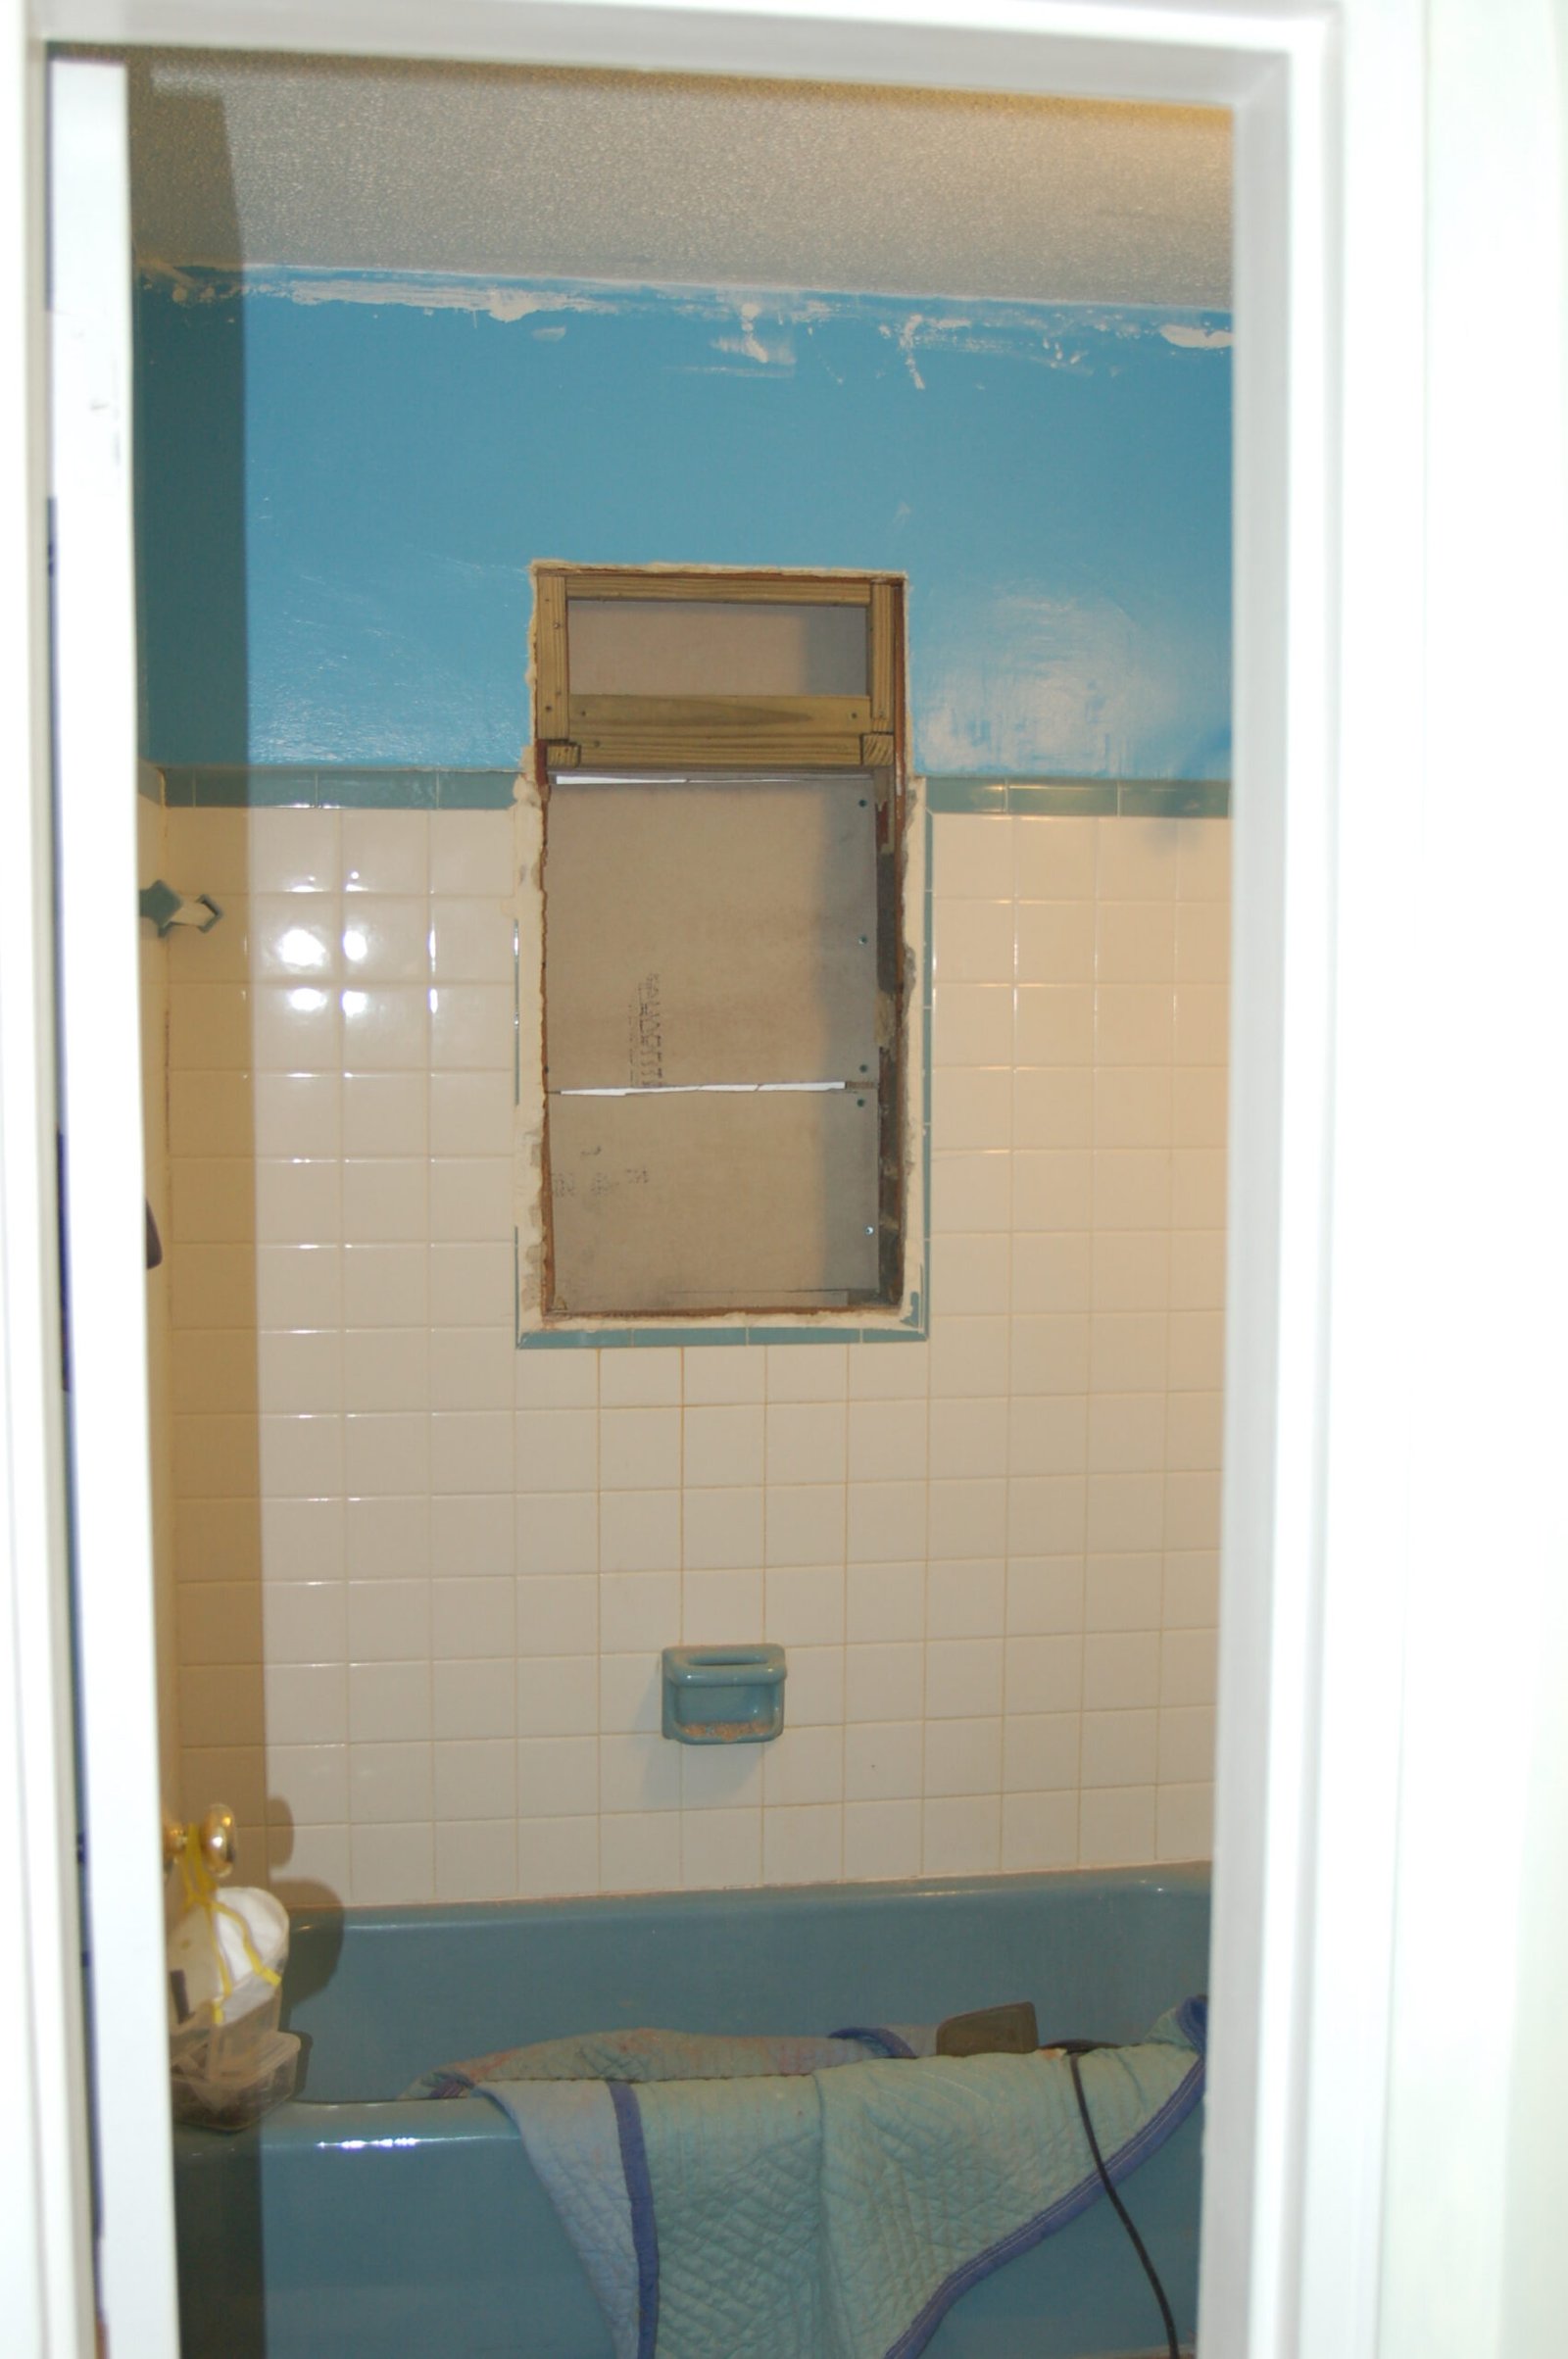
Window Closed in - Work Continues
Photo taken January 31, 2009. Window removed and closed in. Now the hard part starts.
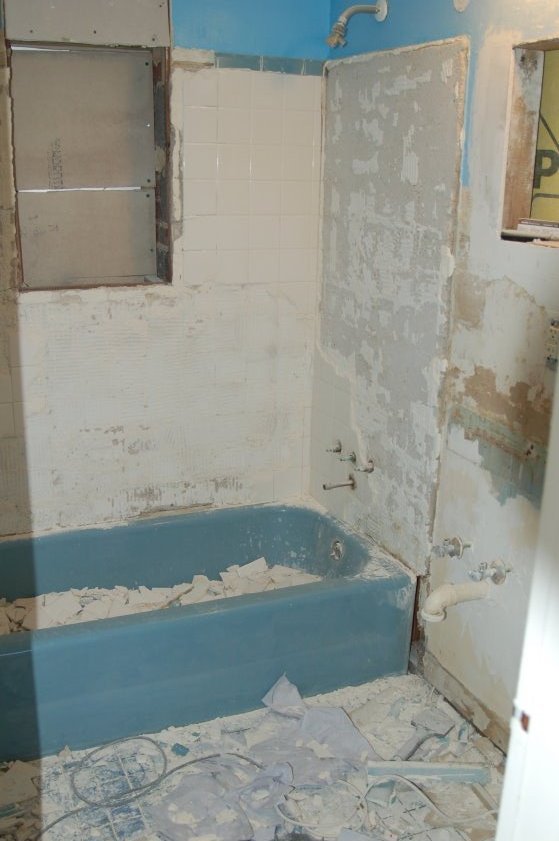
The Bathroom - Tearing out the Tile
Photo taken January 31, 2009. Tried to save the wall tile after taking out the window but could not. So it all came out.
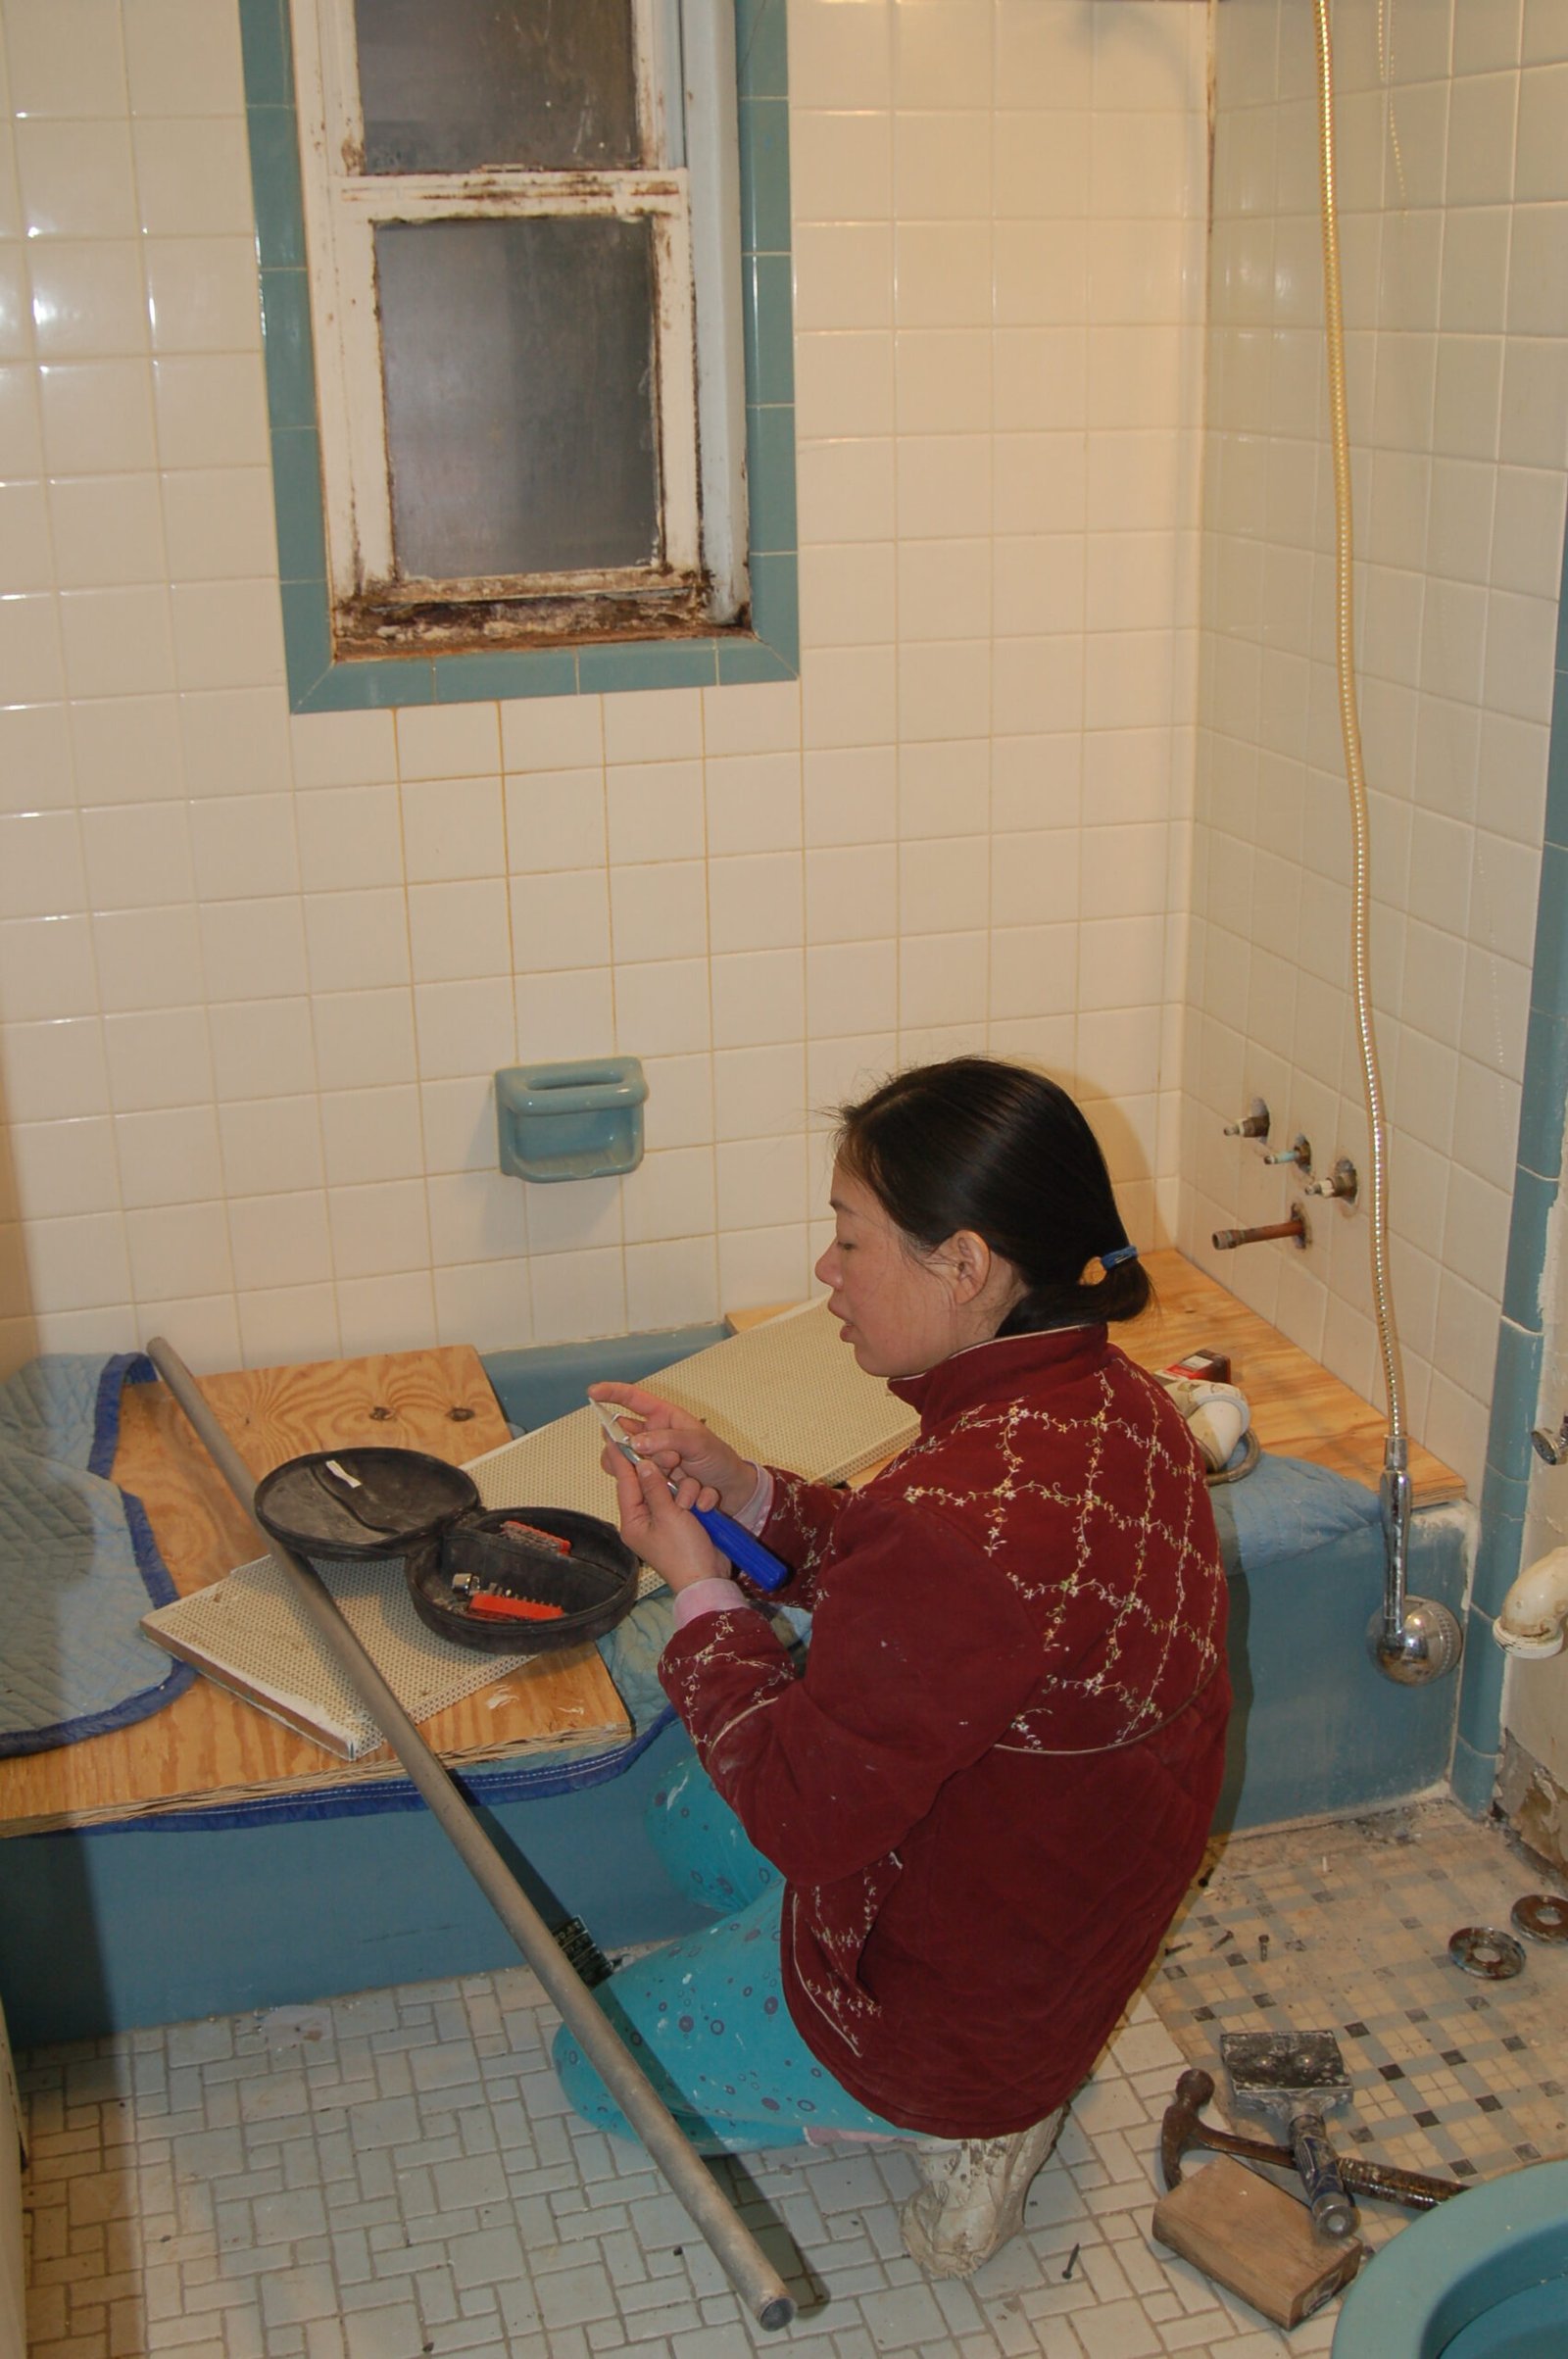
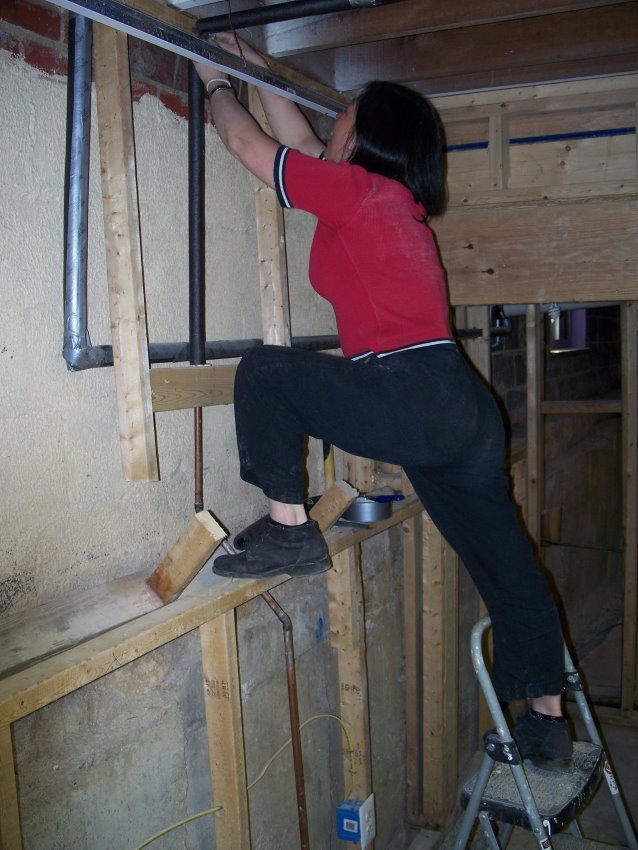
The Bathroom - Winnie at Work
Photo taken January 18, 2009. Starting to renovate the bathroom by removing second layer of tile floor.
The Bathroom - After
Photo taken March 22009 the day the bathroom remodeling completed. All tile installed sink with new cabinet back in all plumbing works. Still need to hang doors on rebuilt sink cabinet.
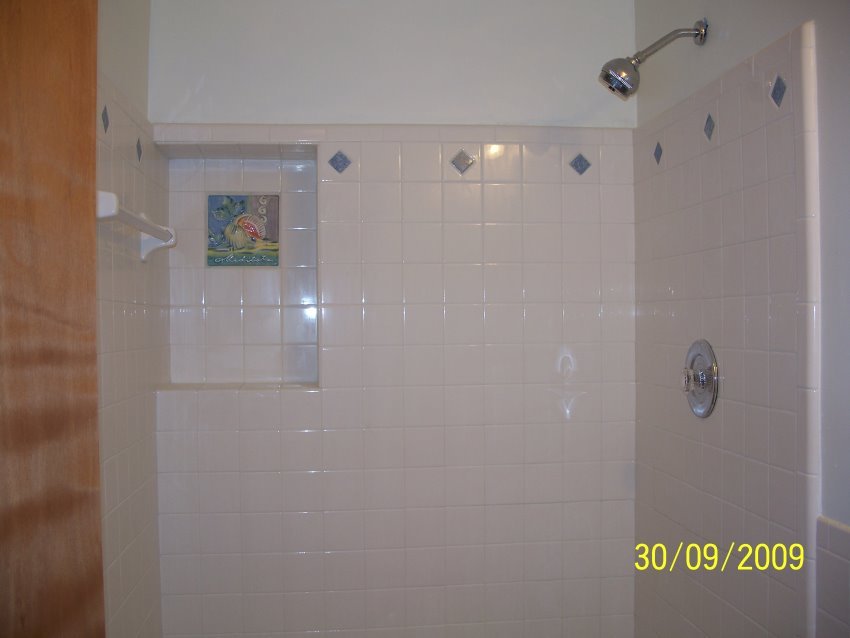
Finished Bath
The bath was a lot of work but came out beautiful. As with the upstairs bath and kitchen Winnie put in her signature shell tile accent.
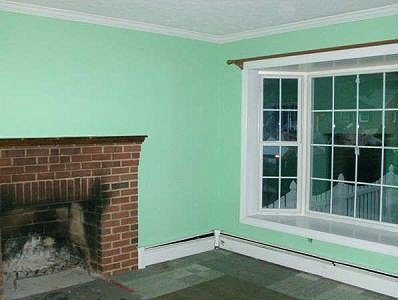
Living Room with Fireplace - Before
This photo was taken by the Realtor and used in their on-line listing. Taken around May, 2008. Note the glue-down carpet squares on the floor. The small object about mid-point of the lower window frame is an electrical outlet half-covered over.
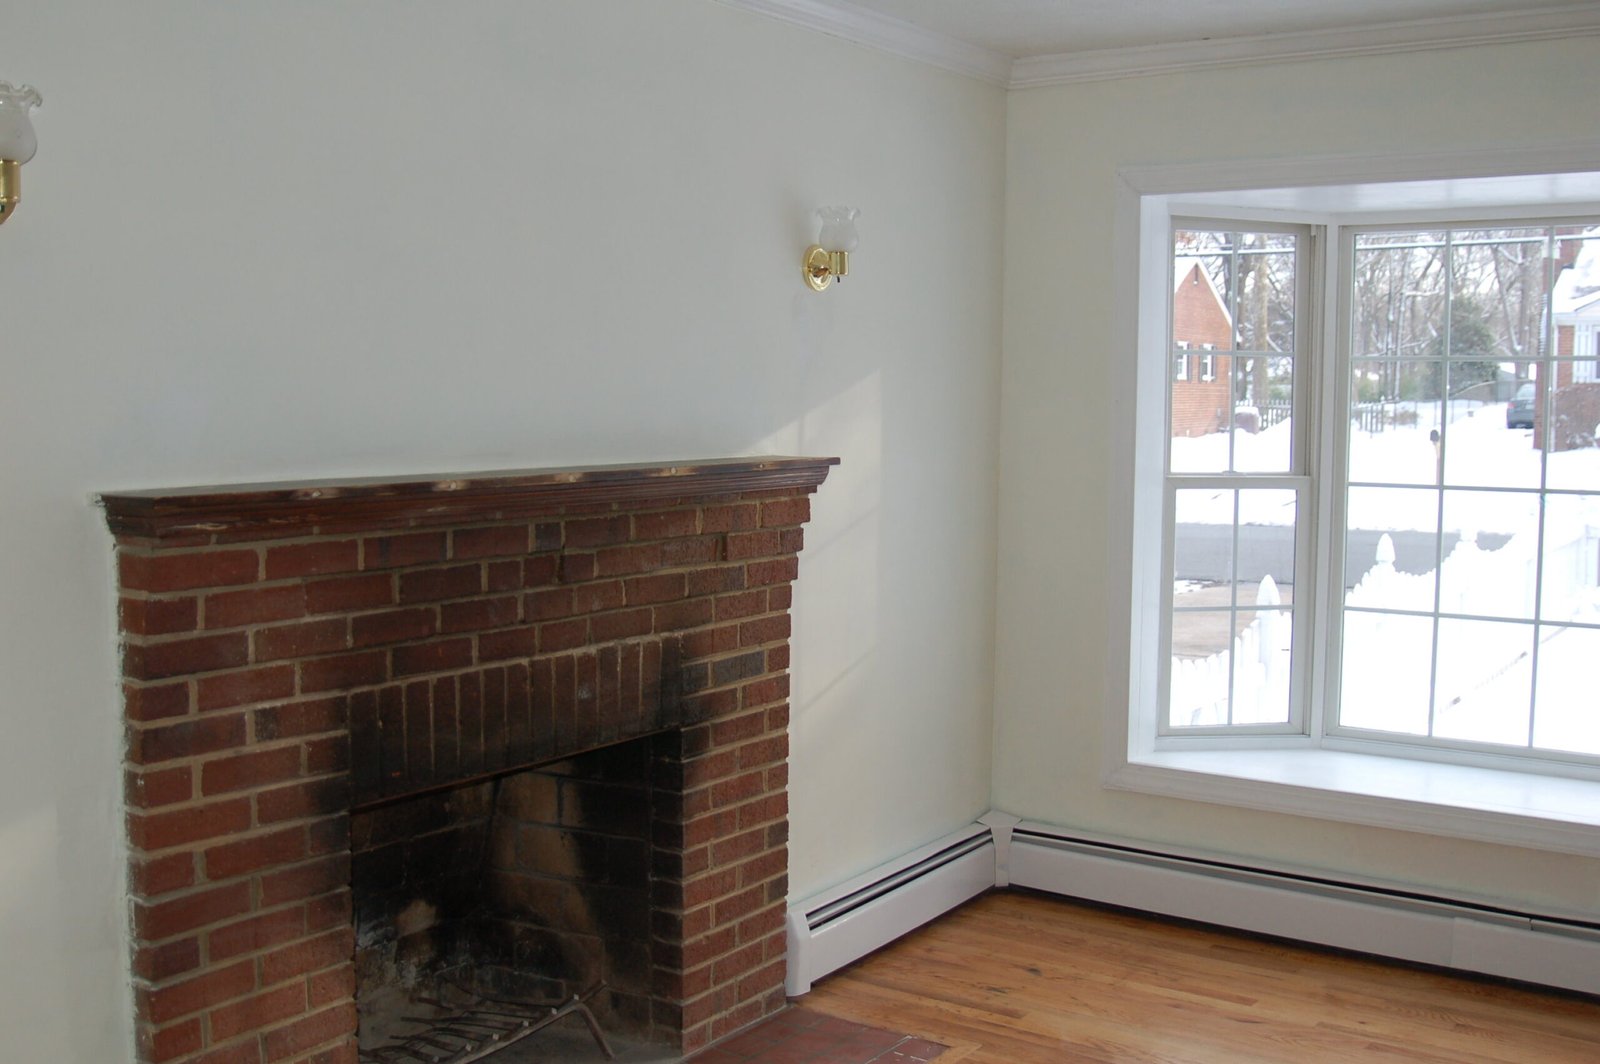
Living Room with Fireplace - After
Living room after the floor was refinished and interior repainted. Note the wall lamps on either side of the fireplace controlled by the switch inside the front door. Before the switch controlled the outlet half covered by the window frame removed.

Restoring the Wood Floors - Patching After
Photo taken January 182009 late in the evening. New red oak flooring in floor ready for refinishing.
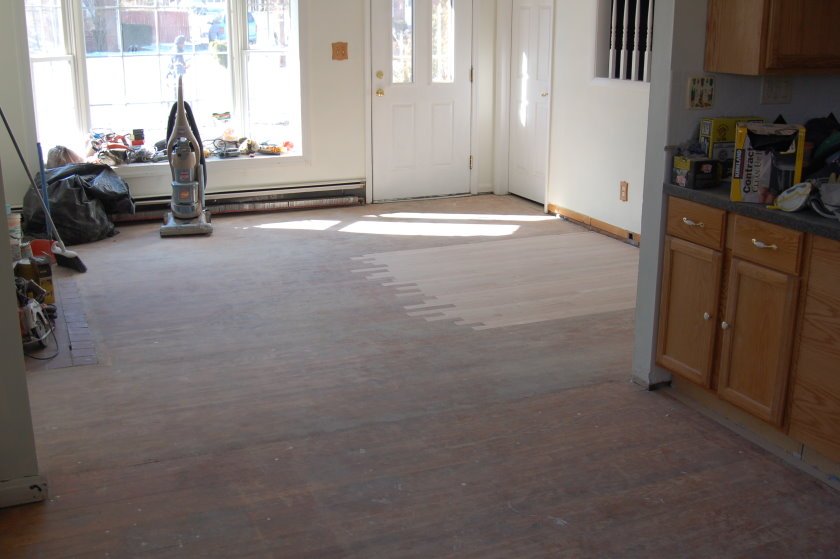
Living Room Floor - Before Refinishing
Photo taken January 31, 2009. Grand view of living room and dining room floor the morning prior to refinishing.
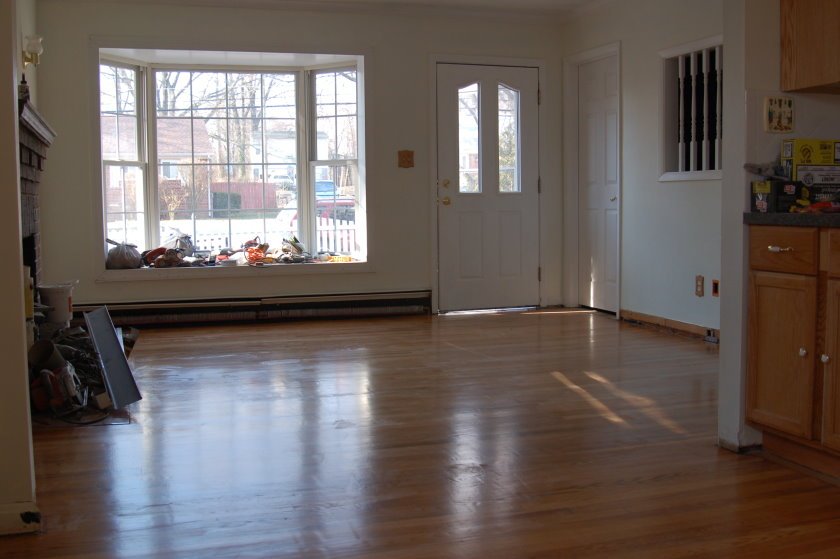
Living Room Floor - After Refinishing
Photo taken February 7, 2009. Grand view of living room and dining room floor after refinishing drum sanded sealed two coats of polyurethane floor finish.
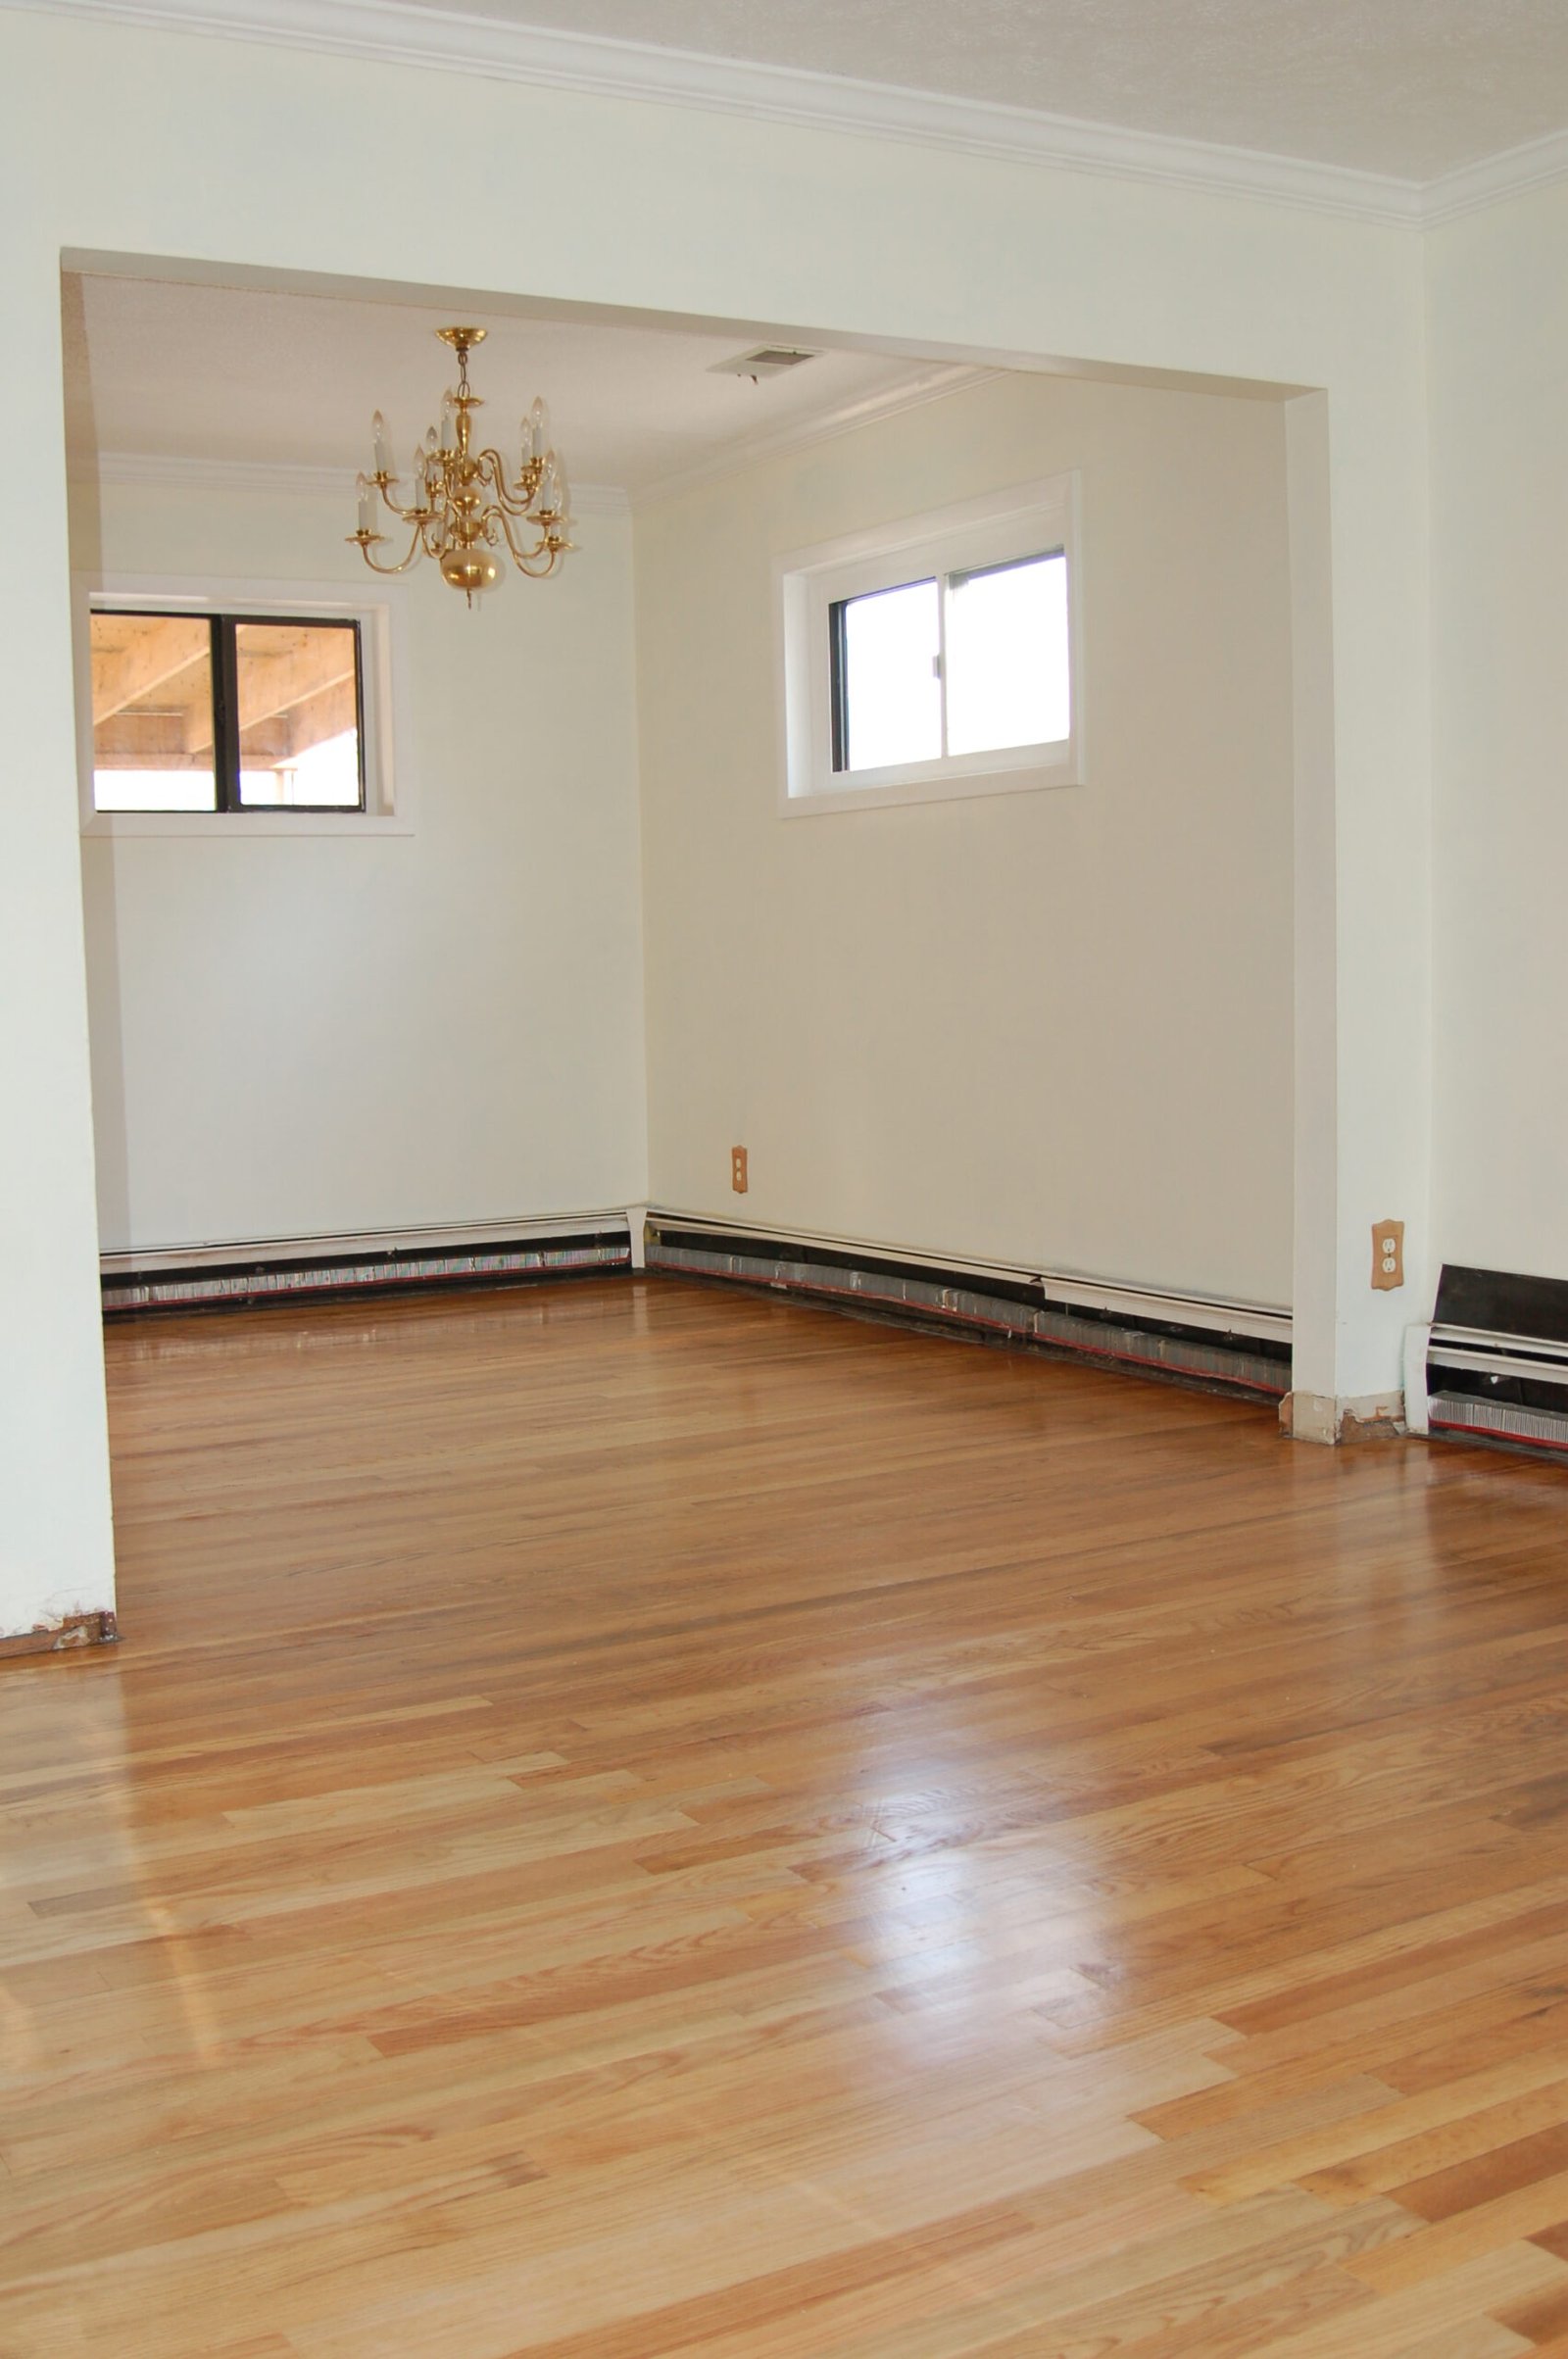
The Dining Room - After
Photo taken February 7, 2009. The dining room after painting and after refinishing the floor drum sanded sealed two coats of polyurethane floor finish.

Hallway Floor - Before Refinishing
Photo taken January 31, 2009. Hallway floor the morning before refinishing.
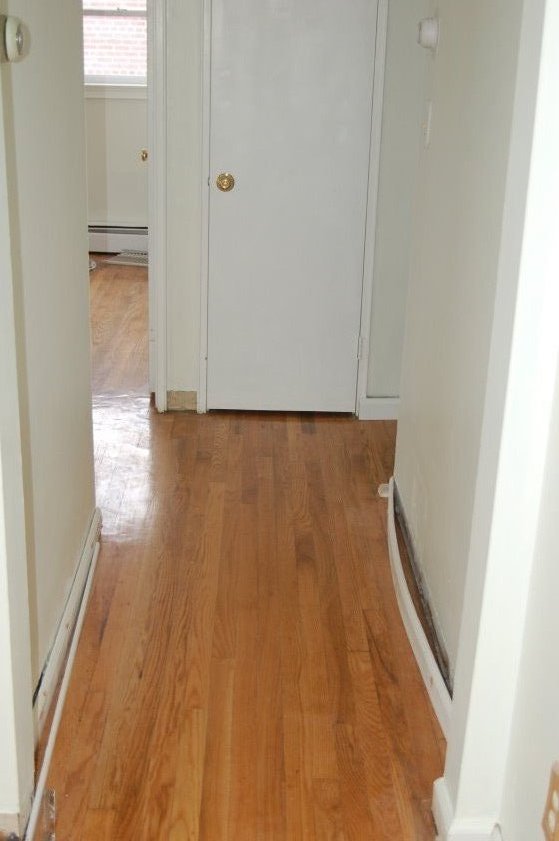
Hallway Floor - After Refinishing
Photo taken March 2, 2009. Hallway floor after refinishing drum sanded sealed two coats of polyurethane floor finish. Baseboard trim fitted up.

Front Bedroom Floor - Before Refinishing
Photo taken January 31, 2009. Front bedroom floor the morning before refinishing.

Front Bedroom Floor - After Refinishing
Photo taken February 7, 2009. Front bedroom floor after refinishing drum sanded sealed two coats of polyurethane floor finish.
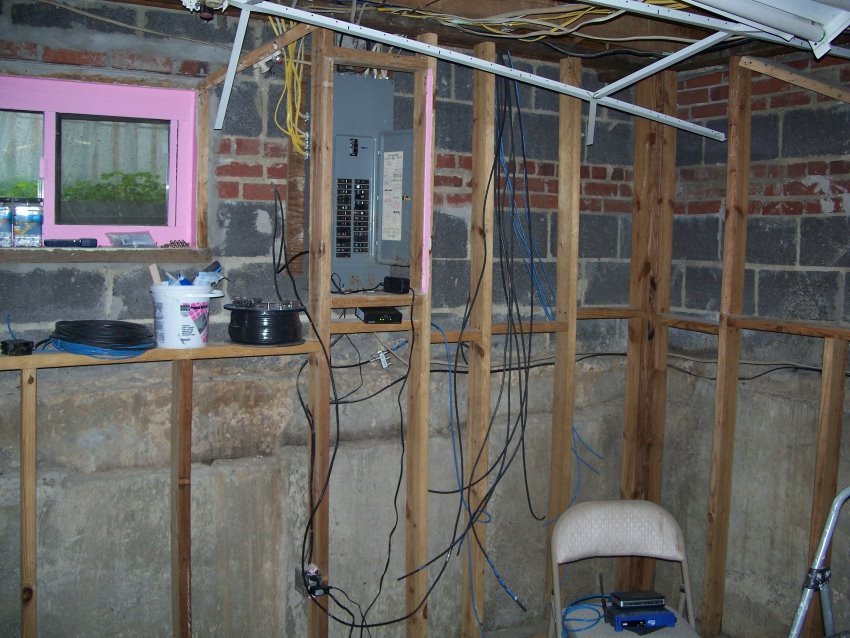
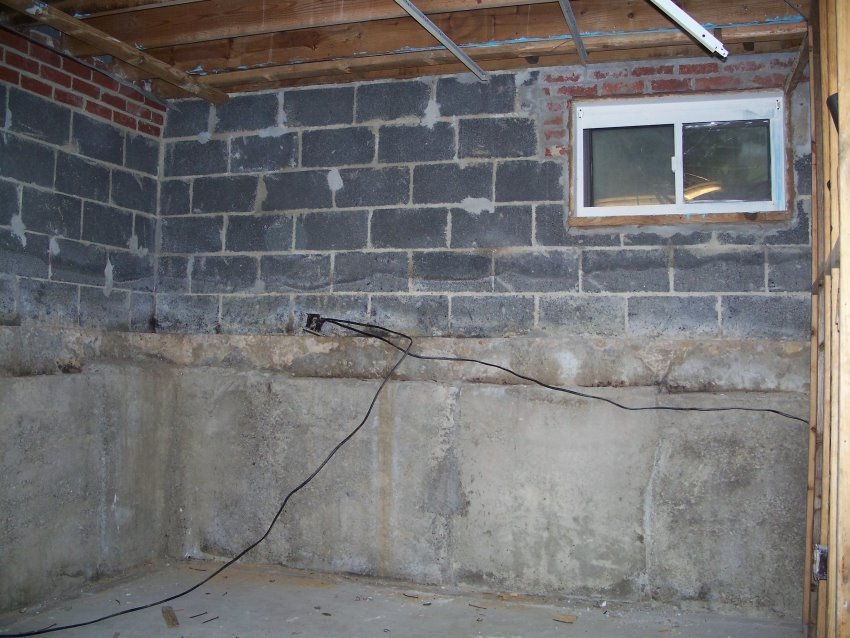
Starting - Back Corner Bedroom
The basement had serious mold issues and we had to gut all drywall and ceiling tile before we could even finance the house.
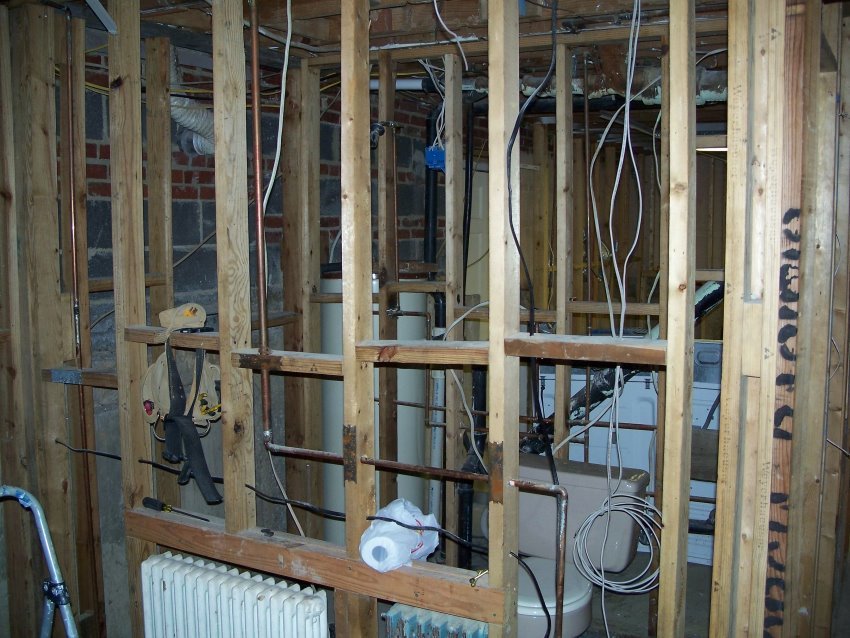
Starting - Looking Through the Bath
We left the basement as was until we finished the main floor. With the main floor completed we took a short break and moved downstairs.
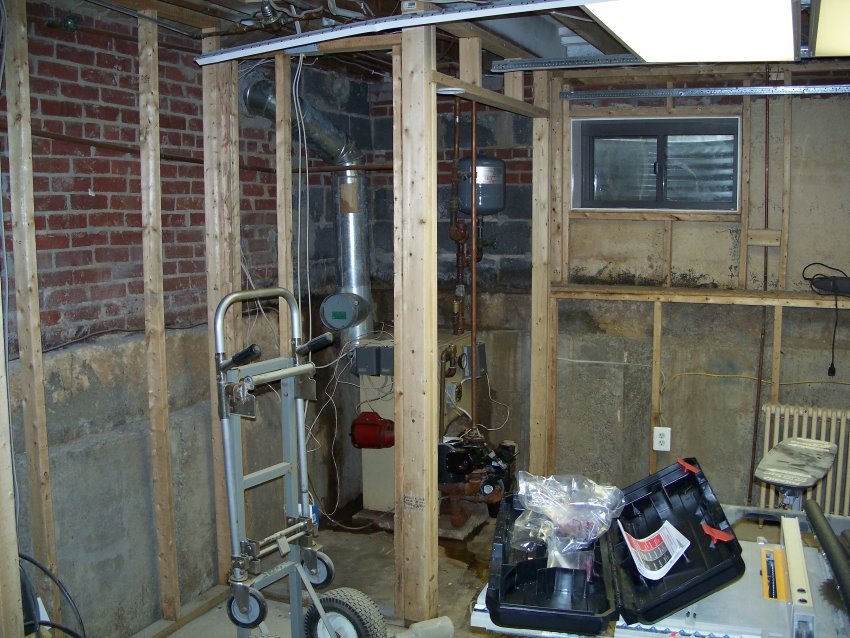
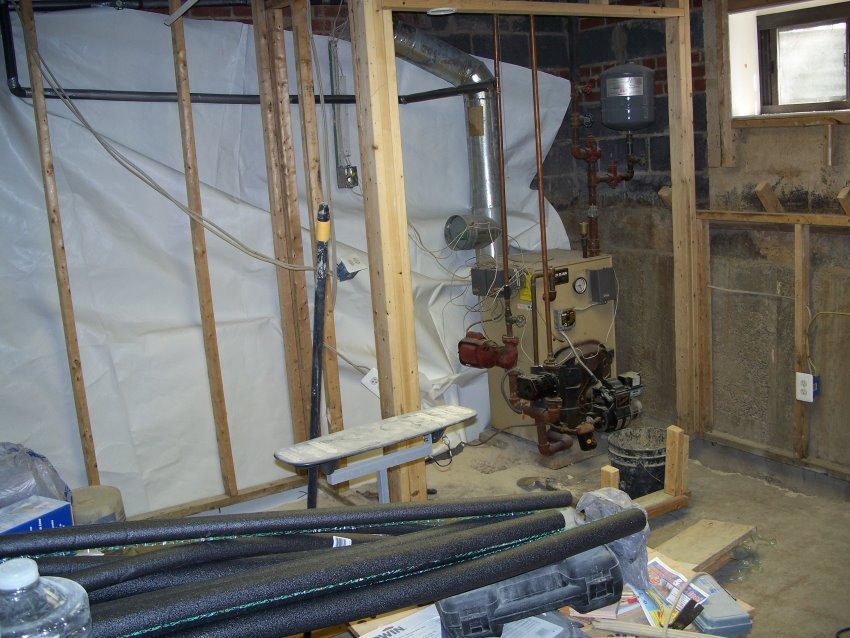
Starting - The Heater Closet
By this time the basement was truly a mess. We had death with rainwater intrusion and a constantly leaking heater all winter long.
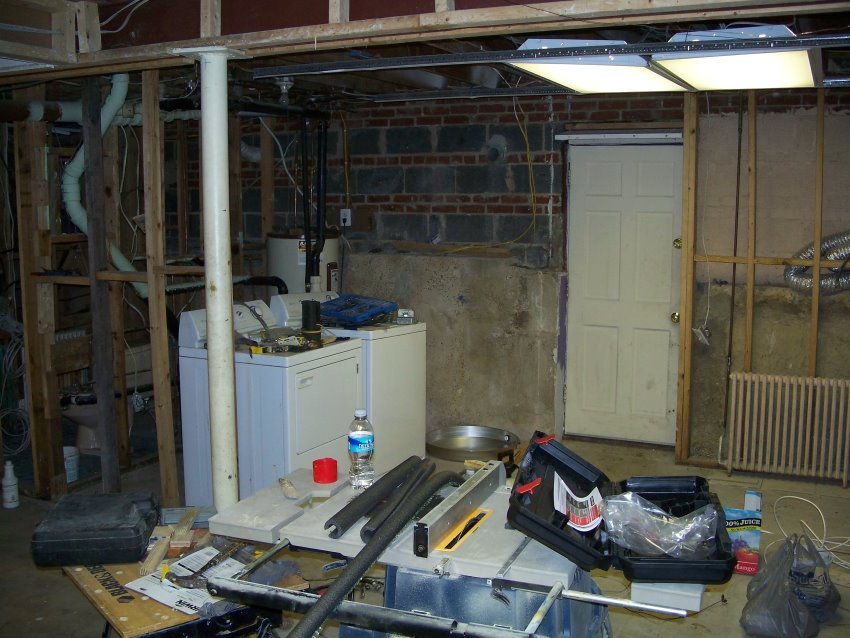
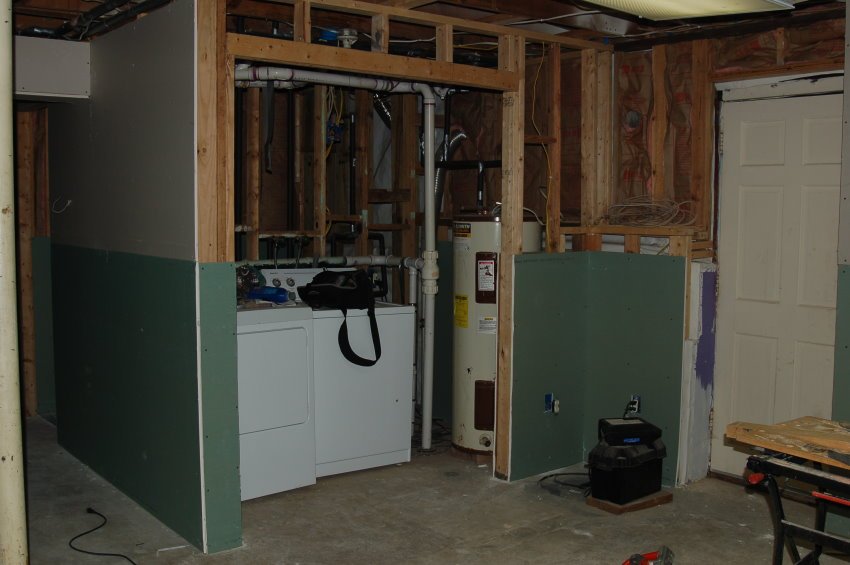
Starting - The Laundry Room
The house came with a washer and dryer but when we hooked them up we discovered neither worked.
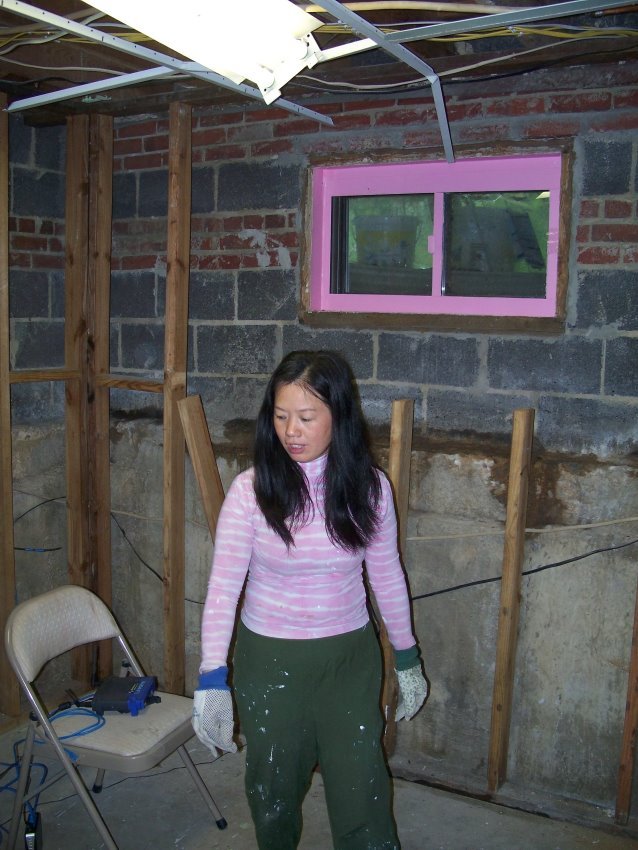
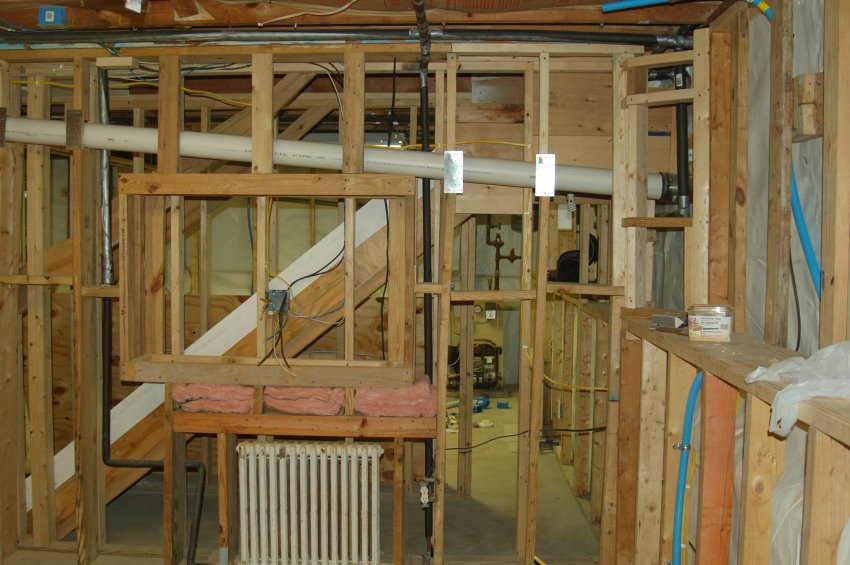
Starting - Winnie Looks at the Mess
Most of the basement framing sole plates were rotted and other framing needed to be removed for the waterproofing contractors.
Starting - Down to Bare Bones
The basement down to bare bones ready for whats next.
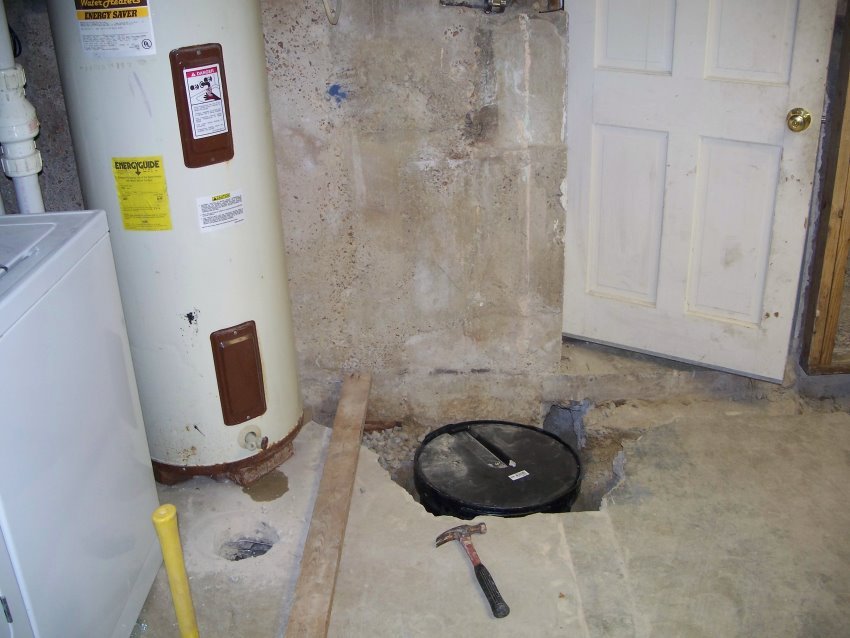
Waterproofing - The Drain Pit
We had the sump pump pit located by the laundry area We also had two floor drains added one by the laundry area and one by the heater.
Waterproofing the Basement
The waterproofing contractors started by cutting a 1 foot x 1 foot trench around the perimeter of the basement.

Waterproofing - The Heater Closet
The contractors were really good cutting the trench. The basement floor proved to have been built well. It is four inches concrete with plastic and gravel underneath.
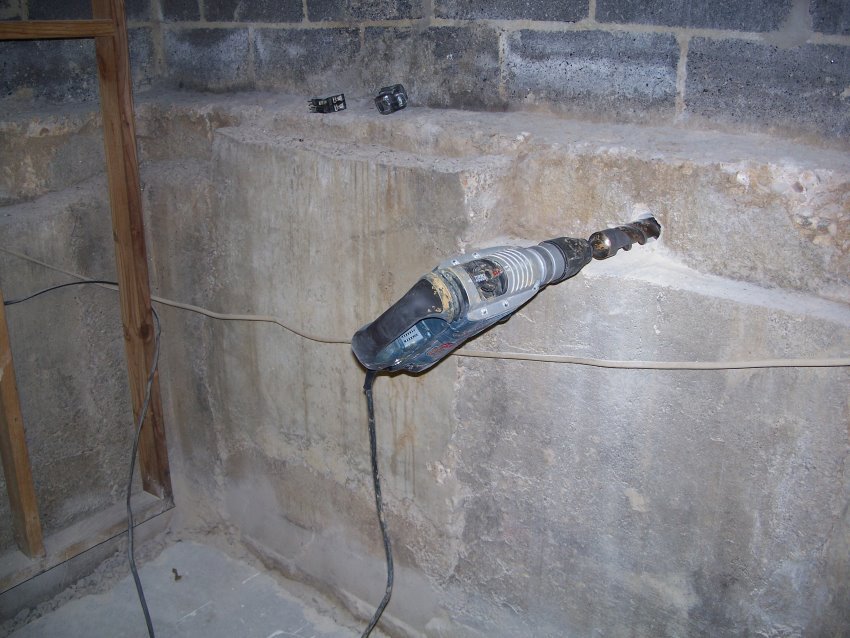
Waterproofing - Drilling Drain Holes
The lower basement walls are poured concrete. The drills had 24 inch bits which were too short in many places to drill through so they had to come higher up.
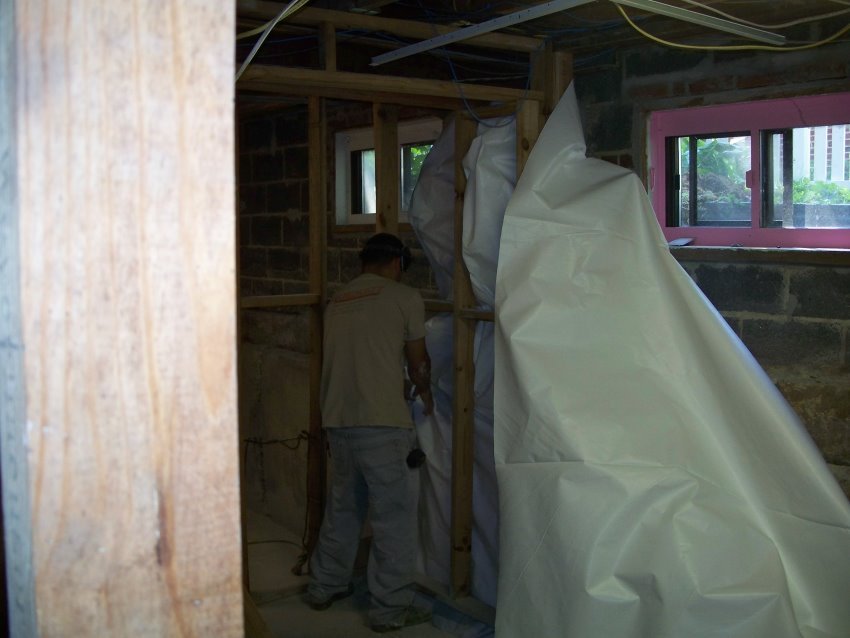
Waterproofing - Wrapping the Walls
Once the trench was cut the contractors lined the walls with 16 mill nylon-reinforced sheet plastic using special tape and wall anchors.
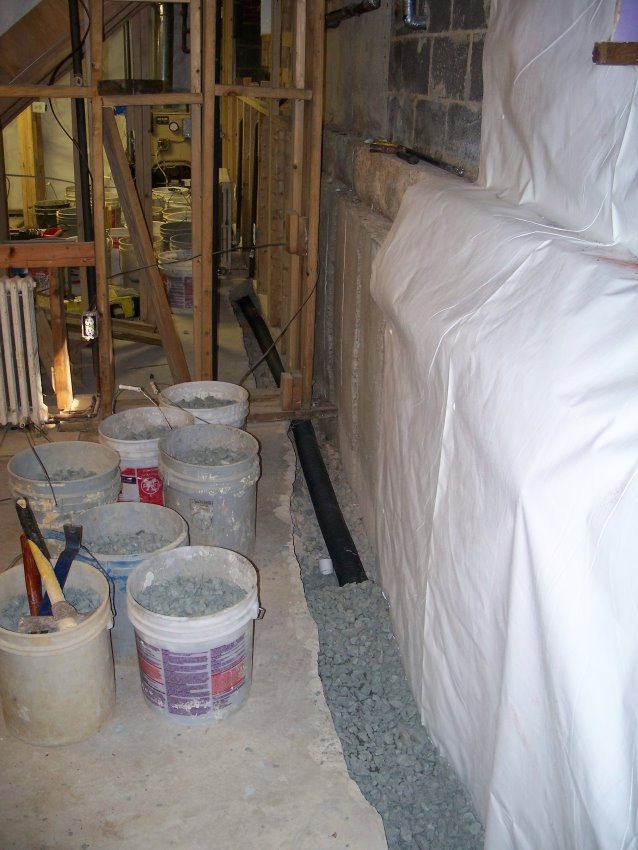
Waterproofing
The sheet plastic extends down into the trench. As the plastic was put up the contractors put down four inch drain piping and filled the trench with gravel.
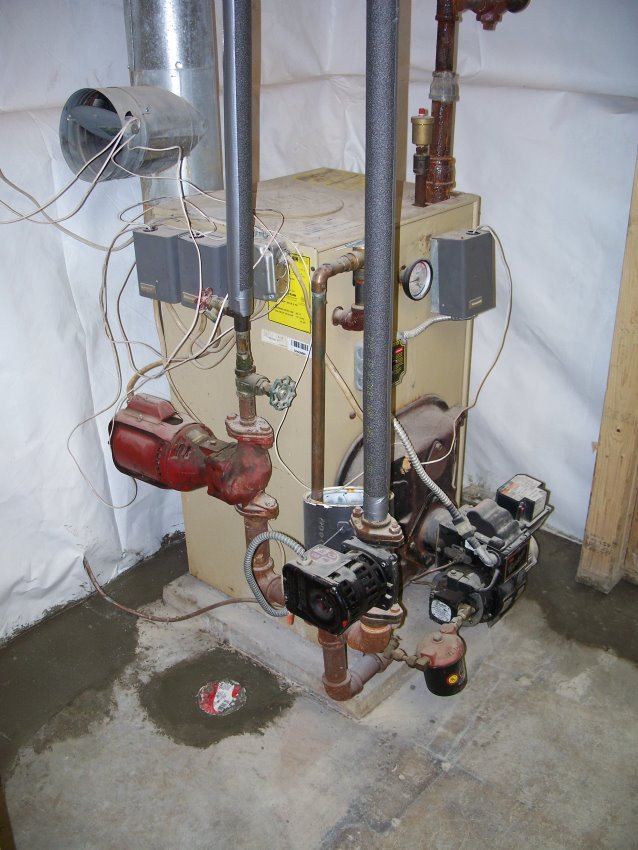
Waterproofing - Behind the Heater
With the plastic up the drain pipes laid and trench filled with gravel the contractors capped everything off with 1 inch of concrete. There is enough space between the plastic and concrete walls to allow for water drainage.
Winnie Insulates the Pipes
Over a period of several days Winnie wrapped all the water pipes in foam insulation with duct tape. We should realize significant energy savings, especially with the baseboard hot water system with this insulation.
Waterproofing
This was the corner with the worse rainwater leakage problems.
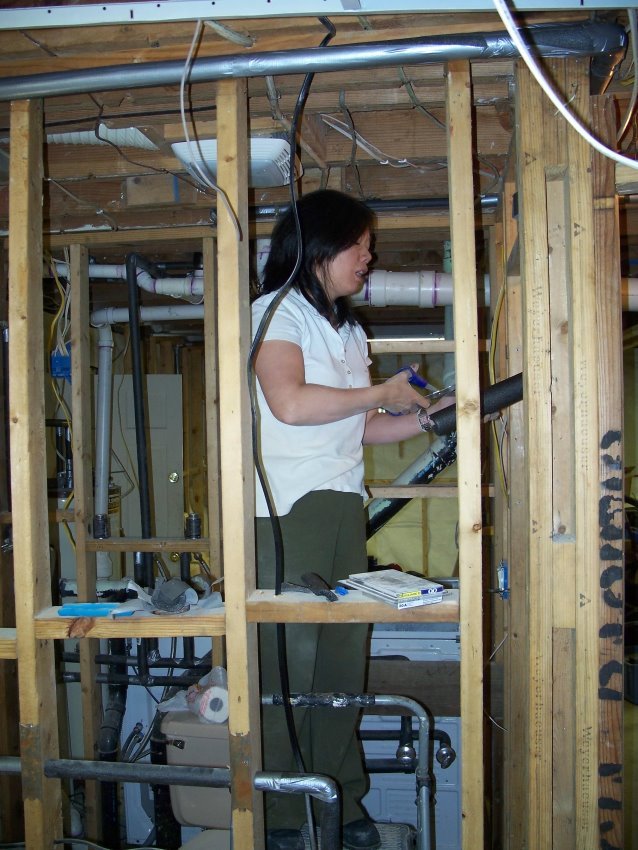
Insulating the Pipes
Insulating the pipes took Winnie a lot of time.
Reframing The Walls
With the waterproofing completed we re-framed the basement walls.
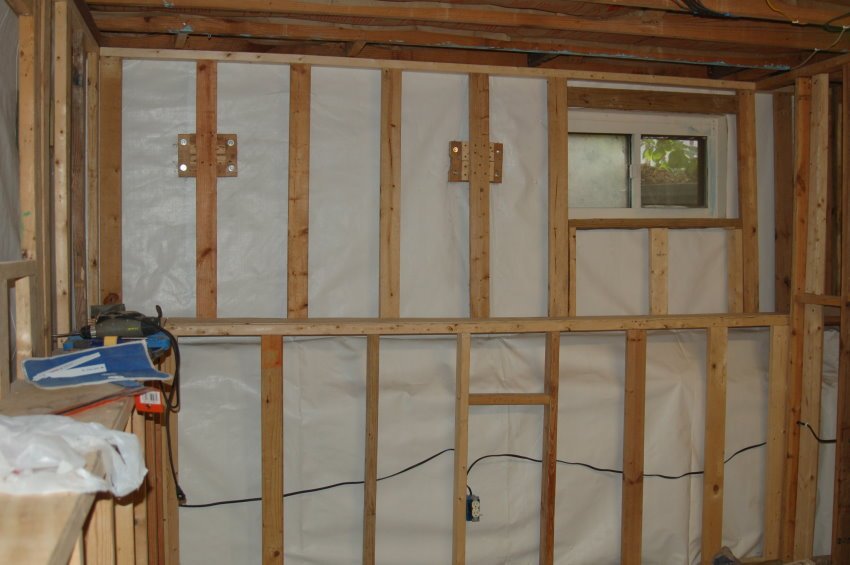
Anchoring the Framing
Because of the different thicknesses in the upper and lower walls we stepped the framing back to make the rooms feel larger. I couldn't rest the upper framing on the plastic waterproofing in risk of puncturing it so I suspended it with wall anchors placed above ground level. Then sealed up the holes with lots of caulking.
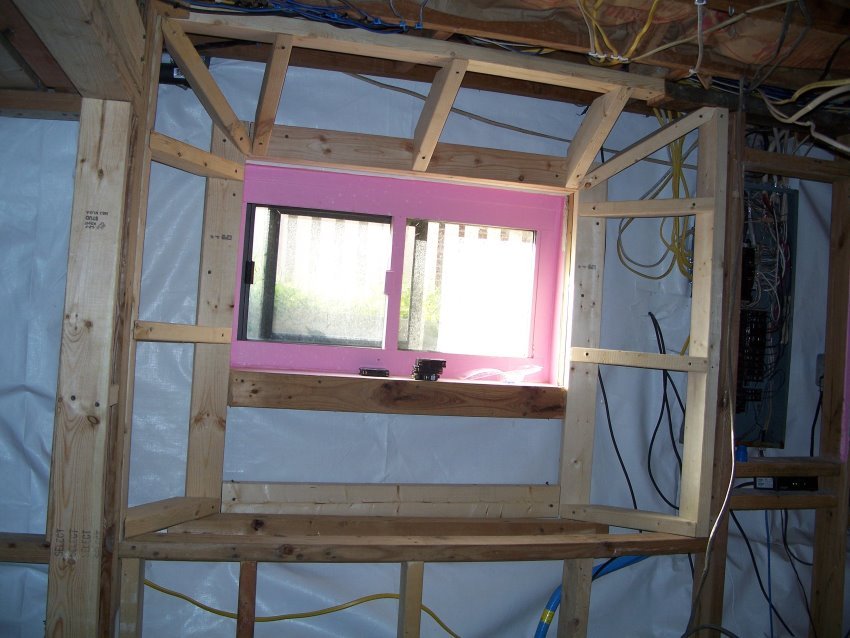
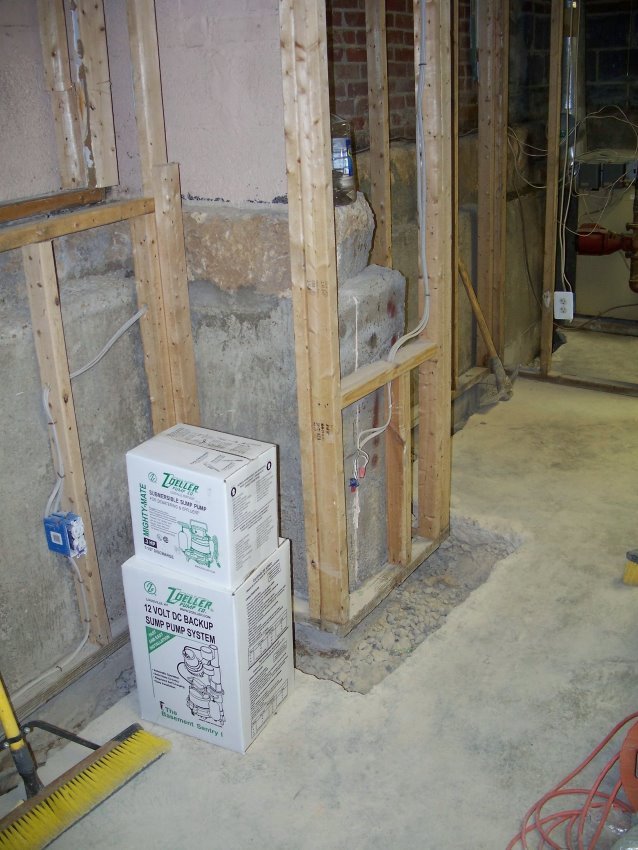
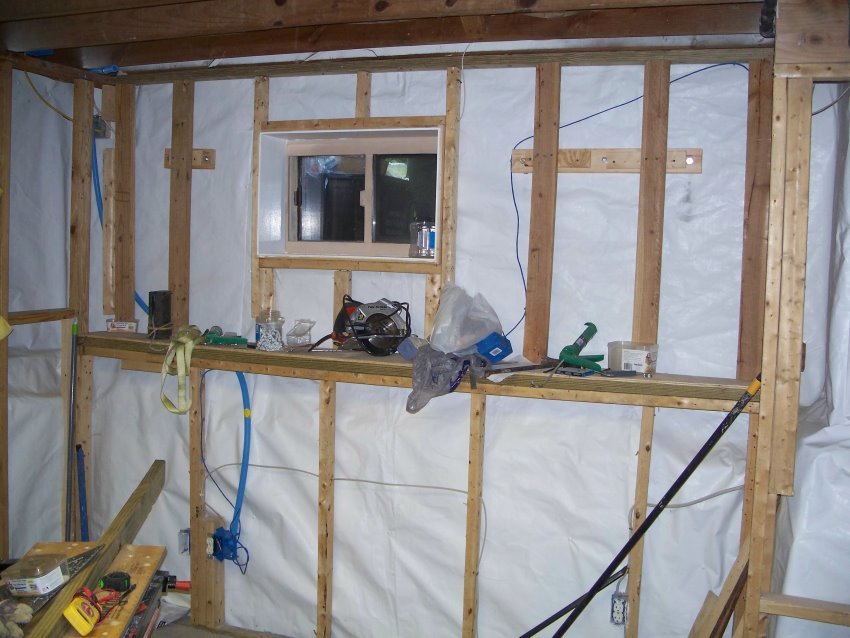
Reframing - The Window
Some areas were more challenging than others. This window tucked between a supporting wall extrusion and the power panel was very challenging.
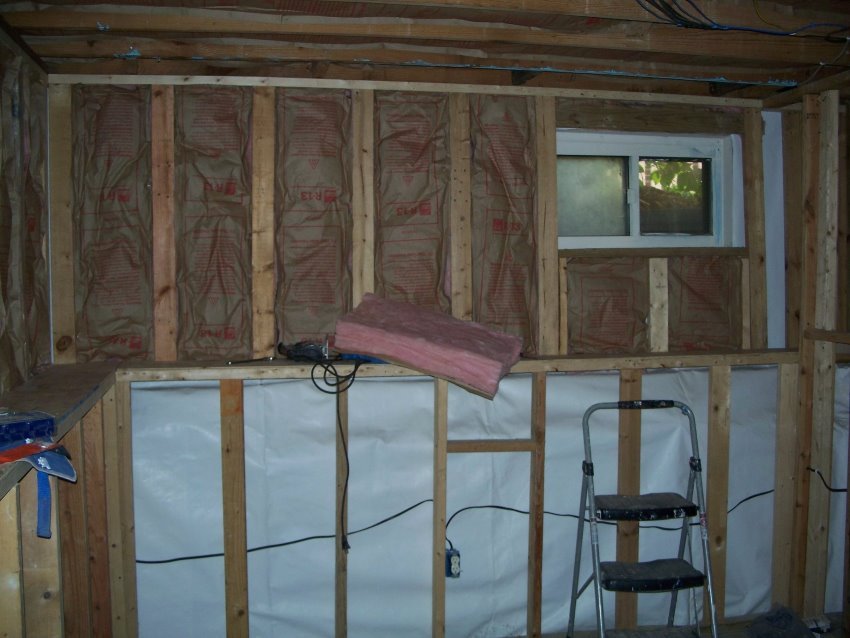
Insulating
The upper walls were only eight inches thick so we insulated the upper walls and ceiling. We did not insulate the lower walls in consideration that they were more than 24 inches thick. We also wanted to minimize the chances of any water leakage soaking into lower insulation.
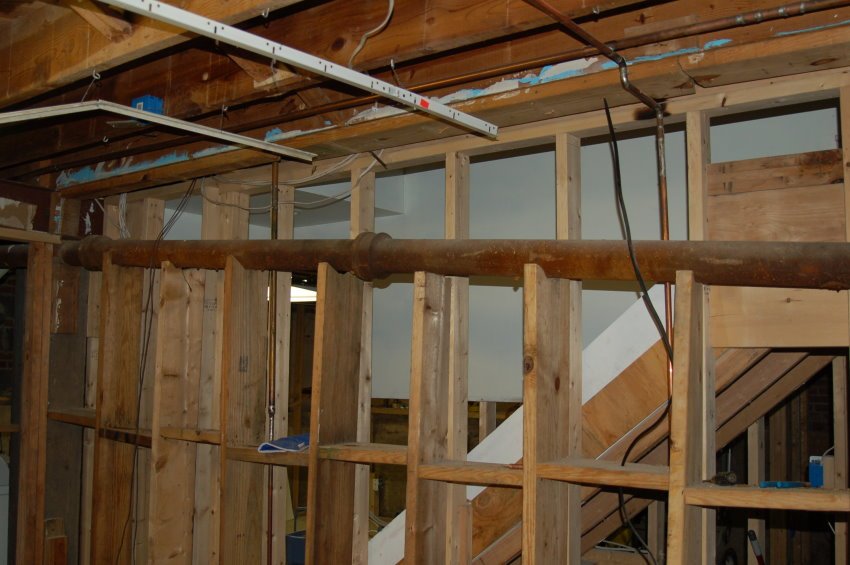
Main Drain Pipe
The house was built with cast iron drain piping. We discovered that it was leaking an apparent result of former owners using drano for too many years. All the drain piping had to be replaced, an expense we did not expect.
Framing Out a TV Niche
One of Winnies many ideas - a built-in niche for a flat screen TV in the front bedroom area. With the drain piping and stairwell the framing cavity in this area was over 12 inches thick allowing for a nice nine inch deep recess.
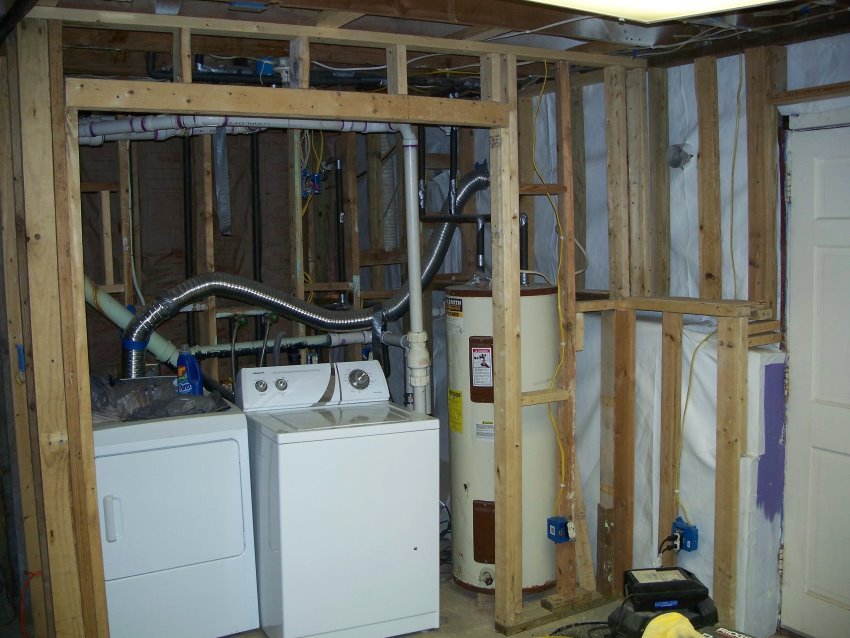
Reframing - The Laundry Room
A new washer and dryer temporarily hooked up and working. With new framing we also had to rewire the basement and add ductwork.
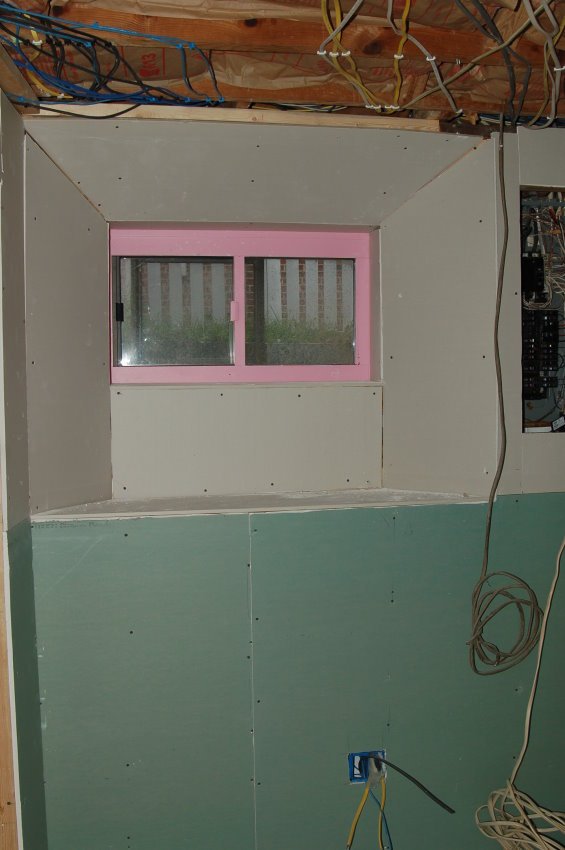
The Window - Drywalled
Drywall in the window niche. Coming along nicely.
TV Niche Drywalled
The TV niche in front bedroom drywalled with all wiring in place. I put in two TV coax lines a Cat 5e network cable a telephone line and electrical power wiring into one recessed outlet fixture.
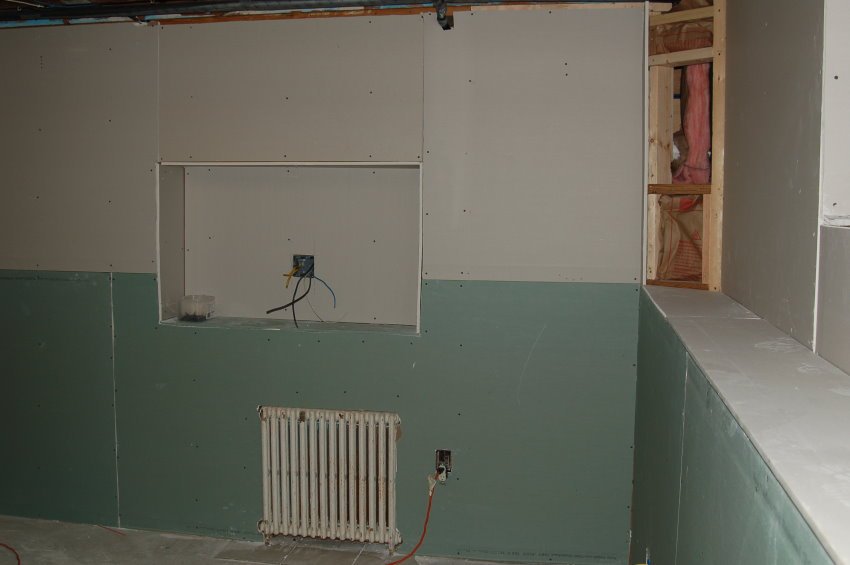
Putting Up Drywall
Once all the framing wiring ductwork and insulation was completed we hired a drywall crew for the next step. We used green board on all the lower four foot areas standard drywall on the upper walls. Again we were trying to minimize chances of mold making a comeback.
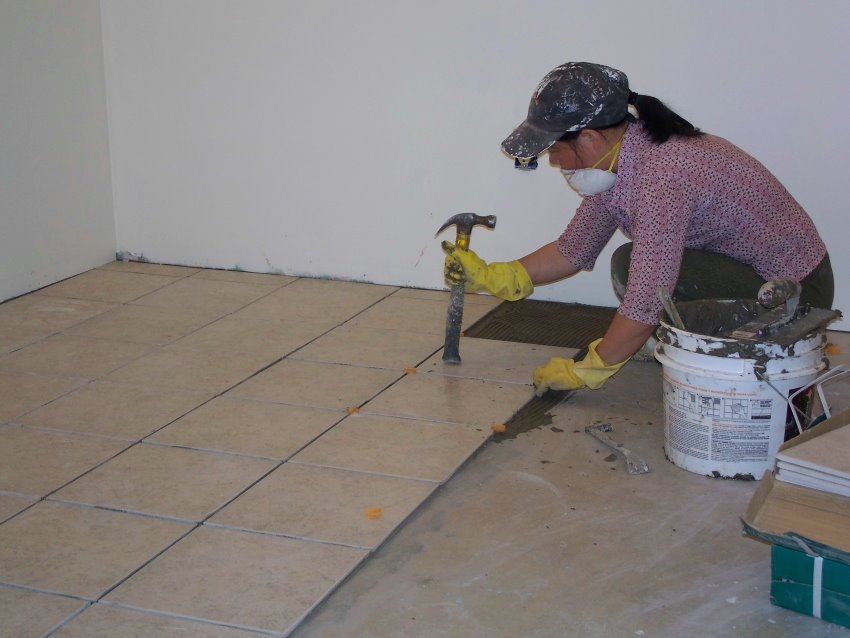
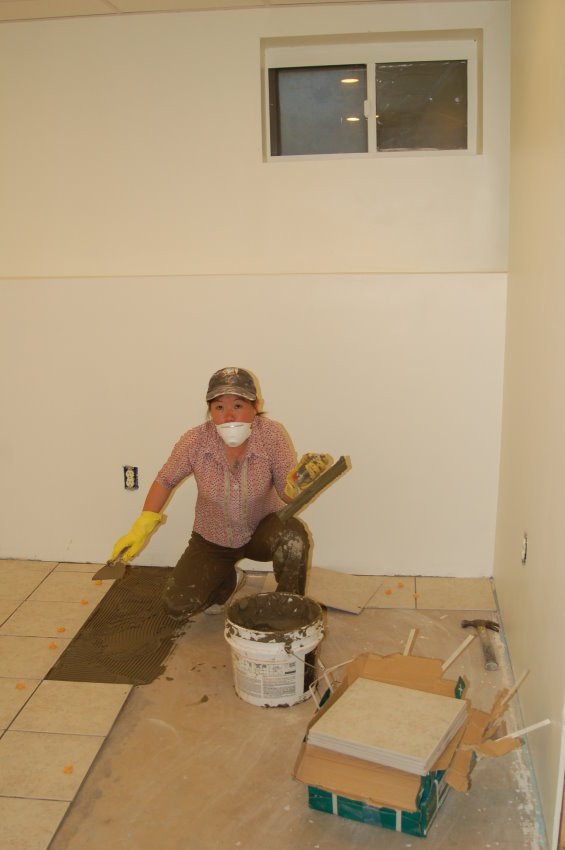
Laying Floor Tile
The drywall contractors also hung ceiling tile. With the drywall and ceiling tile up the walls painted it was time for ceramic flooring. Winnie is the flooring expert here.
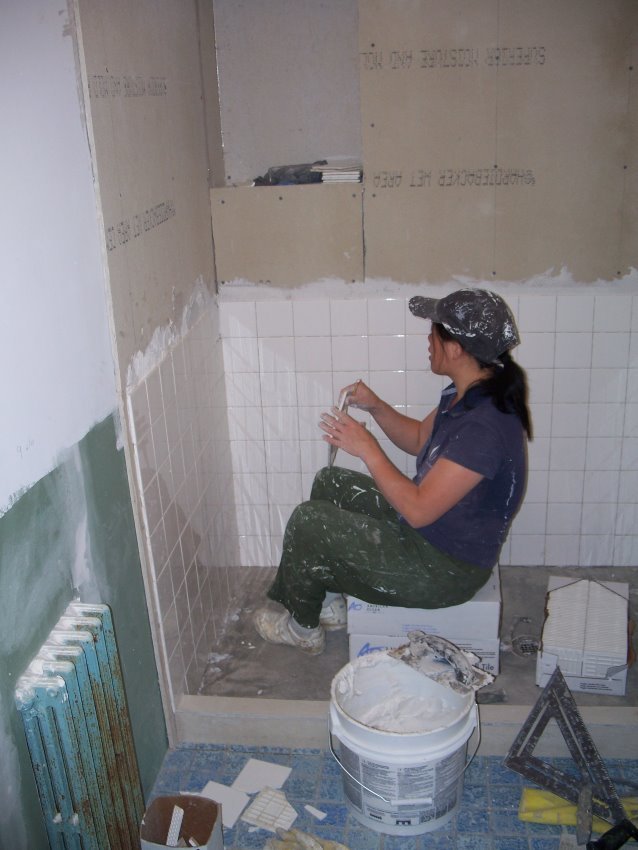
Tiling the Bath
The tiny bath was a challenge. We wanted all tile in here including the stand-up shower stall. The bath tile work ended up taking a lot of time.
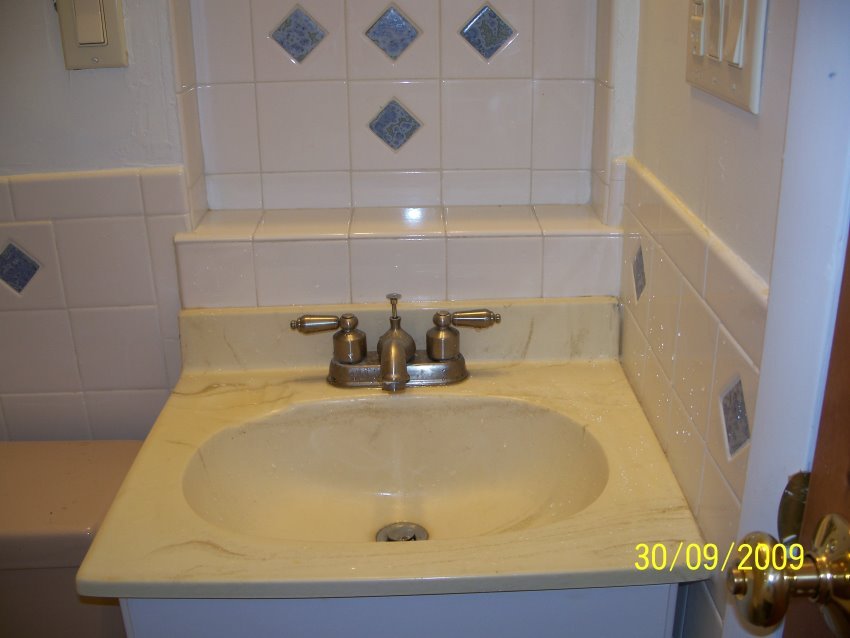
Bathroom Sink and Niche
The sink was tiny so to provide a little more space for toothbrushes and such Winnie thought to put in another wall niche. With the tile work details it ended up looking quite nice.
Bath Tilework
Bath Tilework. This was the renovated downstairs bath after Winnie finished her tilework.
Caught in the Act
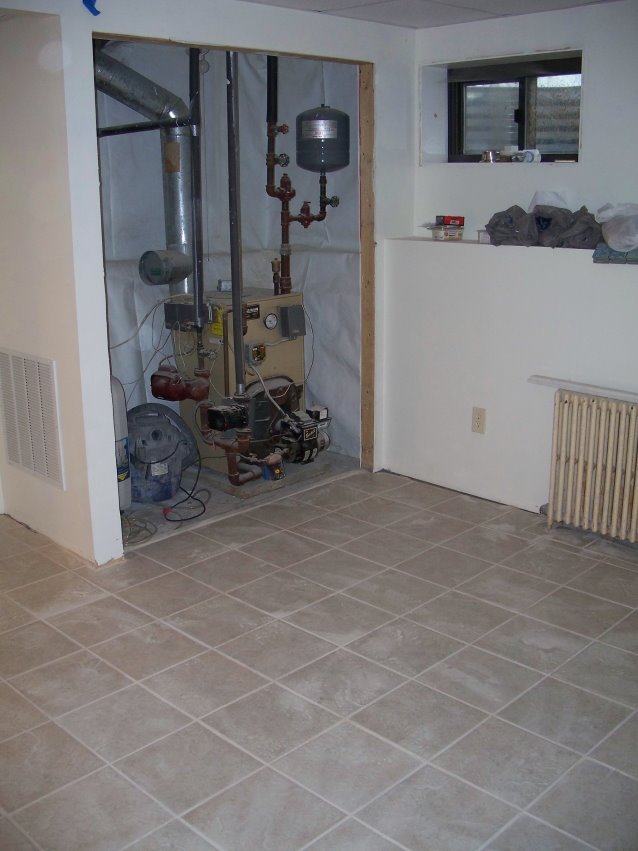
The Heater Closet
Suddenly everything seemed to start coming together.
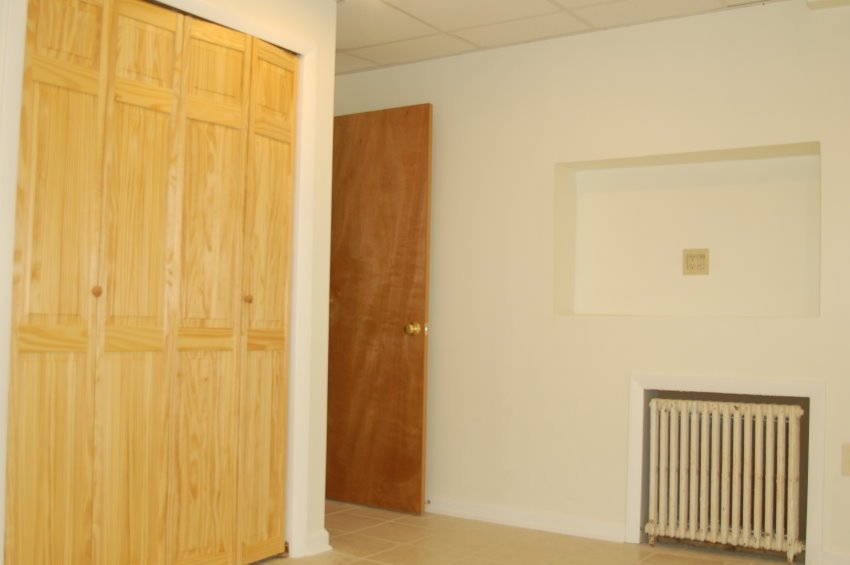
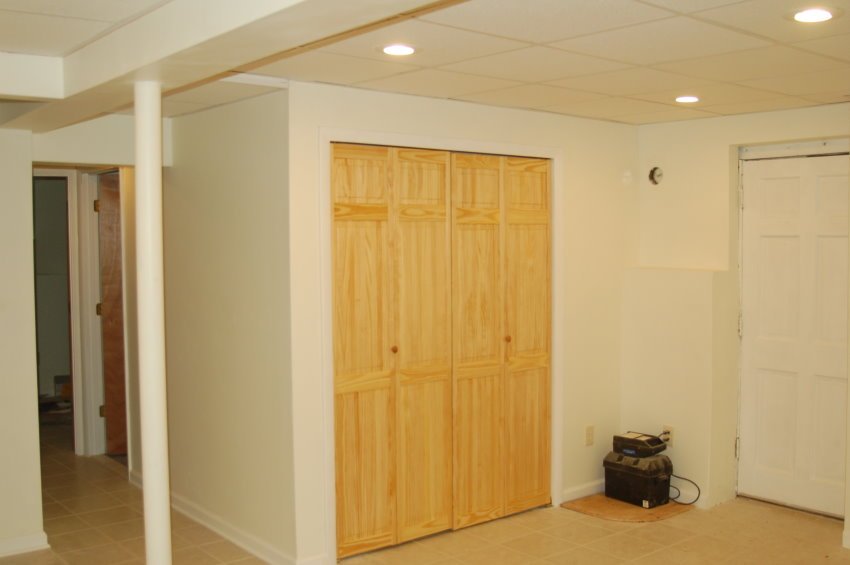
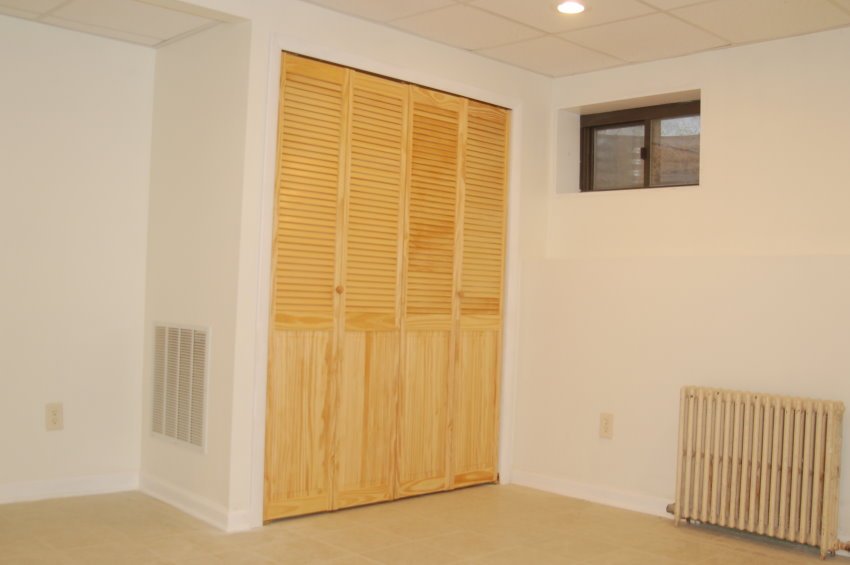
Front Corner Bedroom
Front bedroom showing the TV niche closet and entrance doors. We framed around the cast-iron heaters which ended up looking pretty nice.
Laundry Room
Laundry room area with the backup battery box and charger for the basement sump pump system.
Heater Closet
Final shots. All baseboard trim in place doors hung; its finished!

Under the stairs storage
Finished storage area with lighting under the basement stairs.

Basement Stairs - Looking Down
Basement Stairs - Looking Down. We painted the wood stairs and added carpet treads.

Basement Steps - Looking Up
Basement Steps - Looking Up. We painted the wood stairs and added carpet treads.

A Happy Camper
The basement is finished the house is finished and this person is very happy about it!
Return to The Adventures of Ron and Weifang Charest Homepage
Related Story
This Old House: The full story of renovating this venerable old house
Other Related Posts
(Visited 1,065 times, 1 visits today)
[…] Note: The complete collection of destruction / construction photos can be found in our photo gallery “Remodeling our 1954-Vintage Home.” […]
[…] own a rental property, a 1950’s vintage home that Winnie and I renovated several years ago. Recently we had to replace the over-the-stove […]
[…] This Old House […]
[…] Back then, when the Masters of The Universe crashed the world economy, Winnie and I were able to purchase a second house. It was in bad shape, and we spent about one year renovating it. But we turned it into a home we […]
[…] owned this house since October 2008. After extensive renovation we rented it out as income property. All told, we rented to five different families over the past […]
[…] own a rental property, a 1950’s vintage home that Winnie and I renovated several years ago. Recently we had to replace the over-the-stove […]