Estimated reading time: 6 minutes
Last week Winnie and I took a brave leap into suburban homesteading with backyard chickens. We acquired three hens that just started laying (according to the farmer we purchased them from), and four chicks. Ideally, at least a couple of the chicks are hens and will add to our egg-laying flock.
This experiment is already turning out well for our breakfasts. However, the side issue for our backyard chickens project is someplace to properly keep them. Building a quickie chicken coop involved some creative thinking on the fly.
Improvise and Adapt
Once we arrived home with our chickens, we moved our three hens into a large carboard box with a net across the open top. The chicks went into a smaller box, again covered by a net. Then Winnie and I took stock of what we had available for a more permanent quickie chicken coop. Time – and chickens – wait for no one.
We decided to convert an old 30 inch-wide kitchen cabinet that had been cluttering up the garage ever since we remodeled our kitchen a few years earlier.
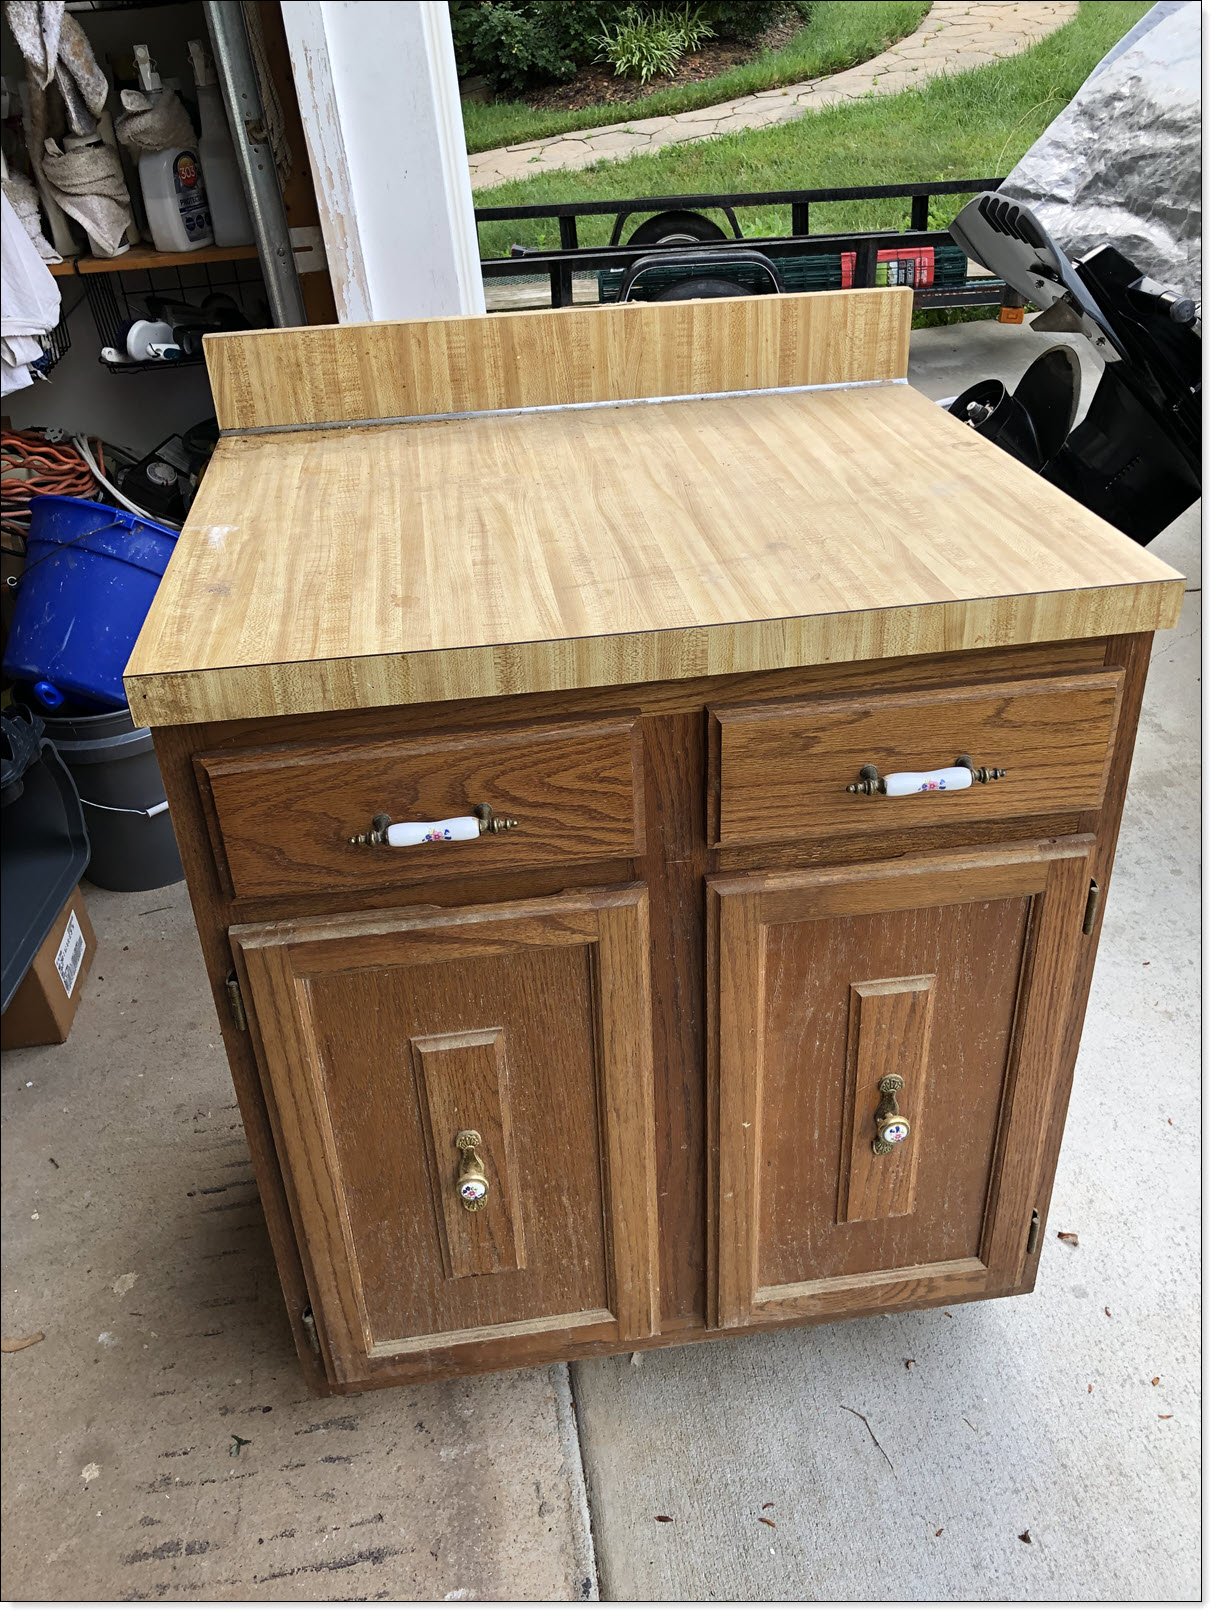
So bright and early the morning after we acquired our chickens, I went to work.
Nesting Box and Vent
The people we bought our chickens from had made a few suggestions for building coops. One was to use a five-gallon bucket for nesting box. We had several buckets laying around, so I went with that idea. I also knew I needed some ventilation in the coop, and I had a couple of plastic vents, acquired after upgrading my boat. So, the first step was to make cutouts for the bucket and vent.


I cutout the holes, glued in the bucket and screwed in the vent. The bucket handle came off, and I used the lowest flange on the bucket as the mounting point for silicon adhesive.

Doors and Windows
Next, I removed the two drawers and cabinet doors. I needed extra height inside the coop and the drawers just got in the way. We also wanted some type of windows for light. So I used the drawer openings for windows, covered with translucent plastic from dollar-store plastic cutting mats. To keep out unwelcomed critters (raccoons) we covered the windows with some scrap welded fencing wire.
Next, I cut two pieces of scrap 3/8″ plywood the same size as the cabinet doors. I screwed in the left-side panel for a permanent wall. On the right side, I used the original cabinet hinges to make a new door. A new handle and hasp to lock the door finished off the door.

Interior Creature Comforts
On the interior, I used some scrap linoleum flooring on the bottom of the coop. I used some silicon adhesive to glue all around the edges. For a final touch, I used some scrap 1 inch by 2 inch wood for two interior perches. I had to guess at placement, but there wasn’t much room inside anyway.

Reinforcements
The back of the cabinet was only thin pressed cardboard and I knew that wouldn’t stand up to any amount of rain. I was also concerned about raccoons tearing through. So I covered the back with some 3/8″ plywood. For good measure, I put some more plywood all around the bottom of the cabinet to reinforce the base.
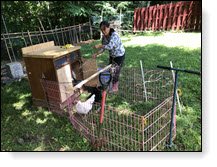
And call it done. A good solid day’s work. While I was building the coop, Winnie had done some shopping and found a “pet’s cage” at the local thrift shop. We used this with some garden netting covering the top for a chicken run.
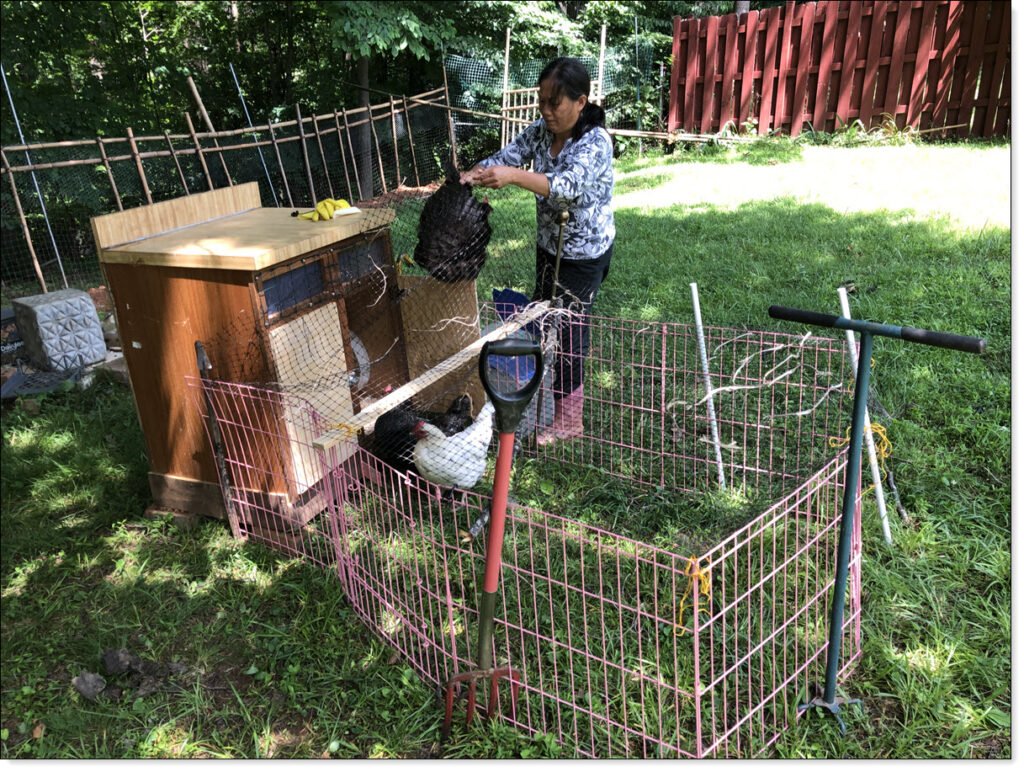
Temporary Success
So for one day’s work and the use of lots of scrap materials, we put together a serviceable chicken coop. We’ve been using this one week now and overall it works ok. The chickens have not used the bucket as a nesting box and I don’t know why. It might be too translucent (letting in too much light). Or, maybe the chickens don’t like the feel of the plastic. It does allow more light inside so I guess there is some benefit in having it.
Meanwhile, we’ve been keeping the baby chicks in a large plastic storage box with netting over the top. Once they get large enough we’ll have to move them in with the hens, at which point this quickie coop will be too small. But, by then, we’ll have figured out something nicer and more permanent for our fledgling backyard flock.
[…] Building A Backyard Chicken Coop […]