
Estimated reading time: 16 minutes
As I’m always looking for stuff to write about, I’ve decided to share my wealth of knowledge on toys equipment through reviews. So, this is my first of hopefully many more reviews to come.
My kick-off review will be on a sports item I purchased this past summer; the HO Sports “Beacon” single seat inflatable kayak.
Summary Up Front
| Attractive Design | Flimsy Construction – Will Not Last Under Normal Use |
| Many Useful Features | Complex to Setup |
| Complete Kit includes Paddle, Air Pump, and Storage Bag | |
| Good Tracking with Attached Skeg | |
| Good Stability | |
| Easy to Store and Transport |
Description
Specifications
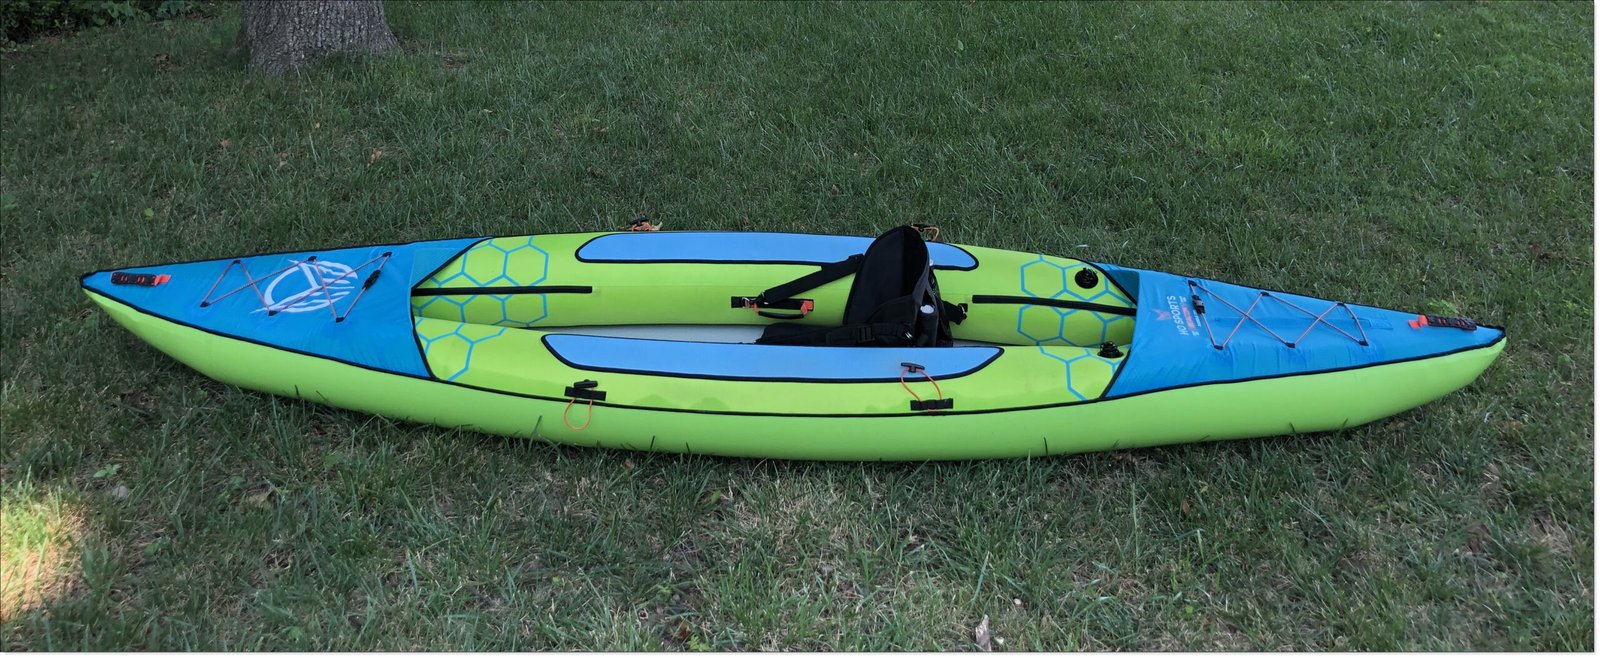
The HO Sports “Beacon” is an inflatable thirteen-foot-long single seat kayak. It is 36 inches wide, 12 inches high, weights 30 pounds, and has a carrying capacity of 450 pounds. Accessories in the package include:
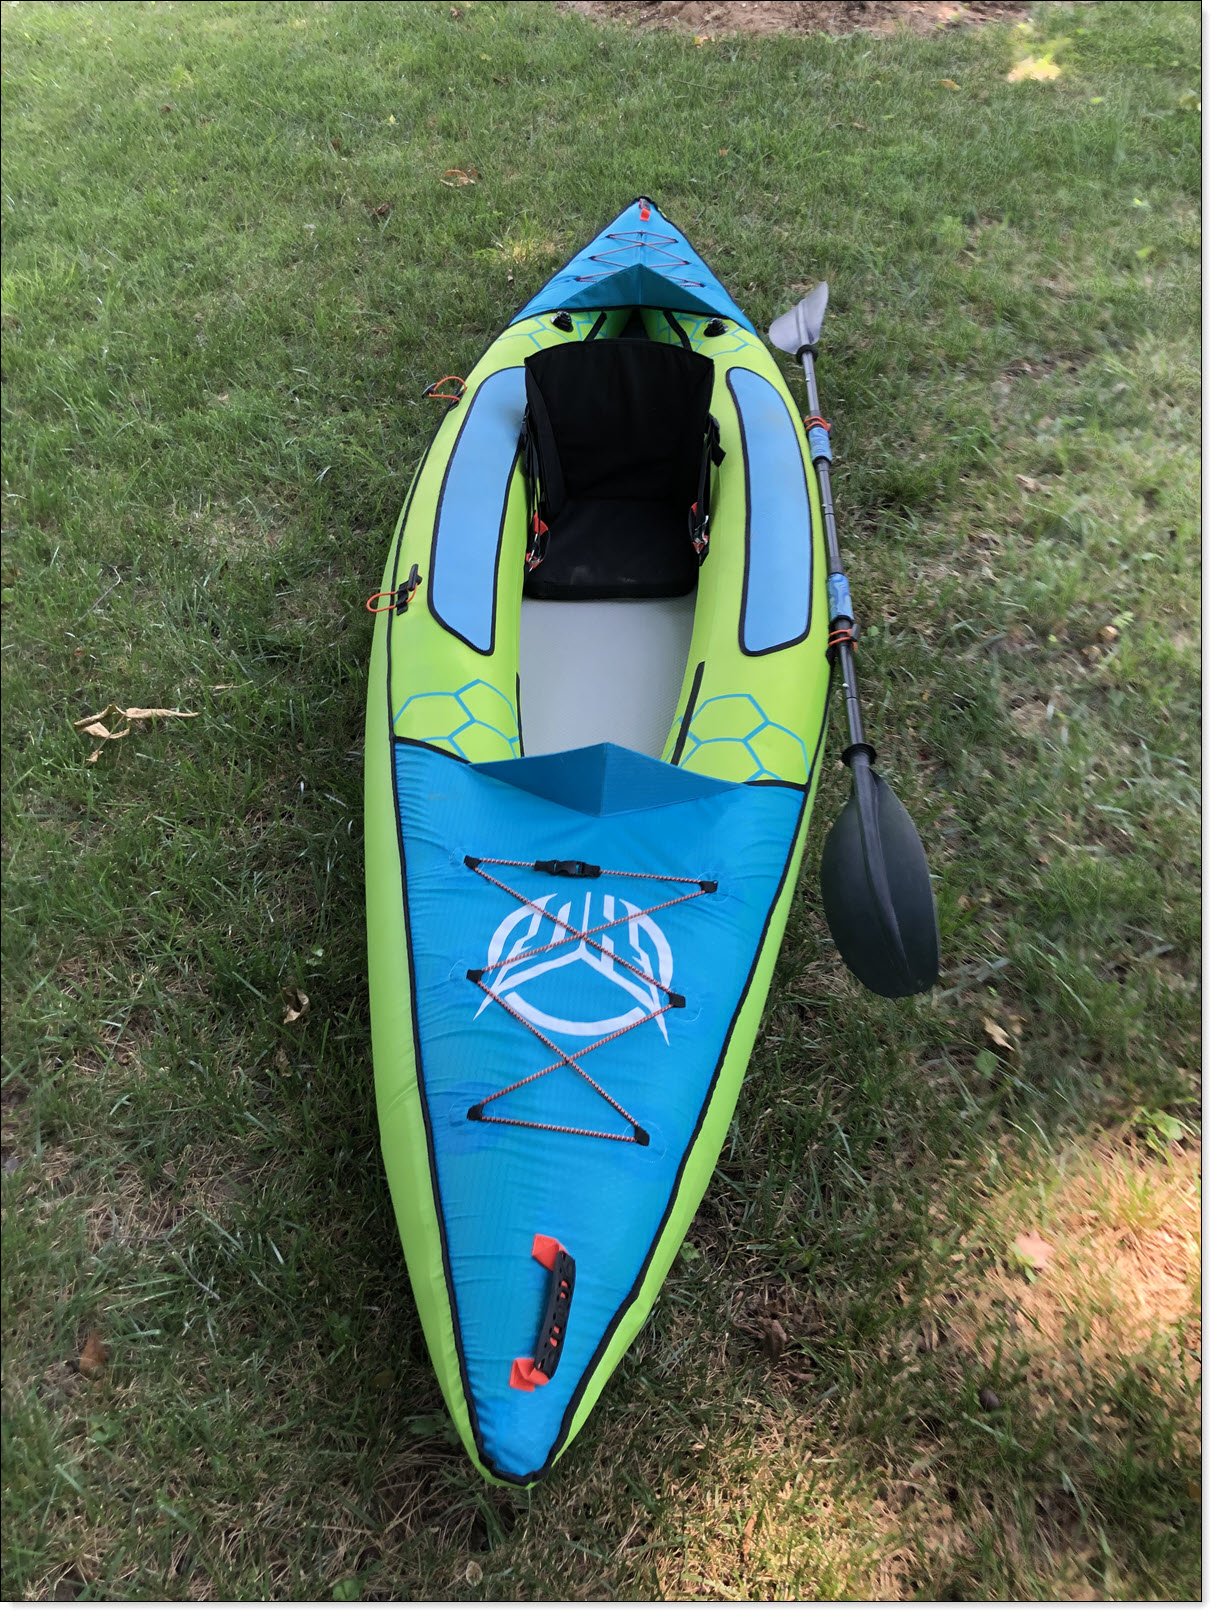
- Seat – Attaches to the drop-stitch floor with velcro strips and four straps connected to hull mounted “D” rings.
- The seat back has two fishing rod holders and a generous-sized storage pouch.
- Kayak Paddle – four piece aluminum and plastic.
- Leverlock Fin (“Skeg”).
- Hand-operated air pump with two different tips.
- Carrying bag with outside storage pocket, backpack straps, and zippered access.
- Nylon strap to wrap the deflated boat.
- Repair kit for low pressure side tubes.
- Owner’s manual.
I purchased this kayak in April 2022 and used it extensively this past summer. At the time of this review, HO Sports has discontinued this model, but they are still available through retail outlets. HO Sports does carry several other inflatable kayak models, two of which appear comparable to the Beacon but priced higher.
Drop-Stitch
Inflatable kayaks come in three basic constructions; low pressure, high pressure “” inflation, or a combination of these.
Outer Shell
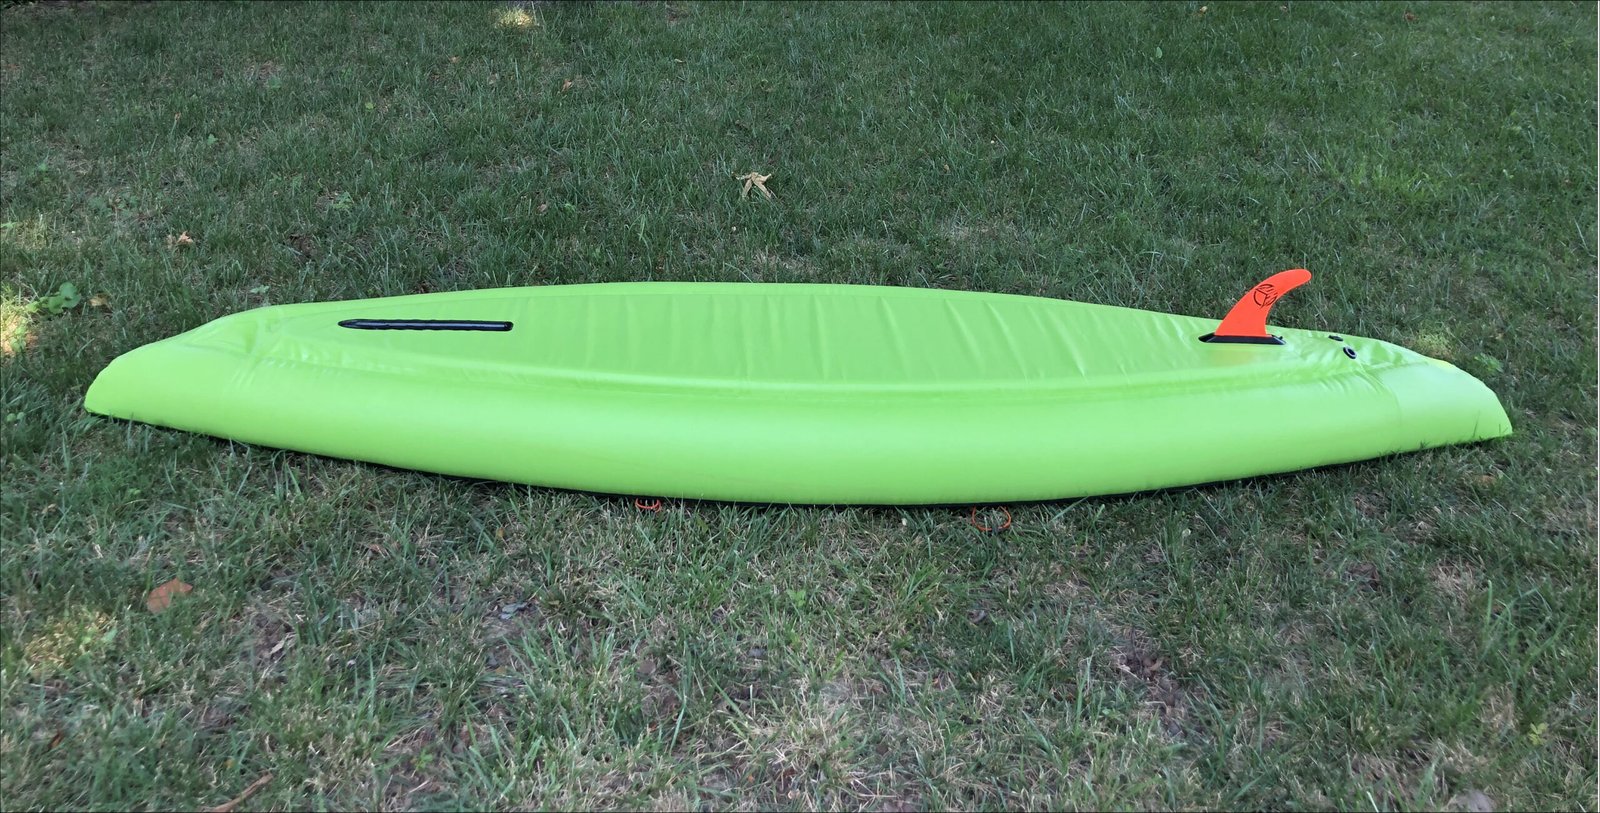
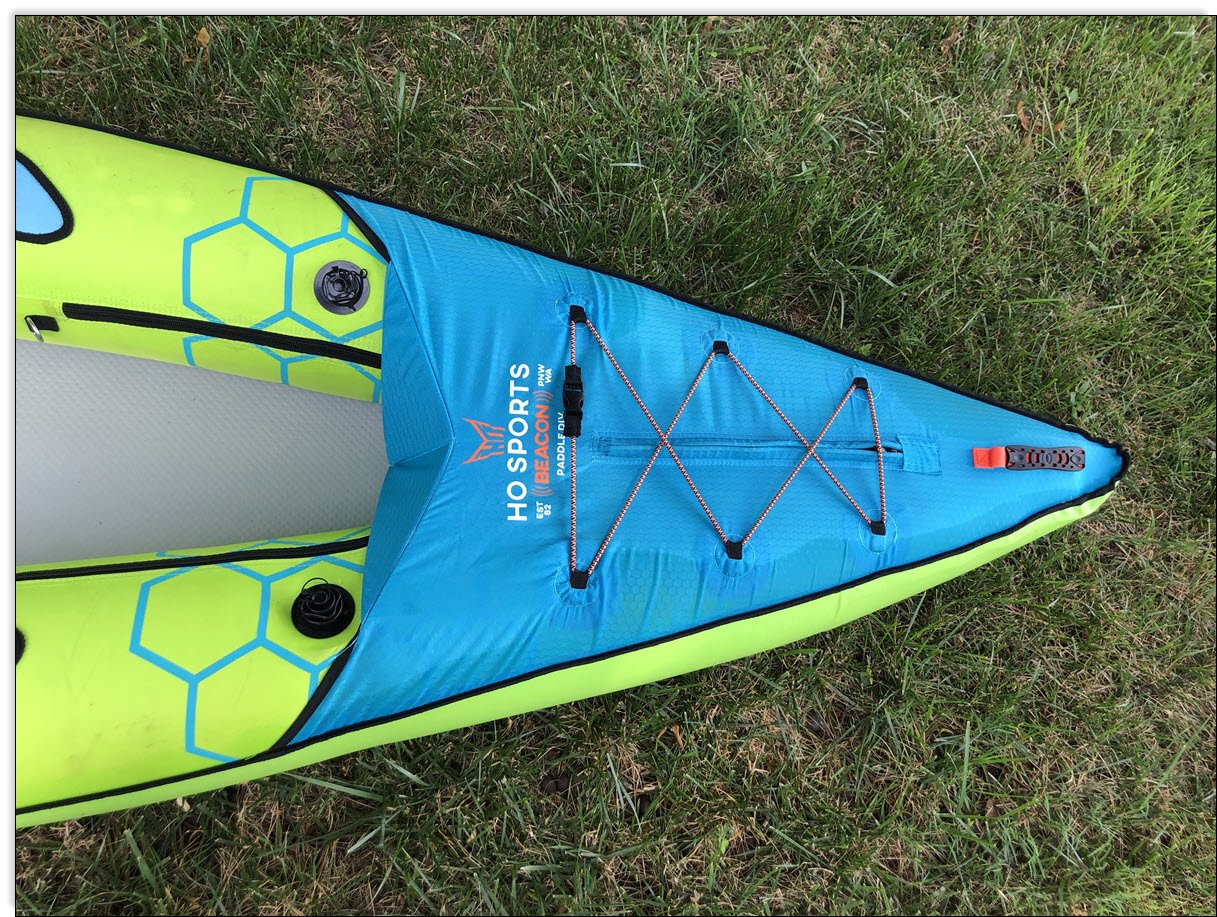
The Beacon has a combination of drop-stitch floor with two low pressure side tubes. When fully inflated the floor is literally “stiff as a board” at about two inches thick, making for a very solid base. The floor is supported by a green PVC fabric shell which extends halfway up the sides. Green . Blue nylon fabric creates fore and aft decking, and there are two blue rubberized patches on the middle-top of each side tube. The bottom of the hull is flat, and the boat includes a removable skeg to improve tracking. The underside also has a bit of a keel ridge at the bow.
The fore and aft decks include bungee cord rigging and carrying handles. There are two included paddle holders, one on each side. Inflation ports are near the back for side tubes, and bottom rear for drop-stitch floor, for a total of three air chambers. The drop-stitch floor can be removed from the boat. The rear deck has a zipper to access the drop-stitch floor inflation port. There are also two zippers on each side tube, ostensibly for accessing the inflation bladders inside the nylon covers.


Special Features
The boat has two drain plugs at the stern, accessed from inside the boat.

The boat looks very sharp with its brightly colored nylon sheathing. It’s roomy for a single seater, and the seat is reasonably comfortable. I like the included features of paddle holders, and fishing rod holders and storage pouch on the seat back.
However, this boat does not include an attached footrest (which I notice HO Sports does include in their current single seat models). A properly adjusted footrest makes a big improvement in kayak handling. When I use this boat, I’ll stuff my lunch bag or a Sea Eagle storage bag in the front to rest my feet on, which works out ok. But still, a footrest is a feature I think should be included.
Storage
The biggest advantage of inflatable kayaks is that they’re easier to store than kayaks. The Beacon and accessories all pack up into the carrying bag weighing about 30 pounds and measuring 30 inches high x 22 inches wide x 12 inches deep.
As the kayak has some rigid sections it folds up rather than rolling. Folding it small enough to pack inside the bag is relatively straightforward, almost intuitive. HO Sports includes a nylon strap to tie the boat together before packing it in the bag. A nice touch, as this keeps the boat from opening up once packed. The air pump, paddle, and seat all fit easily inside the bag along with the boat.
The storage bag has two outside sets of straps that snap together, which hold the bag tight after being packed. There are two shoulder straps that turn the bag into a backpack, along with two carrying handles in different locations. The carrying bag also has an outside mesh pouch for storing small items. I keep the skeg and repair kit in the side pouch, along with some personally added accessories like waterproof pouches for my iPhone and car keys.
The storage bag is roomy for the kit, and with carrying handles and backpack straps is easy to transport. The outside pouch is nice, as this makes it easy to store and access small items. Overall, I rate storage as excellent.
Setup
I always pack my kayaks, so they are ready to set-up on my next paddling adventure. The Beacon sets up fairly quickly for an inflatable, assuming it’s packed ready-to-go.
Inflation
Remove the folded kayak from the storage bag and unfold with the bottom flat on the ground. Open the zipper on the rear deck, which allows access to the high-pressure deck inflation port. Attach the air hose to the air pump and start inflating the two side tubes. Inflate each tube about halfway, then shift hose to the high-pressure port (requires changing air hose tips) on the floor. Make sure the high-pressure valve stem is in the correct “up” position, then inflate the floor to about ten pounds. The air pump includes a handy gauge to monitor air pressure. Put the cap on the port and close the deck access zipper.
Once the floor is inflated, shift hose tips (again) and finish inflating the side tubes. Make them firm to the touch. The strength of this type of kayak is in the floor, so side tubes really just give the kayak its shape and extra buoyancy. After inflating the tubes, close their airports.
One caveat is that the floor has to be evenly positioned between the two tubes. If it’s offset to one side, then when inflated the entire boat will be “crooked” to one side. It will still paddle and track properly but looks awkward.
Seat and Paddle
Install the seat using the Velcro fasteners on bottom, and the four side straps. The straps connect to four “D” rings sewn into the nylon side tube covers. The lengths of these straps can/should be adjusted to optimize the position of the seat back. Playing with the straps to adjust the seatback correctly can take a bit of time, but when properly set really helps with comfort.
Put the four-piece paddle together and set it aside the boat or attach using the paddle holders. The last step is to attach the skeg.
Skeg
The skeg is a bit awkward to attach. Turn the boat upside down, pop the front of the skeg into the socket, and lock the skeg into place using the rear lever lock. The lever lock appears robust enough to hold the skeg in place even if it strikes bottom. The skeg itself feels solid and not likely to break easily.
Turn the boat right side up, and you’ll see it now sits at an angle. I don’t think it’s a good idea to load a lot of gear in with the boat sitting like this as that would put pressure on the skeg and keel joint. So, after attaching the skeg I move the stern into the water if launching from a ramp. If launching from a pier, I move the entire boat into the water. Then finish loading out whatever other gear I plan on taking with me.


One observation with the socket the skeg fits into is that dirt is a problem. Any dirt (or sand) that works its way into the socket will block the skeg from connecting.
Finish and Go
Pack up the bag, air pump, storage strap, and throw everything back into your vehicle. Strap on your (you do wear a PFD while paddling, right?) and you’re ready to go. With a bit of practice, I’ve gotten setup time down to about 20 minutes, not counting the time needed to move my Jeep from the launch point to a legal parking spot.
Cleanup
Due to the construction and different materials used, cleanup is more involved than other inflatable kayaks I’ve used. First, the high-pressure floor can come out, and needs to, as water and sand/dirt will collect between the bottom of the floor and PVC shell. The nylon fabric will get dirty differently than the PVC fabric so different cleanup is needed. I’ll normally inflate the side tubes and floor separately, wipe everything with Simple Green® cleaner and water, and let dry. I let the parts dry while inflated. After everything is dry, I use a marine vinyl polish for the floor and PVC shell, and 303 Protectant® on the nylon, for stain resistance and UV protection.
The seat gets rinsed off and dries separately. Once everything is thoroughly dry, I’ll pack it all away, ready for my next paddling adventure.
Handling
is an important feature of a kayak. This boat tracks quite well on for an inflatable. The boat sits low enough that wind doesn’t seem to blow it around too badly.
At 36 inches width with a flat bottom, the boat offers excellent stability.
I note that the skeg is 8 inches long, which, adding another two inches for hull displacement, equates to a minimum water depth of 10 inches this boat can play in. But one feature of a removable skeg is that you don’t have to use it. If you’re going to be in “skinny water” less than the skeg depth allows, you can paddle without it. I’ve experimented and found that the boat will handle OK without the skeg but does blow around more easily. Tracking is not as crisp, but not as bad as I would have expected for a flat-bottomed boat. I suspect the small keel ridge at the front makes the difference.
I would also remove the skeg if I were to try any whitewater paddling. The manufacturer does not specify any whitewater rafting, and I’m not a whitewater paddler. I cannot comment on whitewater capabilities.
Durability
The one concern I have with this boat is its durability. Outdoor equipment is meant to, well, be outdoors. Meaning it should be able to take reasonable amounts of abuse and hard use without failing. In just this first season I have had a couple of issues.
The owner’s manual says of inflating the side tubes “the more air pressure the better.” This is not true as on my tenth use I popped the seam between the nylon and PVC sheathing on one tube from too much air pressure. Fortunately, the tear was close to one of the side tube zipper accesses. I was able to repair the torn seam using some Gear Aid brand Tenacious Tape®,® needle and thread reinforcement, and a sharpie to color the patch. It’s fixed, but this annoyed me as I don’t think it should have been so easy to pop a seam. A bit of reinforcing tape inside the PVC to Nylon seam for reinforcement would add a lot to the durability. A warning in the owner’s manual about overinflation of the side tubes would have also been nice.
I also snagged the side mesh storage pouch while loading the bag into my jeep and tore it quite nicely. Some needle and thread work repaired it almost as good as new. But, again, I feel annoyed that the pouch could tear so easily. A regular mesh laundry bag can take all kinds of abuse without tearing. It shouldn’t be hard to make this pouch at least as durable as a laundry bag.
Company Support
Related to durability is company support for repair parts. HO Sports has a decent website showcasing their line of water sports equipment. However, they do not handle any direct online sales, deferring to their dealers around the U.S. My personal preference is ordering repair parts directly from an via online sales. However, if local dealerships can provide repair parts, then I can live with this arrangement. The company website states they have been around since 1982 so I don’t feel I need to worry about them suddenly disappearing.
Purchase Price
At the time I purchased my kayak, the was $847. The present kayak models on the HO Sports website show MRLP between $950 to $1300. This makes OEM pricing comparable with similar designed inflatable kayaks from reputable manufacturers.
Conclusion
Overall, I feel this is an excellent inflatable kayak. It looks sharp and includes most features and accessories I want on a kayak. Storage is excellent with a well-thought-out bag that’s roomy for packing all the parts. The boat is stable, handles well in flatwater, sets up easily, and offers plenty of room for storage. It comes standard with two fishing rod holders, so that storage space could be used for fishing gear. I am concerned with long-term durability and suspect this boat may require gentler handling than other brand inflatable kayaks. The boat is competitively priced with similar style boats of other manufacturers.
I have no problem recommending this boat to anyone looking for an inflatable kayak with an MRLP in the $800 – $1000 price range. If you were to catch this on sale it would be a great buy.
Review Update – May 26, 2024
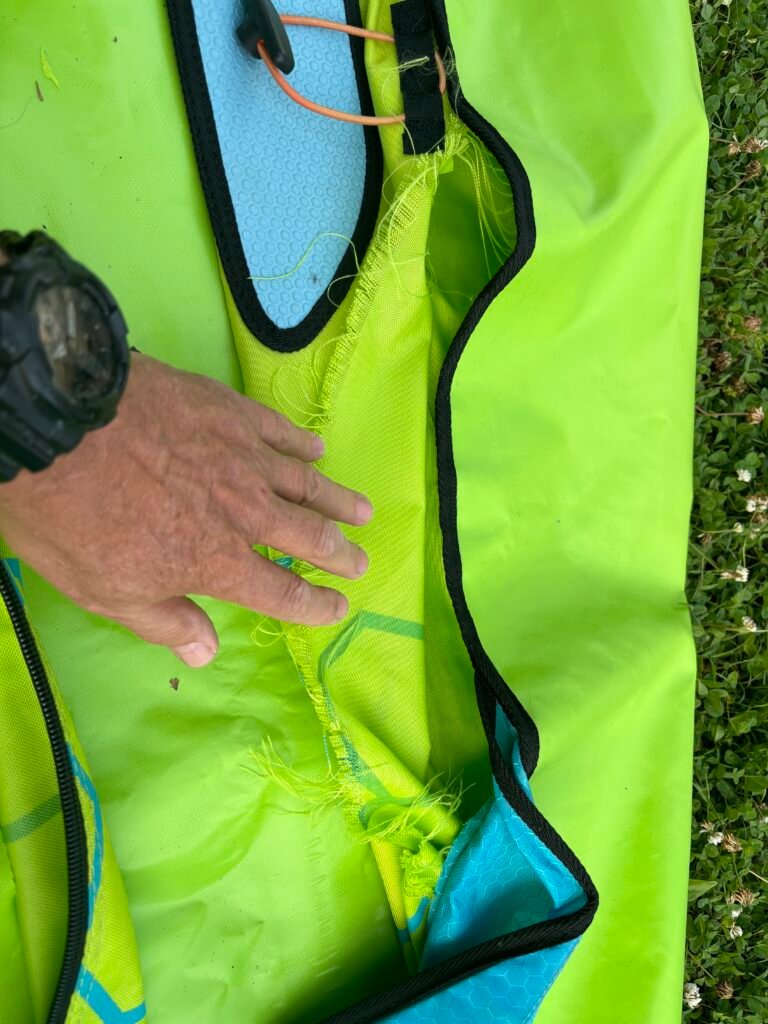
So, I need to provide an update on this review. I expressed concerns in my earlier review on durability of this boat. Today, those concerns were proven when, on the start of my third season’s use, an entire seam of the green nylon shell separated while the boat was inflated, and in the water. An obvious sign of poor-quality construction, which simply should not have happened. Manufacturer’s warranty on inflatable boats is only one year.
Based on this product failure, I cannot give HO Sports kayaks a positive review.
I also note that this model boat is now listed on the HO Sports website with an MRLP of $399. This puts it at the entry-level end for an inflatable with low-pressure sides and drop-stitch bottom.
Additional Reading
Drop Stitch Inflatable Kayak: A Quick Guide to the Versatile Water Vessel
Inflatable Kayaks: Bladders vs ‘Tubeless’ Construction
Thanks for reading my review, and happy paddling!
Related Posts
Updated: February 17, 2025, with “Summary Up Front” table