
Estimated reading time: 11 minutes
Just because we’ve moved to a new old house doesn’t mean home improvements stops. Quite the contrary, Given that we’ve already done just about everything inside this house that needs doing, Winnie decided she really needed to tackle the great outdoors.
Given her love for tile and concrete work, her choice was building a patio – driveway and walkway. Mostly using found materials. As always, she did some excellent work.
The Start
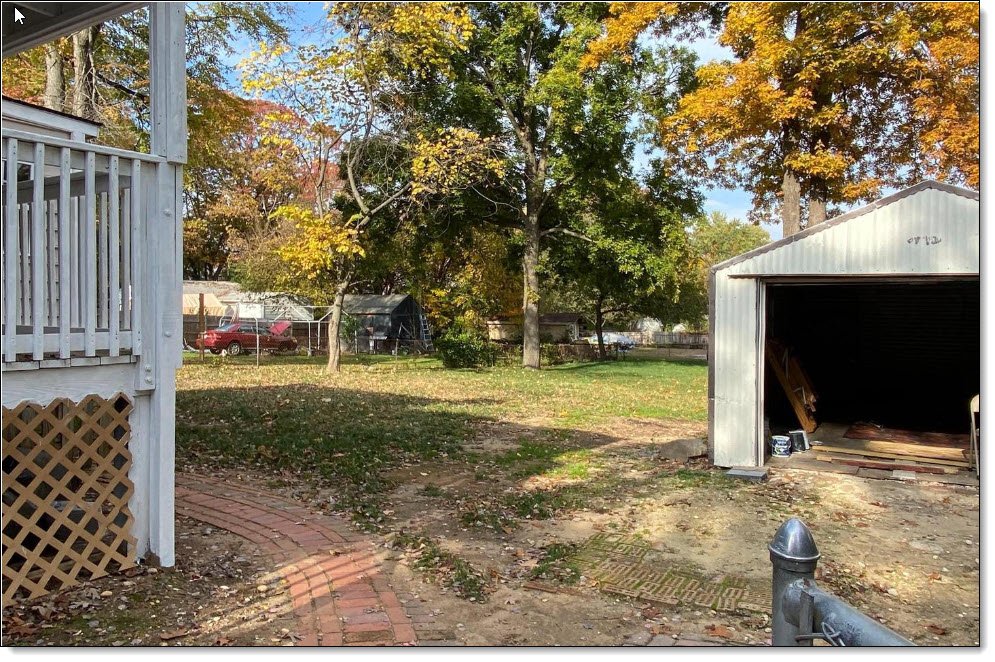
Our 1954-vintage brick house has a detached garage sitting behind the house, at the end of a long concrete driveway. When we moved in this past December the part of the driveway that extended from the back edge of the house to the garage door, an area roughly 46 feet long by 13 feet wide, was in pretty bad shape.
Off the one side of the driveway was a eighteen foot-long brick-laid walkway connecting the driveway to the outside basement steps. It wasn’t in much better shape than the driveway.

Neither of us were happy about the driveway condition, and once settled in we started discussing what to do about it. Power washing off the grass helped some, but it was still pretty ugly. We weren’t crazy about spending several thousand dollars replacing the section of driveway with new poured cement.
The Discovery
One thing I knew I needed to do was get electricity into the garage so I could setup my workshop. There was an existing cable coming out of the house that seemed like it once led to the garage. But, the garage was now powerless. So, in early June I dug a trench from house to garage for a new power line. I dug it along the left side of the pitiful driveway as the easiest route. As I dug, I started pulling up bricks and chunks of assorted types of rock. Lots of bricks and rock. By the time my forty-five-foot trench was finished, I’d dug up a couple of dozen bricks.
Winnie got real interested in this. One afternoon, returning home from the office, I discovered she had started digging further into the old driveway. As she dug she pulled up more bricks and rocks. So, we kept digging.


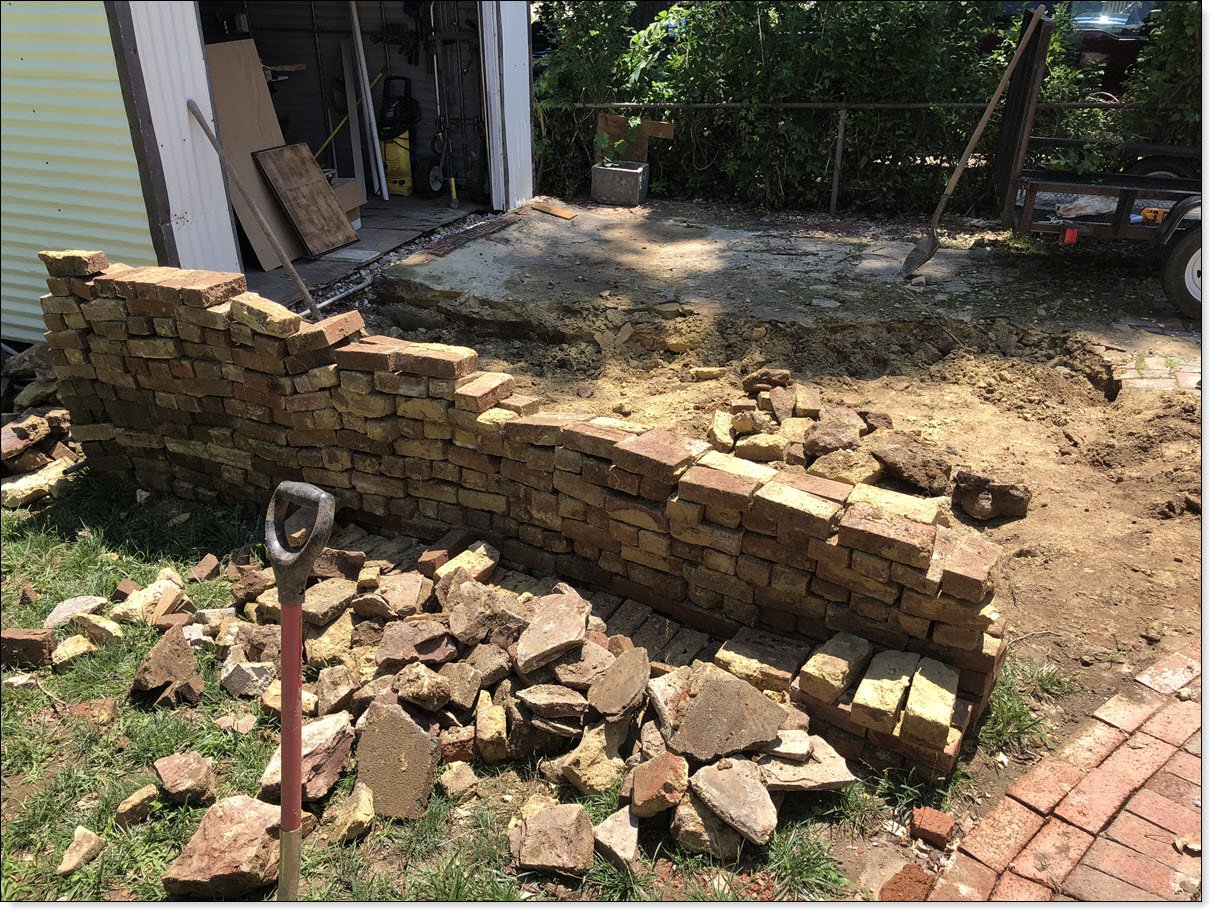

By all appearances, some previous owner, possibly the original, had buried all kinds of scrap brick and stone left over from the house construction and then paved over it. The concrete was at most two inches thick, but the underlying loose brick was almost two feet deep under the concrete.
By the time we were finished digging up the entire driveway it looked like we were doing missile tests.

Next Step
We salvaged well over 2000 bricks. These included , both concrete and ceramic, in several different sizes. Some were broken, but most were whole abet chipped and battered. We also dug up several piles worth of loose granite and reddish shale-looking rock, some square granite cobblestones, lots of assorted-sized round stones, and gravel.
As we dug them up, Winnie sorted and graded and stacked different materials in neat piles around the garage.

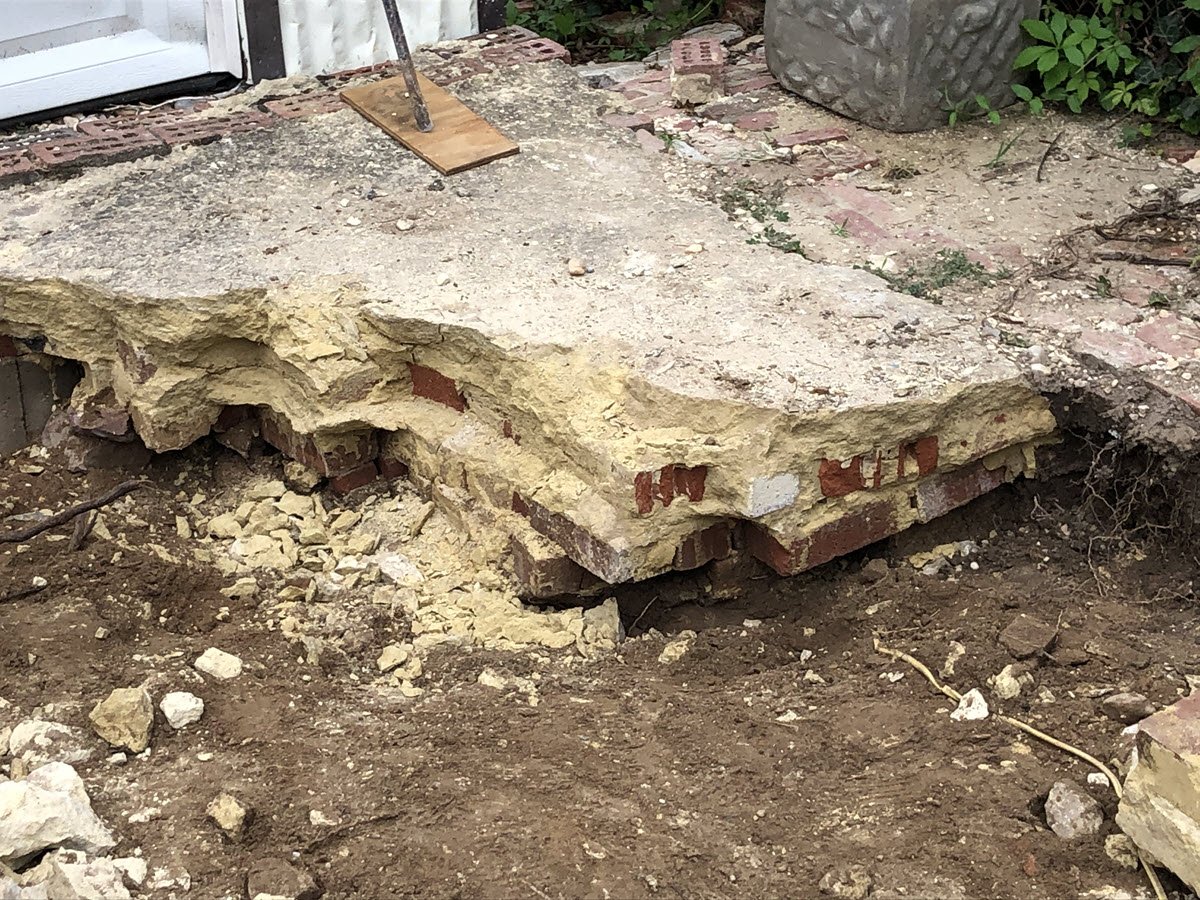
Once we finished digging and sorting and stacking, Winnie and I had serious discussions on what we were going to do next. We hadn’t really made plans while we were digging as we were so enthralled at being amateur archeologists. But, now, we had multiple piles of loose brick and stone in our yard, and a gaping rubble-strew hole in front of our garage. We had to do something. So, Winnie announced she wanted to build a new driveway – patio using the found material.
Building a Patio – Driveway
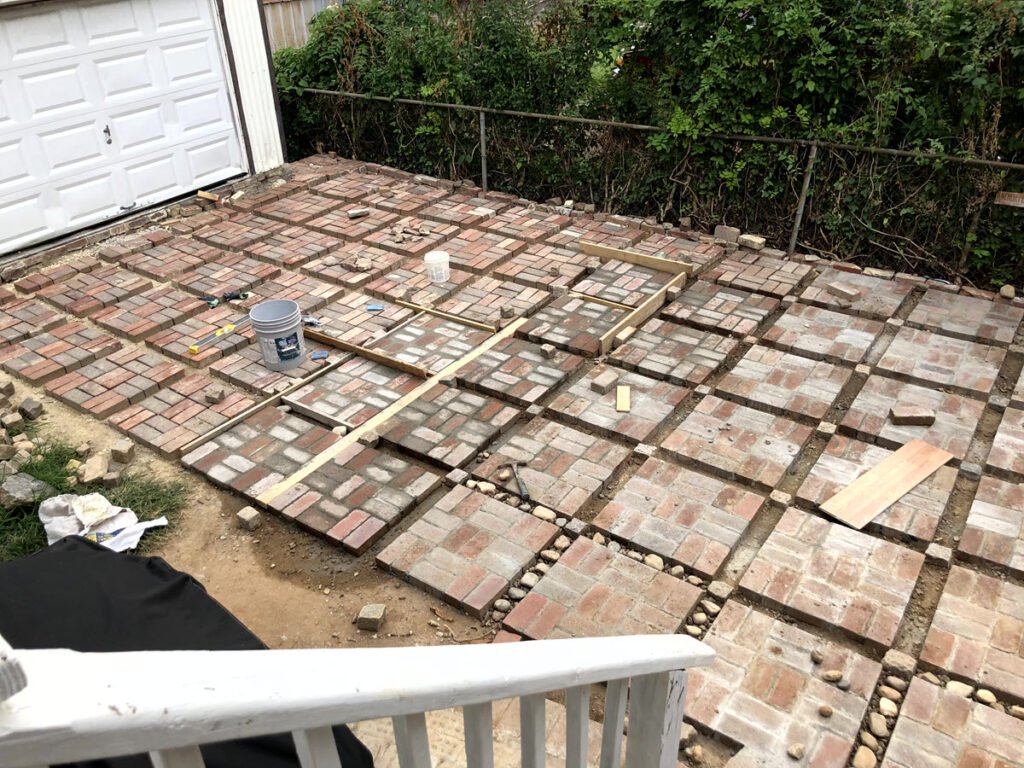
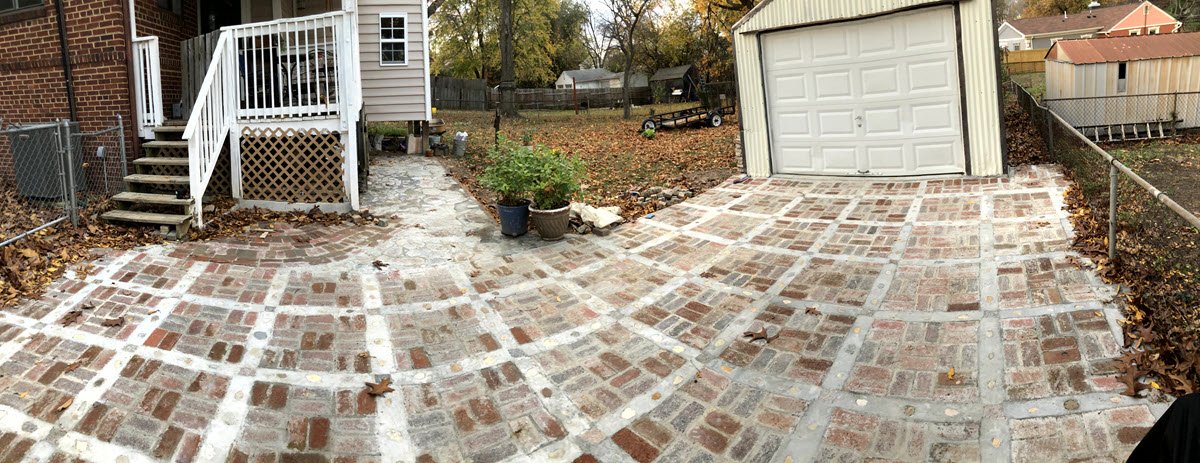
We spent several days testing different patterns of brick and stone, and decided on a pattern of eighteen stones arranged in a two-foot by two-foot square, with four inches of space between each square. Winnie decided to use the round stone and cobblestones set in-between each brick square. It was an ambitious plan, and I wasn’t sure we had enough material . Winnie was unfazed.
Given that we already had all the “found” material, all we’d need to purchase was a few bags of cement.
So Winnie started construction. She first used loose rubble and soil to fill in the hole, and carefully leveled out the ground. Then, she test-laid the bricks into her selected pattern.


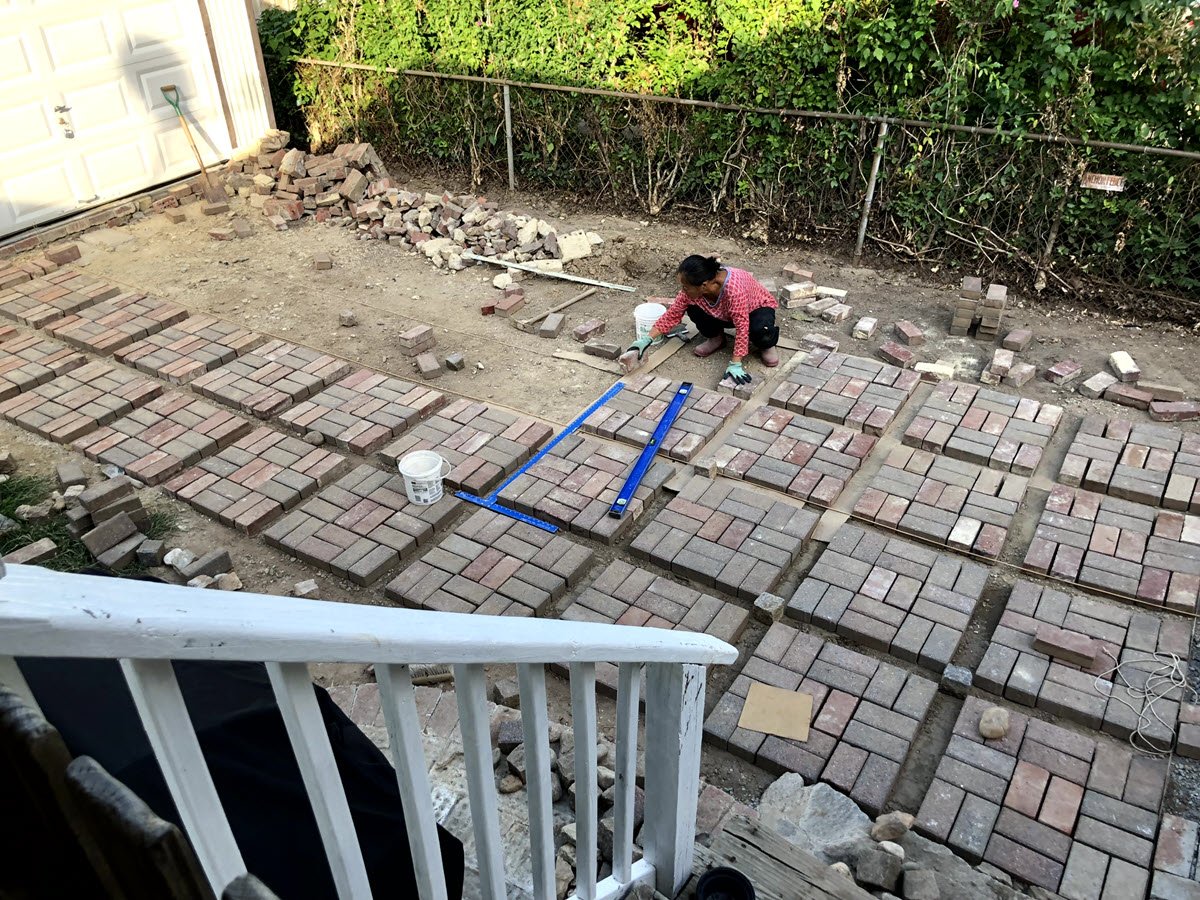

It took Winnie a couple of weeks to level the ground and set the bricks to her liking. I tried helping a few times, but my efforts didn’t pass her checks. So I just let her go, resigned to running tools and drinking water as needed.
At some point, we stopped calling it a “driveway,” and started calling it a “patio.” It just seemed right.
Setting Cement
Once Winnie finished laying out her patterns we moved to phase two; cement work. We made a Lowes run for several bags of cement and sand mix and staged them in the garage. Winnie pushed dry cement mix in between the one-eighth inch gaps between bricks in each square, then sprayed them with water. While the bricks were wet, she carefully washed off the cement haze on tops of the bricks as best as she could.
While she was working the bricks, I was busy setting cobblestones and round rocks in the four inch gap between each brick square. The cobblestones were just a little taller than the bricks, so I had to dig out the space a bit to keep everything level. I also had to select the correct sized rocks to fit in-between the squares.
Once all the brick squares had been mortared, Winnie moved on to phase three; more cement work. In this phase, she mixed up cement and filled the four-inch gaps between each brick square. While the cement was still wet, she would push the round rocks into the cement just enough to expose the tops.
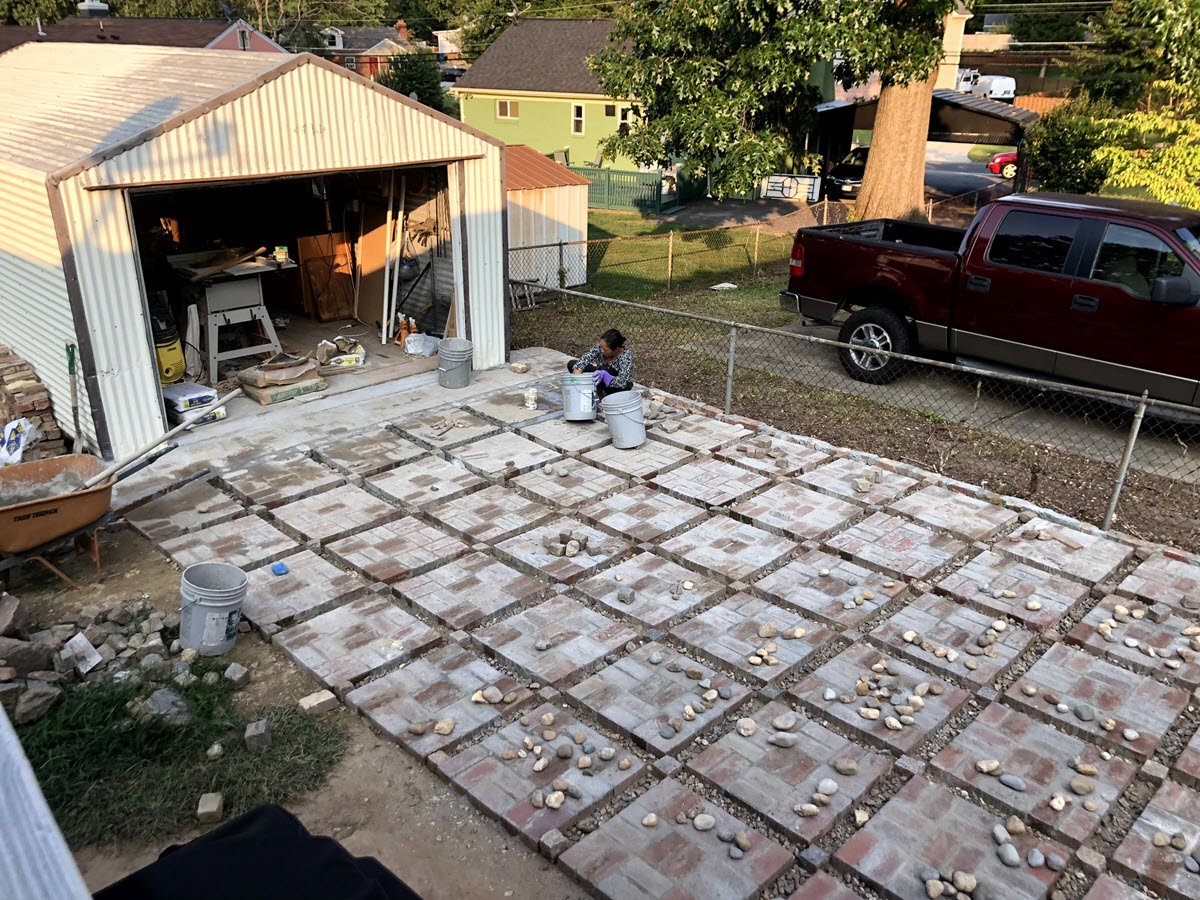
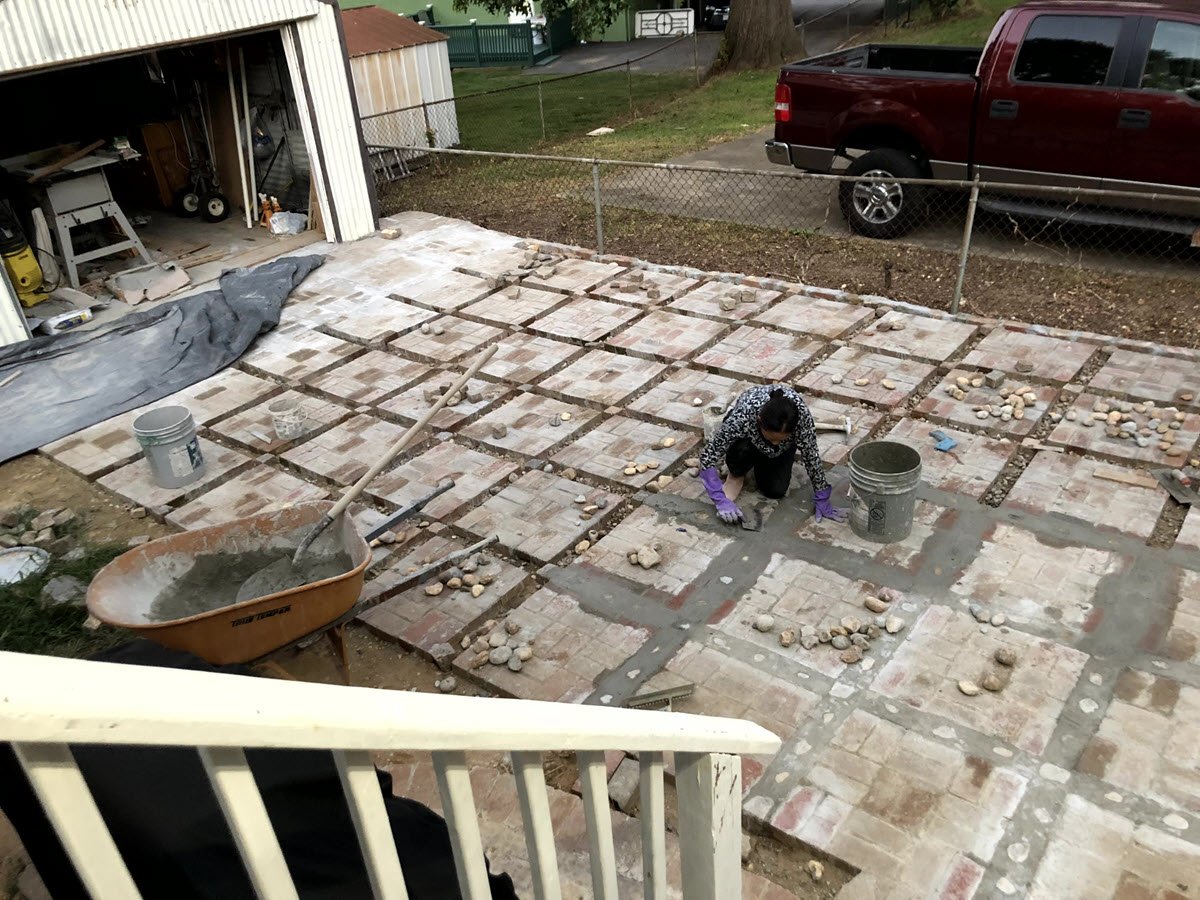
My role was limited to mixing cement as needed under Winnie’s close supervision. As well as running materials and drinking water.
Finishing Up
Winnie had to take a break while we spent a week in Hawaii. Once we returned, she was right back at work. By early October she was finished building the patio. There was a lot of haze from the cement powder, so I got out the pressure washer and blasted everything down. The first pass got a lot of the haze off, but Winnie wasn’t happy. So she blasted everything down a second time.


On To The Sidewalk
It was now mid-October and beginning to get cold, but Winnie wanted to build a new walkway connecting the patio to outside basement steps. We were low on useable bricks but did have a lot of rock. All the rock was boulder-shaped, but each piece had at least one flat surface. So Winnie started digging and placing stones for the walkway.

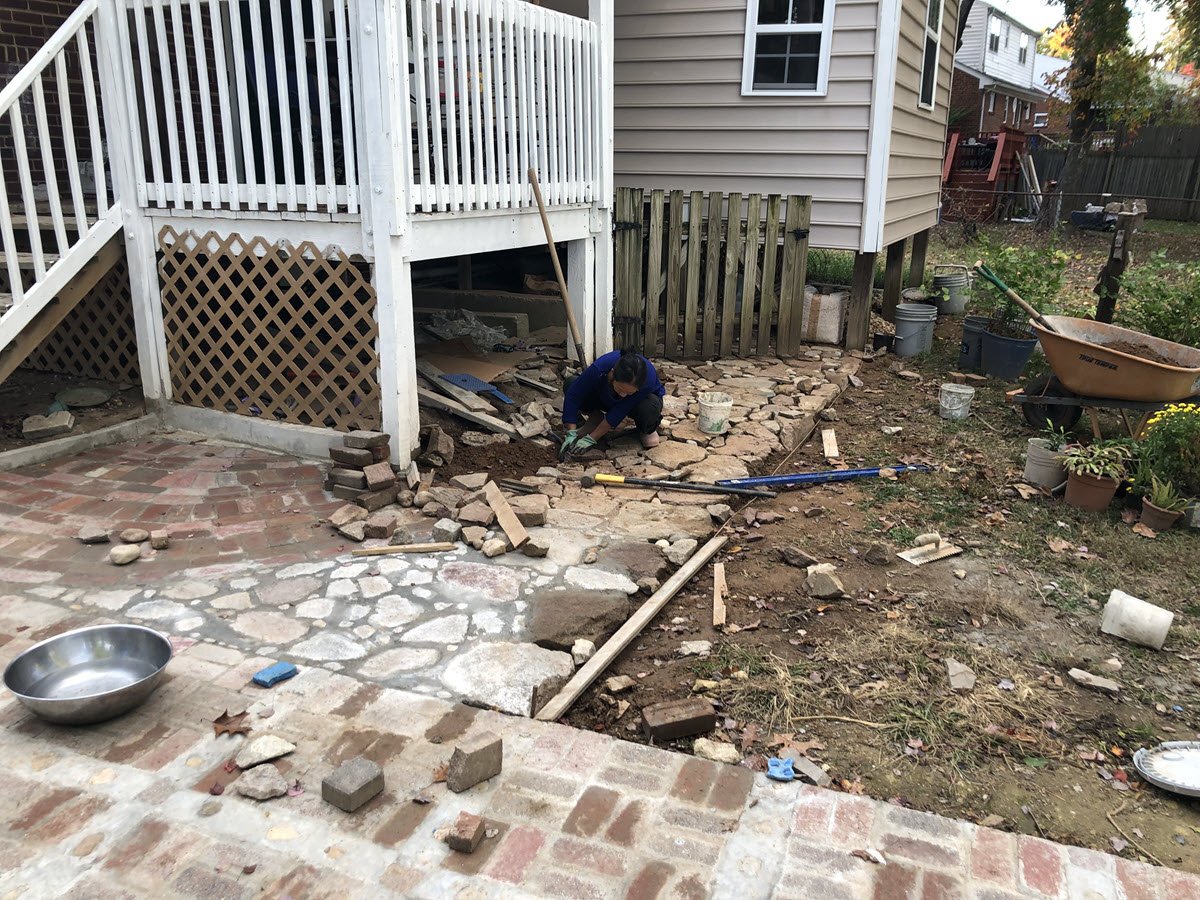
Winnie had to carefully dig and place them so as to get best use of the flat surfaces of each stone. Once the stones were set in place she used cement to fill and level the gaps. She finished off the stone walkway with borders of the remaining brick.
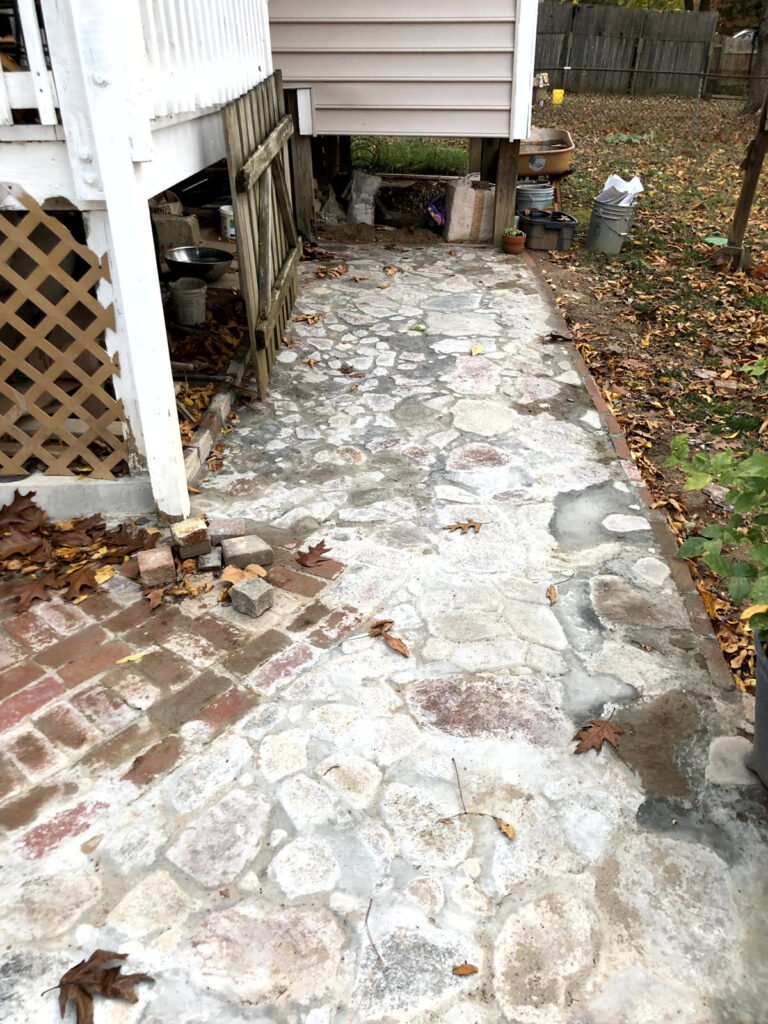
We still need to power wash the walkway to clean off the cement haze. But, it’s finished. I’m thinking that naming this “Winnie’s Patio” is very fitting.
Related Posts
Edited: November 19, 2022 – added an additional photo
[…] Home Improvement: Concrete Work […]