Meanwhile, Elsewhere in The House
In between renovating the kitchen and main bath we were doing a lot of other less dramatic work.
Electrical
As I rewired the kitchen, and attempted using outlets in the house, I realized the electrical system was – lacking. Most outlets on the main floor appeared to be 1950s vintage. Anything plugged into these outlets tended to fall out as the outlets were worn out. They were two-prong outlets with no ground pin because back in the 1950s electrical wiring was ungrounded.
Two prong electrical outlets are simply not available anymore – not to code – and I did not like the idea of installing three pin grounded outlets with the ground pin not used. Besides the fact that it’s not code, it’s unsafe. I decided the original wiring, as much as I could access, needed to be replaced.
I couldn’t gain access to the bedrooms, kitchen, and dining room ceiling lights without tearing out more drywall. And, I wasn’t interested in tearing out more drywall than we already had. With the basement gutted, I could gain access to the the wiring going up to the main floor outlets and wall switches. So, I left the wiring running from wall switches to ceiling lights alone. All other wiring was replaced, along with new outlets and switches.
Most wiring for basement outlets, although newer than the main floor, was also suspect. Just from the excessive moisture, outlets and switches were corroded. So, I ended up replacing a lot of the basement wiring also.
As part of painting and refinishing the floors we had removed all the baseboard trim. I cut small holes in the drywall at floor level under the switch and outlet junction boxes, which would later be covered by the baseboard. Then, I would remove the wire inside the switch box and drop a new wire through, guiding it through the floor into the basement from my baseboard hole. Once the new wire was inside the basement, I just removed the existing wire and rerouted the new one in its place.
Computer and TV Cable
Since I was already running new electrical wiring I also ran network and TV coax cabling. I ended up running at least one network drop and TV coax cable drop into each bedroom on both floors, the living room, and basement common area. I decided against running telephone wiring with exception of a drop in one bedroom. At the time I was doing this work cell phones, wireless phones, and Internet phones were becoming The Thing. Telephone cable already seemed to be obsolete.
The Home Office
One issue Winnie and I discussed was what to do with the small “half-room” that was used for building the basement staircase. The room was only six and a half feet deep by seven and a half feet wide, with no closet. I decided this room could be used for a home office, as it was just large enough for a computer desk. Since a computer system needs a lot of power, I wired the room with four electrical outlets on three different circuits. I also put in Cat5 and TV coax drops designed for future expansion capability.
Living Room Lighting
The living room was built with a switched outlet on the front wall for room lighting. However, when The Former Guy built the huge bay window he destroyed the switched outlet. So now there was no way to light up the room from a wall switch. The original wall switch was still there, next to the front door, unused.
I still didn’t want to tear out drywall to install a living room ceiling light, but I also don’t like switched outlets. I decided to add two wall-mounted lights on either side of the fireplace.
The house is masonry construction, so drywall is fastened to three-quarter inch thick wood nailing strips, which in turn are attached to the inside masonry wall. This gave me a three-quarter inch space between masonry and drywall to run wiring to the light fixtures. Since these wires were so close to the drywall I put them in metal conduit, to prevent future residents from driving nails through the wires when hanging pictures. Installing the metal conduit meant I needed to cut away a little drywall to install it, but not too much. These lights were wired to the existing wall switch by the front door. I thought they ended up looking pretty nice.

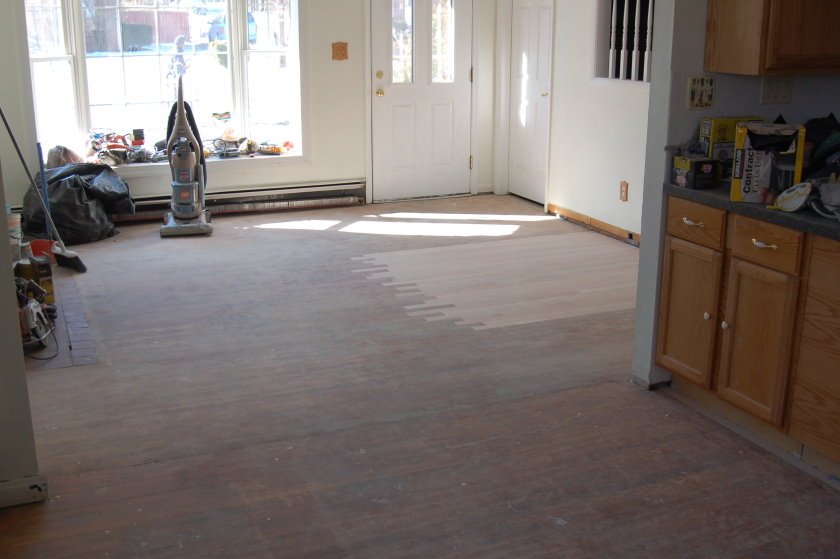
Refinishing the Flooring
While Winnie was doing her tile work, I tackled the flooring. We fully intended to refinish the home’s original oak flooring. The first step was to fill in the roughly four-foot hole in the floor where a spiral staircase once resided.
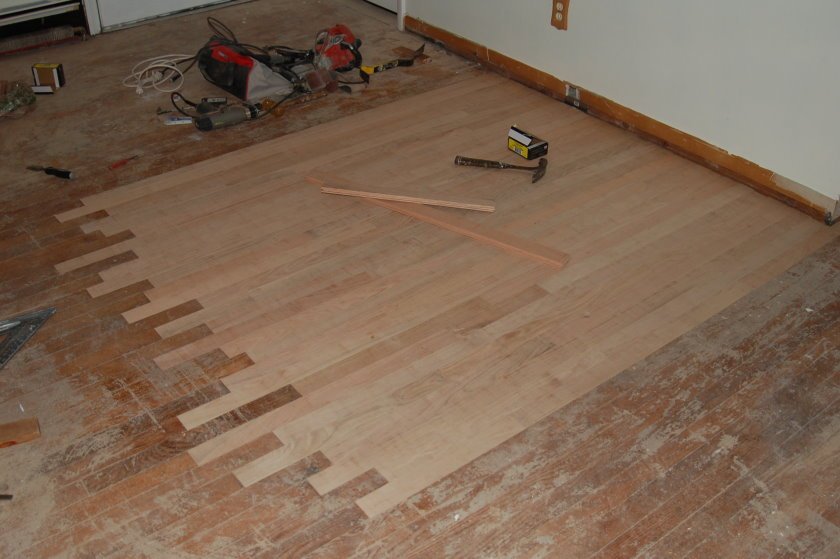
The Former Guy had plugged the hole with new floor joists and chipboard subflooring, which ended up about one-eighth inch lower than the surrounding oak flooring. I found some filler to raise it up, then started adding in new oak flooring. I took my time and feathered the new wood in properly, so there was no straight line across the random-length boards. Once again, this work was something new for me, but I felt pretty good when it was done.
There were a few other holes that needed patching, including a hole in the hall closet floor. At some point, a twelve-inch diameter air conditioning duct had been added from the attic air handler through the ceiling of the hall closet, through the floor, and connected to a ceiling vent in the basement. I didn’t like it as it looked like a sloppy install. I could also see that the air conditioning was not rated for handling the volume of main floor and basement. So, I pulled the duct out, leaving a twelve-inch diameter hole in the floor (and ceiling) that needed filling.
I ended up using exactly two bundles of random-length oak flooring to patch all damaged areas. By now it was the end of January 2009, and we were ready to refinish the flooring.
So one Friday afternoon I stopped by our local Big Box Hardware Store and rented floor refinishing implements of destruction. I also picked up extra sanding discs, wood filler, and floor varnish. Early Saturday morning I started work.
Before sanding Winnie and I scraped wood filler across the flooring to fill in gaps. I discovered using a floor sander was easier than expected. Almost too easy, as I started to think I was taking off too much wood. The carpet glue residue on the living room floor gummed up the sanding disc and I used one just for that small area. The rest of the sanding only needed two more discs.
The biggest issue I had was that the bedrooms were so small, especially the “half-room,” it was hard to maneuver the sander. By Saturday evening I returned the sander, right at 24 hours. Sunday, I touched up the edges of the rooms with a smaller hand sander, swept up the dust, and laid down the sealer.
I gave the sealer 24 hours to dry, then laid down the first coat of varnish. Another 24 hours, then the second coat, and done. The first time I had refinished a wood floor. I thought the difference was breathtaking.
It seemed the house was coming alive.