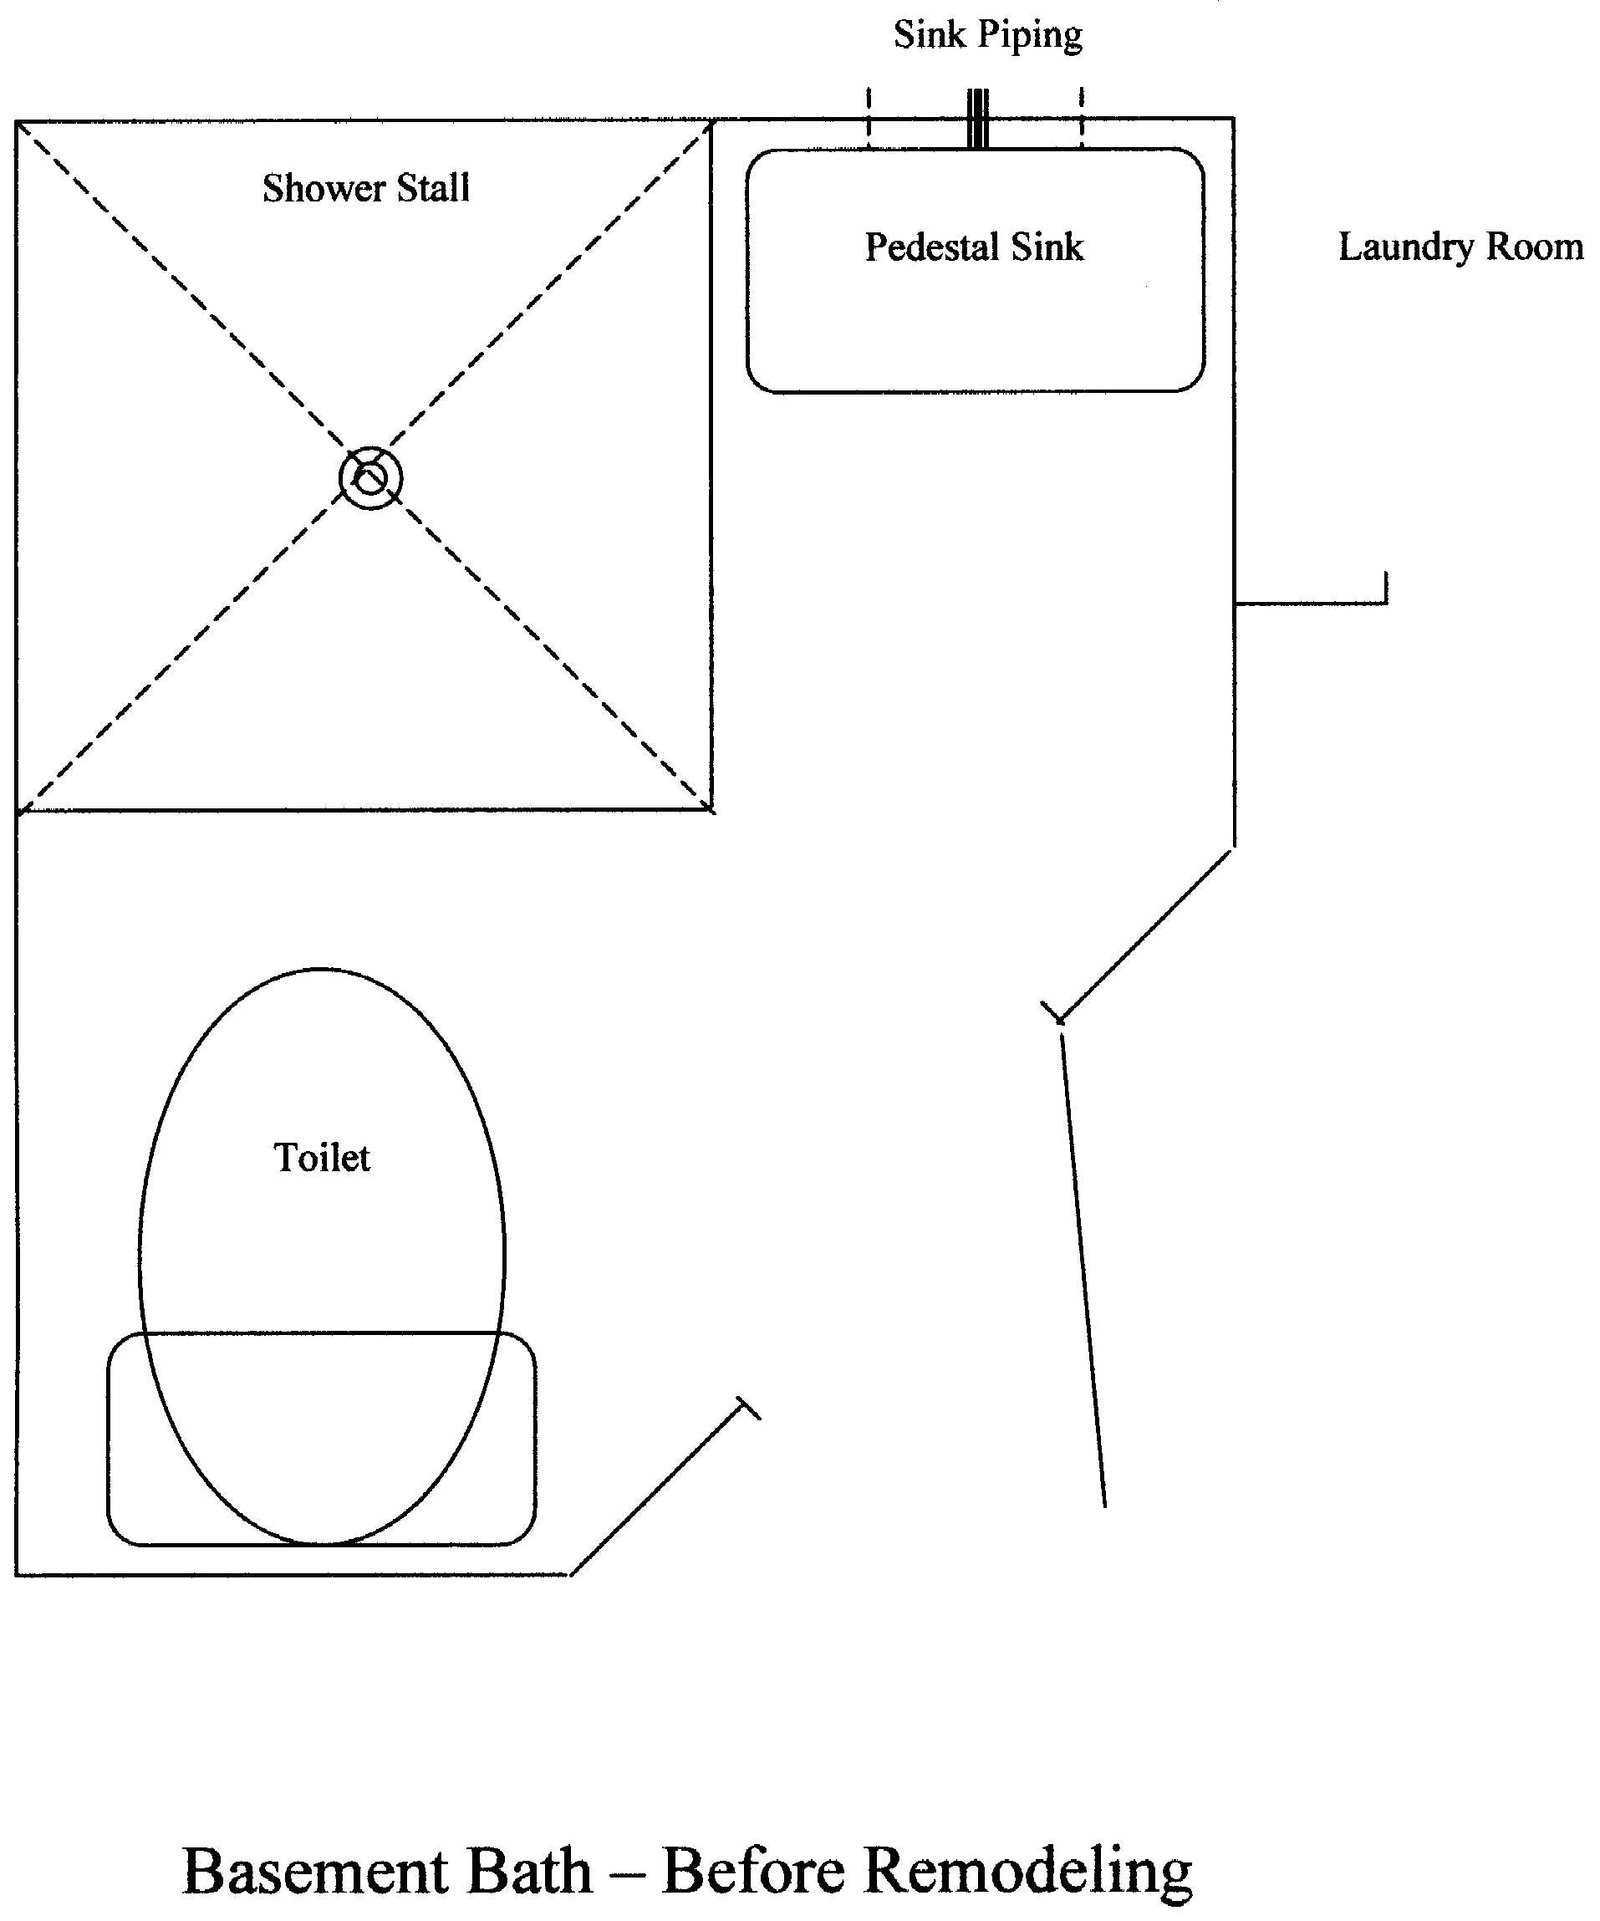
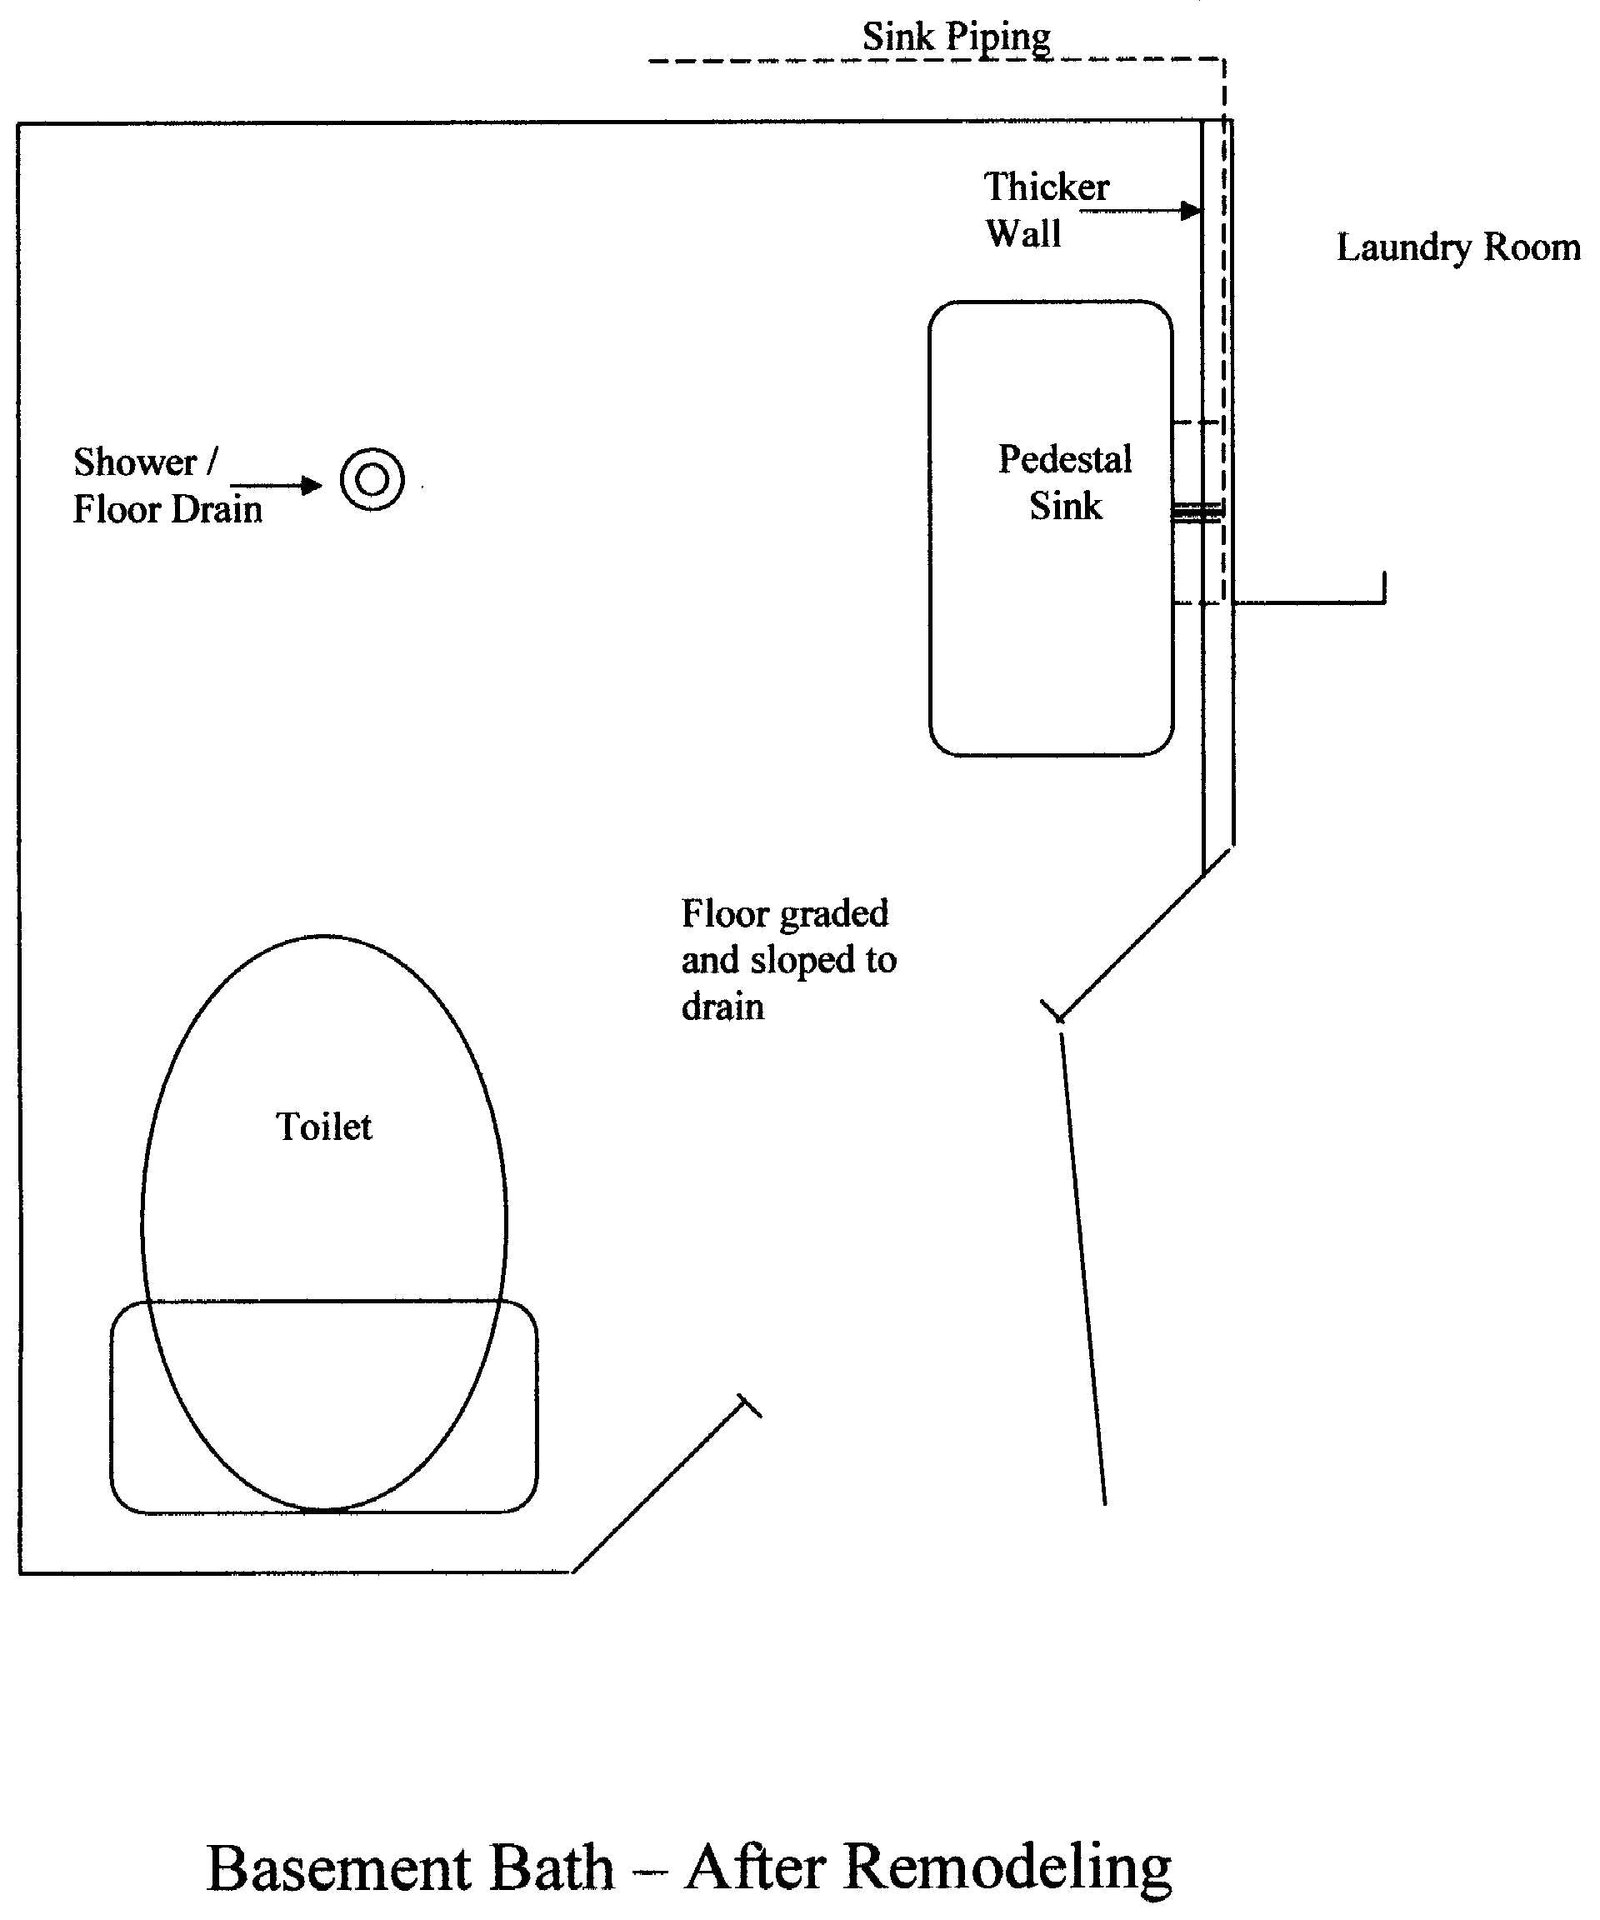
Once again, Winnie and I have taken on a small home improvement project. Not content to merely paint out the entire house, plaster and paint the garage, add a microwave range hood and update the kitchen cabinetry, finish off the basement laundry room, and make a small garden, Winnie decided to finish out the basement bath.
To think we only purchased this house eight months ago.
Our walk-out basement was almost completely finished as a den by some previous owners. All houses in this subdivision with a basement were originally equipped with plumbing for a basement half-bath (toilet and sink) and it looks like the bath was also finished, once.

As best as we can tell, it was the owners previous to us who converted the basement den to a rental apartment. Part of the conversion process was making the once half-bath into a full bath by adding a shower stall. The bathroom itself is only about 27 square feet, so adding a shower stall took up most of the available space and looked really tacky. Not to mention, when the people did the work, they never finished it, so we had a bare concrete floor, hacked-up drywall, and an unfinished ceiling with bare bulb operated from a pull-string.
We really wanted to keep a shower for occasional use but there wasn’t enough floor space for any sized enclosure. After some thought, we decided to keep the shower for occasional use by simply not having a shower enclosure. I’d seen this arrangement in some of the hotels we stayed in traveling around China and though it was a nifty idea. Simply have an open floor with waterproof walls and the shower head installed in one corner. The trick is to have the bathroom floor graded for proper drainage to keep the floors outside the bathroom area dry. And to not use anything in the bath that would be hurt by water…
So, early one Saturday morning in late August Winnie announced it was time to remodel the bath. Within a few hours we had the easy part done; we’d removed all the existing bathroom fixtures and ripped out the fiberglass shower enclosure. Then she left for work… After she left, I hauled the fixtures out into the backyard.
The Ceiling
First step in reconstruction was prepping the ceiling.
We have drop ceilings in the basement den area, solid drywall ceiling in the basement corner room we’ve adopted as our library, but the laundry and bath areas still had the exposed framing and utilities. The bath was too small and there were too many obstructions and cutouts for installing drywall or a drop-ceiling. So we opted to use 12×12 glue-up ceiling tile.

Installing ceiling tile meant setting in 1×2 nailing strips first. One side of the bath’s ceiling had plumbing running below the joists from the first floor bath and kitchen, so the nailer’s had to drop below them. Setting in the nailer’s for the drop so the ceiling tile would look “neat” ended up involving some significant woodworking, which looked so good when it was done I almost hated the thought of covering it up with tile…
The Plumbing
The sink had been crammed into one corner of the room and with the shower enclosure gone there was no reason to keep it there. Winnie wanted the sink on the adjacent wall, which meant extending out the copper pipes and CVCS drain line. I’ve sweated copper pipes before, but it was a long, long time ago.
We took out the drywall where I needed to move the pipes, and one lovely Sunday I spent the day in the basement doing plumbing. I made extra sure I’d have everything I needed before I started, which meant I only made three emergency trips to Lowe’s during the day-long project. We ended up having the water in the house turned off for a mere few hours, tops.
The plumbing work ended up looking pretty good, and I got the copper joints leak-free one the second try. Gluing up the white CVCS drain was easy, a lot of fun, and I got it right the first time.
The new sink location on the adjacent wall meant running the pipes inside a finished wall. The interior basement walls were metal framing instead of wood, something new to me. Metal framing is thinner than standard wood, which meant the drain pipe was wider that the wall it was running inside. Before, the pipes just ran straight through the wall from the laundry room side so wall thickness wasn’t a problem.
Since we wanted the drain pipe hidden, after the plumbing was finished I increased the wall thickness by adding 4″ wide strips of 3/4 inch plywood over the metal framing. I also added some cross-framing to properly mount the sink later, and all together I think the plywood really added to the strength of the wall.
Doing the Floor
The existing concrete floor was pretty uneven around the shower drain, and we needed the floor graded to drain away from the walls and door if we hoped to actually use the shower again (without flooding the basement). There’s all kinds of “self-leveling” floor treatments available for concrete floors, but we needed to slope the floor instead of leveling it.
After several weeks of thinking through how to grade a floor, we hauled home three 60 pound bags of “sand topping” from Lowe’s along with cement-working tools. After some calm, rational (-not-) discussion between Winnie and I we started the concrete work.
I cut 3/8″ thick strips of 3/4″ plywood and laid them down as a large square framing the shower drain area. Winnie showed me how to mix the concrete right on the existing concrete floor instead of in a trough, a technique I’d never seen before. We started molding the sand-topping sloping from the drain low point up to the top of the 3/8″ strips at the far corner of the room.
Once the shower corner was finished we moved the wood strips to another area and used them as a spacer to set the level of the remaining floor. We needed the future area around the toilet and sink base level but at least as high as the high point around the shower area. By using the wood strips, we spread the concrete at the proper thickness.
I say “we” but after we worked the shower area it was Winnie by herself, as there wasn’t enough space in the bath for two people together. She’s actually quite good with concrete and seemed to enjoy working it; Winnie has explained she’d watched people back in China doing concrete work ever since she was a little girl.
The floor grading project turned out okay. The shower area ended up with a low point right at the floor drain, just the way we wanted. We gave the concrete two days to setup, keeping it wet, before laying down the floor tile.
Using ceramic floor tile was a given. We found the same pattern of blue tile at our local Lowe’s that we had used for our bathroom floors back Mississippi. After our 900 square feet of tile in Mississippi, 27 square feet now didn’t seem like such a big deal. Once again, it was Winnie doing the actual work while I cut tile as per her directions. After two days of letting the cement setting up, Winnie put in the grouting. We finished the floor off with a marble threshold at the door.
Putting in Wallboard
With floor tile down we moved on to the walls. The entire walls needed to be waterproof since almost any area in the bath could get wet when using the future shower. We opted for 4 x 8 sheets of “tile board” to cover the walls, a nice tile-looking panel that we could just glue on over the nasty looking drywall. Allegedly easier to install than actual tile, it was still two days of me cutting the panels, keeping the tile lines all matching, with Winnie supervising to make sure I cut everything correctly. After it was all glued up, Winnie filled the wallboard seams using white caulking which actually matched the imitation white grout in the pattern. Once it was all finished, the walls really looked like real tile.
Ceiling Tiles
Next was putting up the ceiling tiles. We quickly learned the trick was to put the glue on the backs of the tile, not the ceiling nailer’s (so the glue didn’t drip all over the tile floor) , and use staples to hold the tiles up while the glue dried (so the tile didn’t fall off while the glue was setting up). Winnie and I worked half the ceiling in one evening. It took longer than expected as every tile needed some cutting or trimming. The second day Winnie finished the rest of the ceiling, again trimming every piece, by herself. As always she made a neat job.
Finish Work
With the ceiling tile finished, I put in a new light fixture and added the trim cover for the ceiling vent. This past weekend we finally reinstalled the sink and toilet, moving them out of the backyard where they’d been lying for almost six weeks. We put back the shower head and mirror over the sink, I trimmed up the bottom of the door, door, cleaned the room out, and Winnie put down a hook latch rug she’d made over the past year. We bought a few bathroom accessories and made the room “ready for use.”
The bath came out looking really nice. Even though it’s a small room with no window, it’s bright and cheerful and feels airy. Winnie is happy with the way it came out, which makes me happy. Even better is that Winnie may not want to do any more home improvement for a few months… Meanwhile, I have an extra shower stall enclosure to sell through Craig’s List.
Related Posts
Home Improvement: How Not-To : Not all How-To projects are created equal. This was one of those projects.
Home Improvement: Toilet Day : Home improvement project number… whatever. Changing out the toilets.
This and That Pandemic Day One Hundred Eleven : Day one hundred eleven of being safer at home from the global pandemic.
