Moving Right Along
By the time we finished the bulk of main-floor renovation work we were into March. There were a dozen small projects still needing to be done. Every small project required either material, special tools, or a couple of hours when we weren’t doing anything else. At this point, Winnie and I had worked on the house literally every weekend, and almost every weeknight until about 10:00 PM, since the previous October. We were tired. But seeing the house come alive felt rewarding.
Not to mention, we were paying a mortgage on two houses and putting every extra dollar into our renovation work. We wanted to get finished so we could start renting the house out. Once the flooring was done, we set-up an air mattress in the back bedroom, brought in a folding camp table, and mostly just lived here. We’d go back to our actual house every few days to check mail and water plants.
On to the Basement
The full basement was created after the house was built, by the then-owner digging out the crawlspace and extending the foundation deeper. The way this was done was for the workers to dig away a section of crawlspace, build concrete forms about six inches out from the existing footing, then pour the new concrete footing. The result was a “ledge” of concrete about four feet off the floor extending about six inches out from the upper foundation. When we gutted the drywall we found markings showing the basement was finished out in 1984. It appeared that the basement only started leaking a few year prior to when we bought the house. These leaks led to standing pools of water on the floor after every rainstorm.

During the months we were working on the main floor, we were trying to use the basement for storage. Keeping tools and materials dry with constantly forming pools of water was difficult. Over the winter months Winnie and I had numerous discussions on how to fix the basement water problem. I’d been doing research and determined the most effective fix was using a full barrier liner with a . Which was expensive. We also knew if we couldn’t keep the basement dry, we couldn’t rent the house.
We dug a dry well in the front lawn, with drain line connected to the front gutter downspout, hoping this would solve the water problem. It didn’t. It was a forlorn hope of saving thousands of dollars on a repair we really didn’t want to do. So,with no other options we took estimates from licensed contractors and hired a company to put in a barrier waterproofing system.

Most of the basement 2×4 framing was still standing, even though all drywall had been gutted the previous summer. Now, we needed to remove all framing around the perimeter foundation so our contractor could cut the drain trench.
Waterproofing with Jackhammers
The waterproofing work consisted of:
- Cutting a perimeter trench around the basement foundation walls
- Lining the walls with a 12-mil thickness fiber-reinforced plastic which dropped into the trench
- Installing perimeter drain pipes in the trench
- Add extra drain points as needed
- Install drains in all outside window boxes, leading inside to the trench drain
- Install a new sump pit with pumps
- Run a discharge pipe from the sump pit to outside the house
- Cover over the trench with new concrete
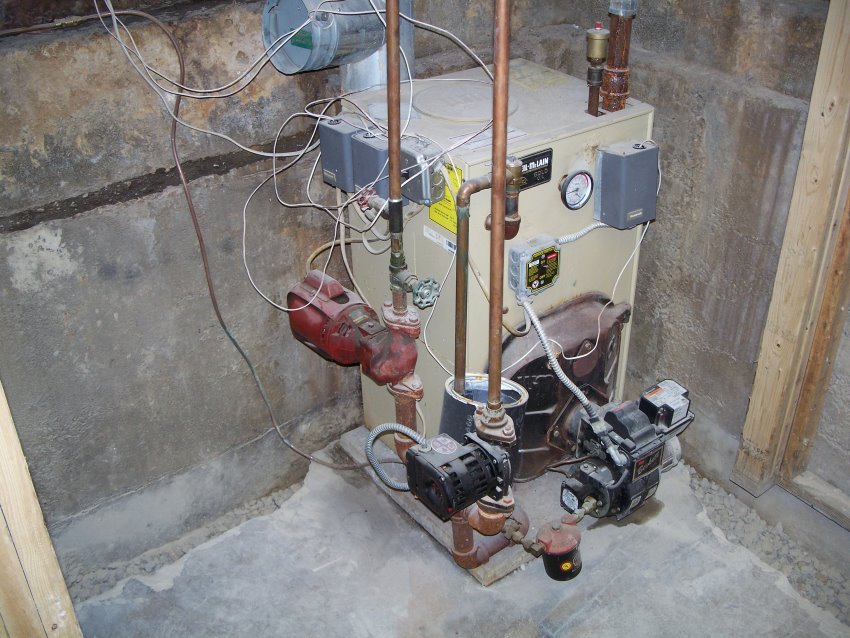
I had the contractor cut drains next to the oil burner and in the clothes washer/dryer/hot water heater closet. Drains in each window box and at the bottom of the outside basement door were included in the price. All these drains ran through the foundation wall into the interior drainage trench. There was a crew of four people working our project.
Cutting the perimeter trench through the concrete floor required jackhammers. I’d seen/heard jackhammers in use before, but never inside a house. The sound was…attention-getting. Fortunately, the contractor didn’t need more than a couple of days to jackhammer the trench.
The concrete floor proved to be four inches thick with a heavy layer of gravel underneath – a solid construction job.
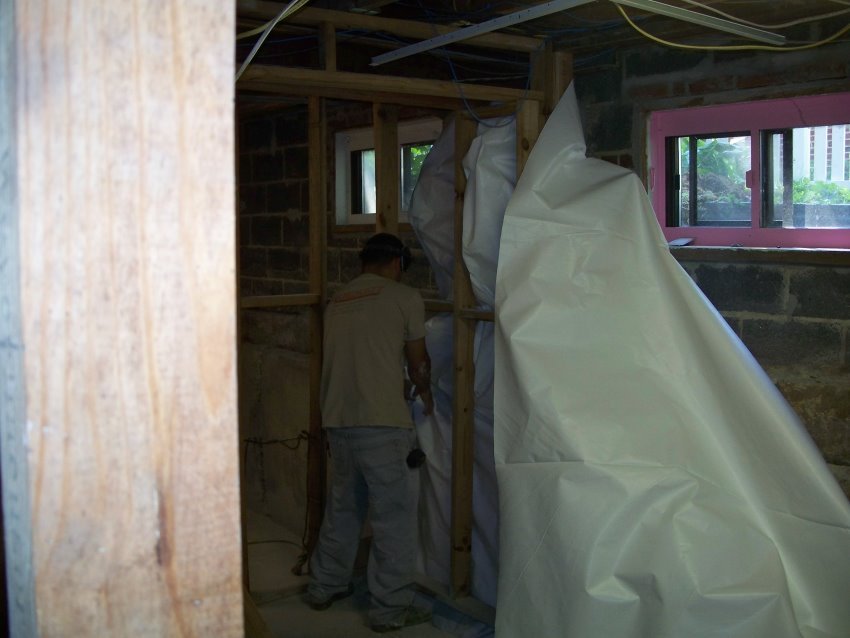
They also drilled holes through the foundations walls to install drains in the outside window boxes. These drains were routed into the trench. Once the trench was cut, the contractor started lining the walls with fiber-reinforced plastic sheeting. They used a special tape that allegedly bonded with the plastic sheeting, guaranteed to hold for twenty years.


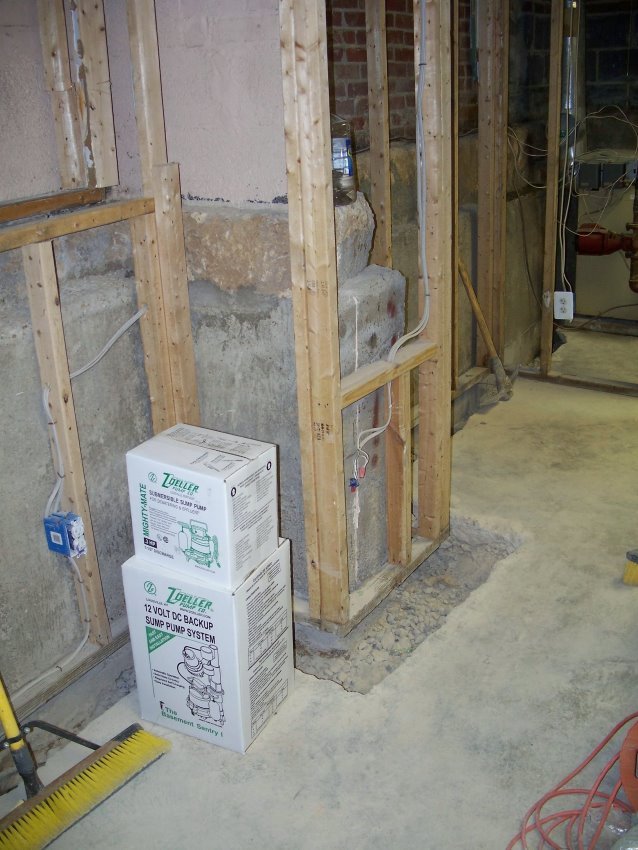
After wrapping the basement walls with sheet plastic, the contractor set in four-inch diameter perforated drain pipe packed in gravel. They routed this pipe into the sump pit. The sump pit housed two pumps: one a standard half-horsepower submersible pump. The second was a battery-powered pump, and the installation included a car battery with battery charger. The contractor explained this was done so we’d have drain coverage even if we lost power. A nice touch. After this, the trench was filled with gravel to one inch below the existing floor, and concrete poured over the top to seal it all in. There was just enough space left between the sheet plastic and foundation walls to divert water down into the trench drain pipe, to the sump pit, and pumped out. I later wired up a dedicated outlet just for the pump and battery charger.

The work took about one week. We had our first live test several days after they finished – a heavy spring rainstorm. I could literally hear water trickling through the basement wall behind the sheet plastic. But the basement stayed dry. We were off and running.
Reframing
When the owner who built the basement framed it for rooms, they extended the framing straight up from the floor. Which created window pockets about twelve inches deep and made the already-small rooms feel even smaller. While I tore out all the perimeter 2×4 framing for waterproofing work, I came up with a plan on improving the rebuild.

I designed 2×4 framing panels for the upper wall section that I mounted from the ceiling joists. I also added anchor points to mount the panels to the masonry walls. Puncturing the plastic sheeting seemed like it would defeat the purpose of waterproofing in the first place, but I drilled these anchor points above the exterior ground level. I also used a lot of caulking inside the anchor holes and around the edges, before mounting the panels. These panels had a couple of inches clearance from the plastic sheeting.
Once the upper panels were mounted, I pre-fabricated lower 2×4 panels and installed them. Since these were sitting on top of thin concrete covering the perimeter drainage pipe, I used heavy-strength construction glue to fasten the frame panels to the floor. I also fastened the inside corners together, which increased their strength. These lower panels also had a couple of inches clearance from the plastic sheeting.
I used one-half-inch plywood to connect the upper and lower panels. When I was finished, I had nice perimeter framing that created a little more useable living space. As bonus, I also had a lot of built-in shelving about eleven inches deep for storage and display.


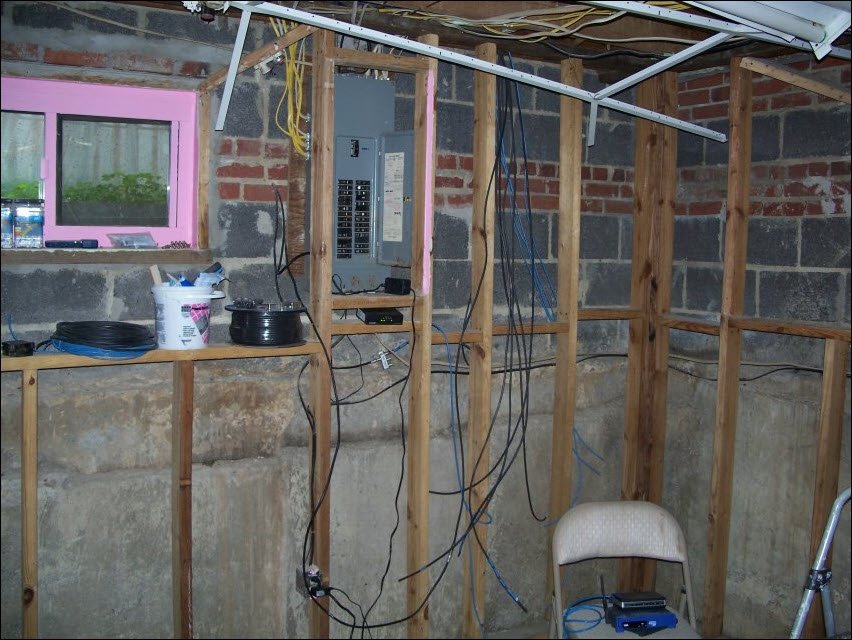
In a few places I still continued the straight-up walls. One spot was in the back corner bedroom where the power panel was located. I decided to create a cabinet door over the power panel and use the space next to it for terminating all Cat5 network cables and TV coax cabling, with another cabinet door for access. There was a window next to the power panel, so I did some seriously advanced (for me) carpentry to frame out this window.

Notice the pink window frame. The entire basement was painted this color when we purchased the house – grounds for ripping out the drywall even if it hadn’t been covered in black mold.