Estimated reading time: 9 minutes
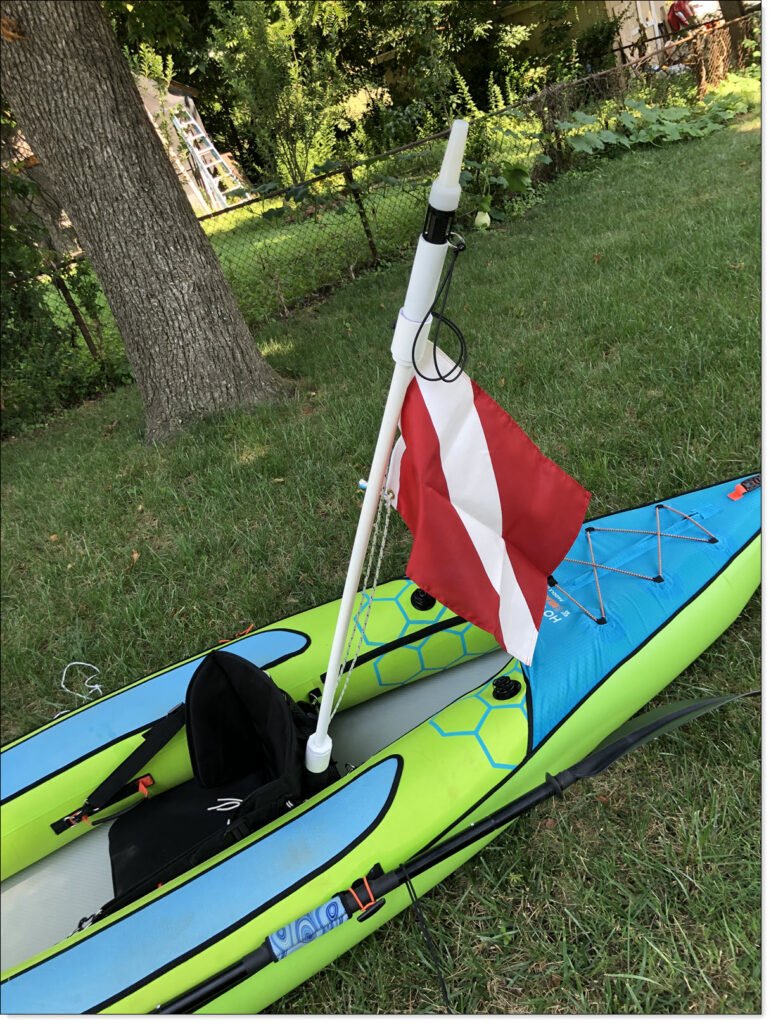
My latest kayaking hack is a simple mast made of PVC piping, used to hold a safety light for nighttime kayaking. This mast can be assembled in about one hour, once you’ve collected all the pieces, and costs less than $30. It mounts in a fishing rod holder, which are fairly common on many recreational and fishing kayaks. As added bonus, this mast can also be used to display a flag or pennant, which may be useful to increase your visibility if you paddle in open water around lots of power boats.
Why Use This Mast?
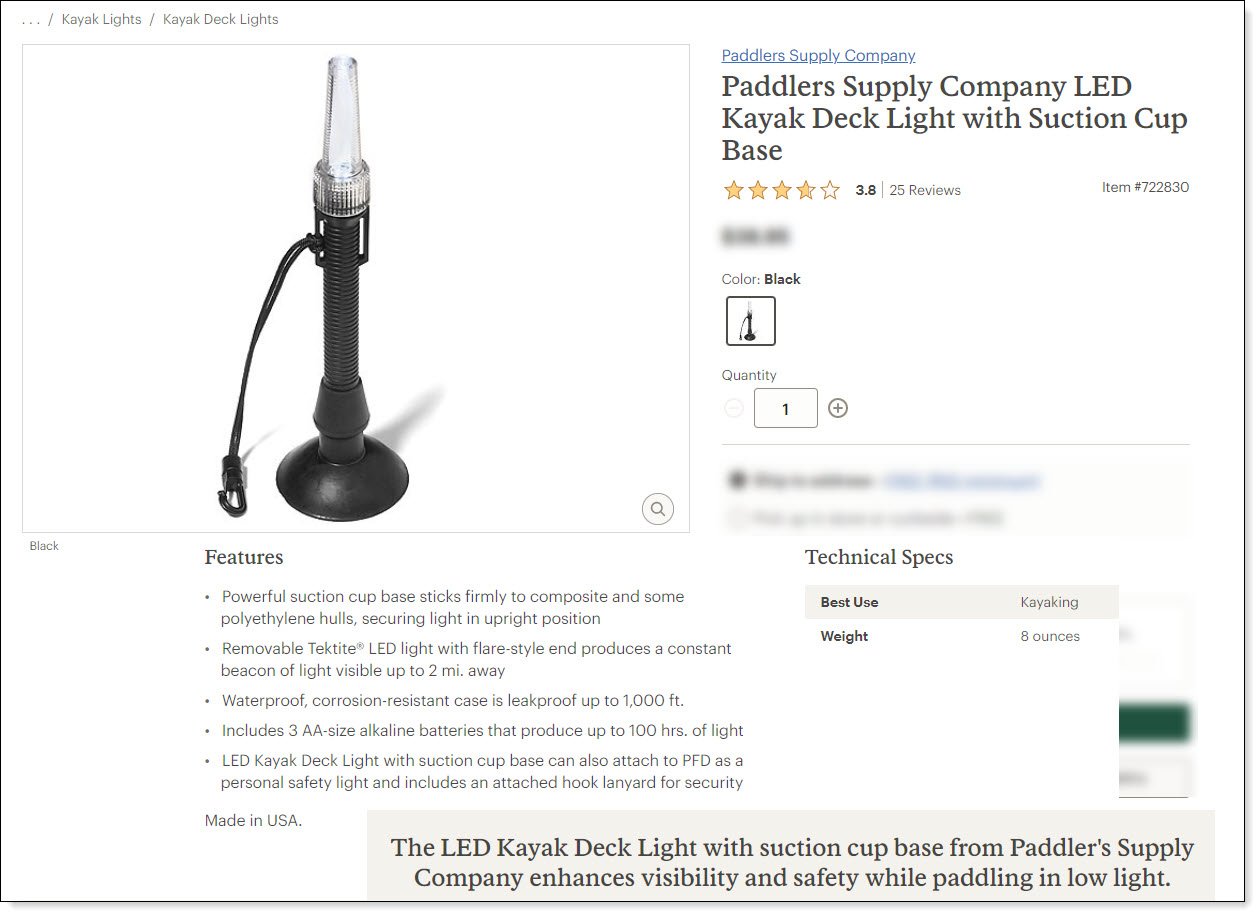
Nighttime kayaking can be even more enjoyable than daytime kayaking. However, US Coast Guard regulations requires all boaters out on the water at night to display, at minimum, a single all-around white light. There are a number of kayak safety lights designed for this purpose. However, most include a suction cup or screw mounting to attach them to a kayak’s deck.
There are a few problems with mounting your safety light directly on your deck. For one, your body will block the light from certain angles, creating blind spots where other boaters do not see your light. Which defeats the purpose of having a safety light. Another issue is for those of us paddling inflatable kayaks. Suction cups simply don’t stick well to an inflated kayak, and mountings that require clamps or screws are pretty much a non-starter.
There are a few small-boat white safety lights on the market that come with a mast. But those tend to be expensive, and most still require either clamps or drilling mounting holes in the boat.

Design Notes
I came up with a design that uses a kayaks’ fishing rod holder as the light mast mount. I’ve tested it a few times and found it works well. It holds the light above my head, providing clear all-around visibility to other boaters. I also like being able to fly a flag or pennant. A future project is to convince my wife to make me some custom pennants I can fly with the names of my kayaks. Just for fun.
Base
Of the kayaks I’ve tested, I’ve found that fishing rod holders come in two sizes. The standard size is slightly less than one and one-quarter inch inside diameter. For these, you would use one-inch diameter PVC pipe as the base, which creates a secure fit. Another size, on some inflatables, is a fishing rod holder one and one-half inches inside diameter. For this type, you would need to use PVC pipe one and one-quarter inches diameter, which again creates a nice, secure fit.
The lower eyelet gives you a place to tie off the mast assembly to you kayak, which could prevent loss if you flip your kayak.
Light
The actual mast light slides inside an open PVC pipe on top of the mast (“socket”). The model safety light I already owned has a body about three-quarters inches diameter. This light fits nicely inside a piece of one-inch PVC pipe. The suction cup base is easily removable, and not needed if using this light mast. The upper eyelet gives you a place to tie off your light, which prevents losing it.
There are several other portable boating safety light models with a larger diameter body. For those lights you would need to use a larger diameter PVC pipe for the light socket.
Mast
For aesthetics, I used a piece of one-half-inch diameter pipe for the mast section. In order to adapt the light socket and base to the actual mast, I used PVC pipe fittings called “bushing.” In the plumbing world, a bushing allows a plumber to securely connect two different diameter pipes together.
Building the Mast
If you’ve never worked with PVC pipe, this project can be a great introduction to working with it. PVC pipe is quickly becoming a popular material for home-built boating accessories. It’s cheap, doesn’t deteriorate in outdoors use, and is easy to work with.
Instructions
In addition to the instructions and parts list shown below, I’ve also created a downloadable set of instructions. These instructions are freely distributed under a Creative Commons (BY-NC) license, and offer additional details on piece parts.
Tools
- Small hand saw or PVC pipe cutter
- Sandpaper, 220 grit or finer
- Electric drill with 1/8″ diameter drill bit.
- Tape measure
Materials
To build a light mast with one-inch diameter mast base, and one-inch diameter light socket:
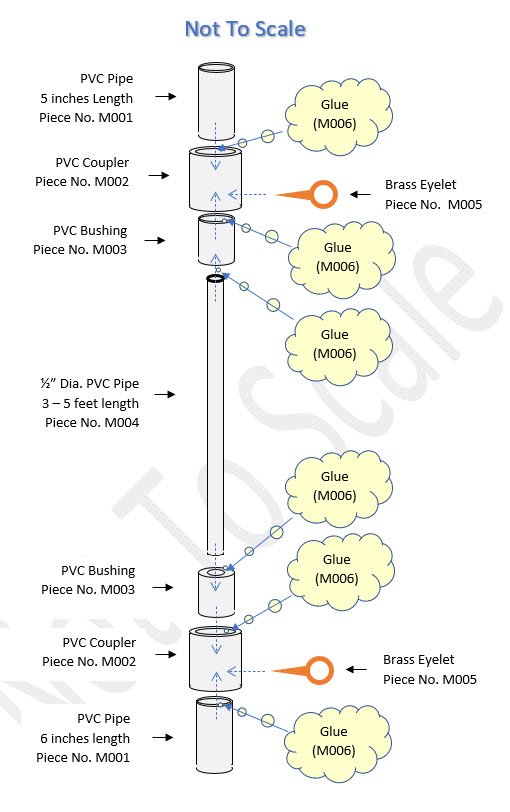
- At least one foot of one-inch diameter PVC schedule 40 pipe. Typically, PVC pipe is sold as a minimum five foot lengths, but some big box home improvement stores may sell PVC pipe in two foot lengths. (Piece M001)
- Two PVC One inch diameter couplings. Designed to slide over the bushing and one-inch diameter pipe for a secure connection. (Piece M002)
- Two PVC reducer bushings, designed to adapt a one-inch diameter pipe to a one-half inch diameter pipe. (Piece M003)
- A five foot length of one-half-inch diameter PVC schedule 40 pipe. (Piece M004)
- Two number eight wood screw brass eyelets. You can substitute common steel for brass, but they will probably rust with use. (Piece M005)
- One kit of PVC primer and cement. You only need six swirls of glue, so find the smallest sized kit as this cement is a little expensive. Ensure you buy the cement for “white schedule 40 PVC, for water piping,” as there are several different types. The cans include glue applicators attached to the inside of the caps. (Piece M006)
Assembly
Time needed: 1 hour
Building a PVC Light Mast
- Assembling the Light Socket Subassembly
– Cut a five-inch section of one inch diameter pipe (piece M001). Smooth the cut ends and test fit into the one-inch coupler (piece M002). Then remove and use glue to assemble.
– Test fit the one-inch to one-half-inch bushing (piece M003) into the other end of the one-inch coupler. Then remove and use glue to assemble. - Assembling the Mast Base Subassembly
– Cut a six to eight-inch length of one-inch diameter pipe (piece M001). Exact length should be determined by the depth of the fishing rod holder on your kayak. The length of the piece should not exceed the depth of the holder, plus about one extra inch to insert into the coupler.
– Smooth the cut ends and test fit into the one-inch coupler (piece M002). Then remove and use glue to assemble.
– Test fit the one-inch to one-half-inch bushing (piece M003) into the other end of the one-inch coupler. Then remove and use glue to assemble. - Assembling the Mast
– Cut the one-half inch pipe to desired length (piece M004). This piece should be at least three feet long, to get the light above your head while seated in the kayak. Making this piece too long may make it difficult to store inside the kayak when not in use.
– Smooth the cut ends.
– Test fit into the bushing hole of the mast socket subassembly. Then remove and use glue to assemble.
– Test fit the other end of the mast into the bushing hole of the base subassembly. Then remove and use glue to assemble. - Installing the Eyelets
– Using a pencil, draw a straight line on the lower area of the mast light socket aligned with a line on the mast base. This aligns the two lanyard rings with each other.
– One the mast socket and base, on the line in the area where the bushing is glued in, drill a small pilot hole for the brass eyelet screw. You want to drill where the bushing is located as this is the area with thickest plastic.
– Hand twist each eyelet (piece M005) into the pilot holes until the threads are completely buried in the plastic. Be sure to align the rings vertically along the axis of the mast. - Finishing
If you want to clean up and remove the PVC industrial markings, you can paint the assembly using a spray paint designed for plastics. As an alternative, polish the plastic pieces using a nylon scouring pad, which should buff off the markings without excessively scratching up the PVC.
Notes on Modifying This Design
Larger diameter PVC light socket and base pieces may be needed if you use a light different than the one shown here, or have a kayak with one and one-half inch fishing rod holders. The HO Sports “Beacon” kayak, shown in the illustrations, uses the larger diameter rod holders. The rod holders on Sea Eagle’s “Multi-Purpose Kayak Storage Box” which is designed as a fishing and storage box accessory on several of their kayaks, also uses the larger diameter rod holders.
If you modify the sizes of the light socket or mast base, be aware that you will need to change three pieces each subassembly; The short section of piping, the coupling, and the bushing. The bushing will need to have the outer diameter match the size tube section you use, with the inner hole-sized for one-half-inch pipe. The coupling will also need to be sized for the larger pipe size selected.


[…] Boating Hacks: Kayak Light Mast […]