
Estimated reading time: 16 minutes
When we moved to our present house, I really expected to not be doing any more home improvement projects. After our pre-move-in and clean-up I thought the house looked pretty good. Then, Winnie built a massive brick and stone patio over the summer. Once again, I thought that would be the extent of home improvement here.
It was not to be. Right after Thanksgiving, Winnie announced she wanted to redo our kitchen countertops. Of course, the project needed to be completed before Christmas, as we had already planned a Christmas dinner with guests.
The Start
We completely rebuilt the kitchen as part of our extensive renovations when we bought the house in 2008. I built the countertops using three-quarter inch plywood with an extra three-quarter inch thick lip. Then I covered it with a greenish-colored Formica® laminate. Given the extent of damages various tenants did to this house over the years we rented it out, I’d say the laminate held up pretty well. When we moved in there was one chip missing on one outside corner, some wear spots, and one long crack on an inside corner near the stove.
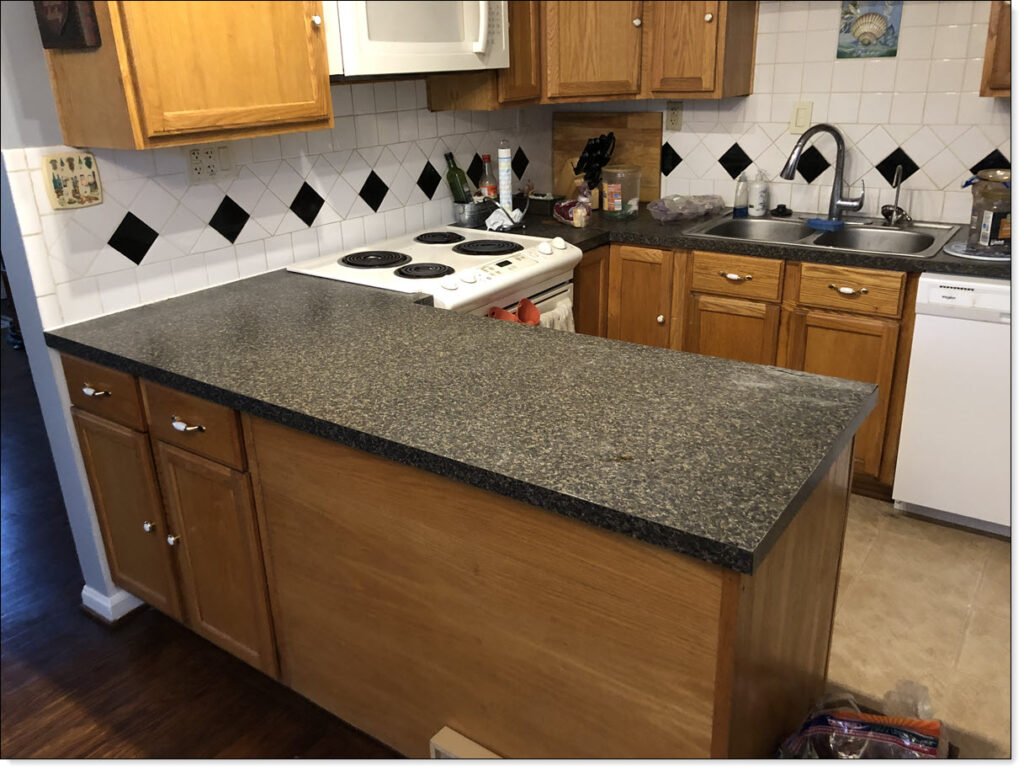
It was good for me. Winnie, of course, had other ideas. After returning home from our cousin’s house after Thanksgiving, Winnie announced she wanted to redo the kitchen countertop. My first thought was “why?” My second though was to replace the Formica® laminate with some new, different patterned laminate. Then Winnie explained she wanted to use large-sized four foot by four foot porcelain tile, which currently seems to be the in-style. Which would also be a lot more difficult than just installing laminate.
Deciding On Toppings
The next day we went to our local big-box tile and flooring store to take a look. I was pretty quickly opposed to using the four foot by four foot tile Winnie wanted, on basis that I had no facilities to cut it. After considerable negotiation, we agreed on using two foot by four foot tile. I felt I could manage a two foot by four foot size, and it would still cover the countertops well. Winnie did not want small tile as she didn’t want grout seams.
After considerable shopping, she selected a white marbleized-looking porcelain tile pattern. It also happened to be on sale, which was a big decision factor. I calculated we’d need seven pieces, and insisted on buying one extra piece “just in case.” I wanted some leeway for tile-cutting practice.

Mission Creep
Not content to just replace the countertops between Thanksgiving and Christmas, Winnie also wanted a new sink. The existing sink was a stainless steel thirty-three inch wide double basin, six inches deep. It was actually wider than the sink cabinet, so when I installed it I had to cut the vertical sides of the cabinet to fit the sink. Winnie didn’t like the double sink and wanted a smaller single basin sink, eight inches deep. A smaller sink meant I’d have to make the countertop hole smaller.
After buying the tile, we found a twenty-six inch wide sink basin and sink faucet Winnie liked, and hauled it home. We were ready.
Preparation
Having acquired the future countertop tile and sink we started prep work. Beside the hard deadline of Christmas, we also knew that we’d have no stove or sink during this project. Which placed some urgency on moving the project along.
I started with the peninsular section as it looked to be the easiest part. I had glued the laminate down with contact cement, and a wide chisel was all I needed to remove it. Once the laminate was gone I scraped off excess contact cement as needed.
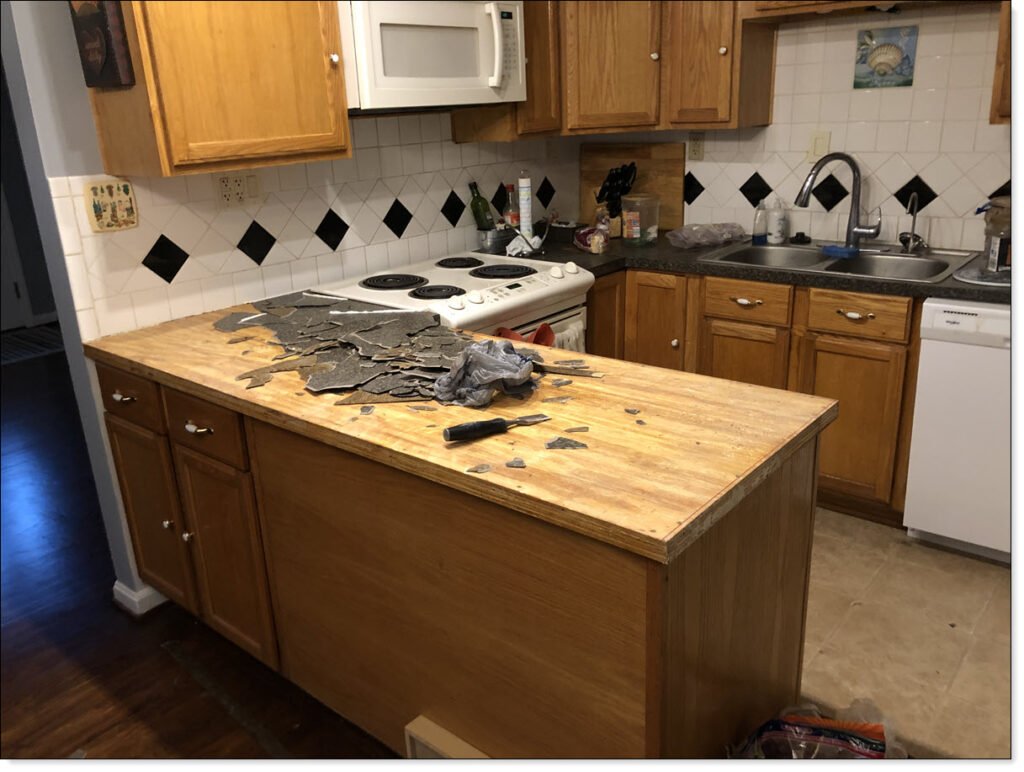
We worked around the sink and stove until the rest of the countertops were cleared. Then, bowing to necessity, we removed the stove and sink. This allowed us to remove the last of the laminate.
With no stove and no kitchen sink, the clock was seriously ticking.
A Smaller Sink
The next step was making the sink opening smaller. I had to close in both the vertical sides of the cabinet and the countertop. Since I used three-quarter inch plywood to build the countertop, I used three-quarter inch plywood as filler.
I cut two pieces to fill in the countertop opening, then cut two more pieces to fit the vertical cabinet side cutouts. I opted to use Gorilla Glue® to hold everything together. This type of glue is waterproof when dry, very strong adhesion, and it also expands as it cures which is great for filling in small gaps between the two glue surfaces. I stapled some thin scrap wood on the inside surfaces for flush alignment, applied the glue, and set the pieces into place. Then I took a break.
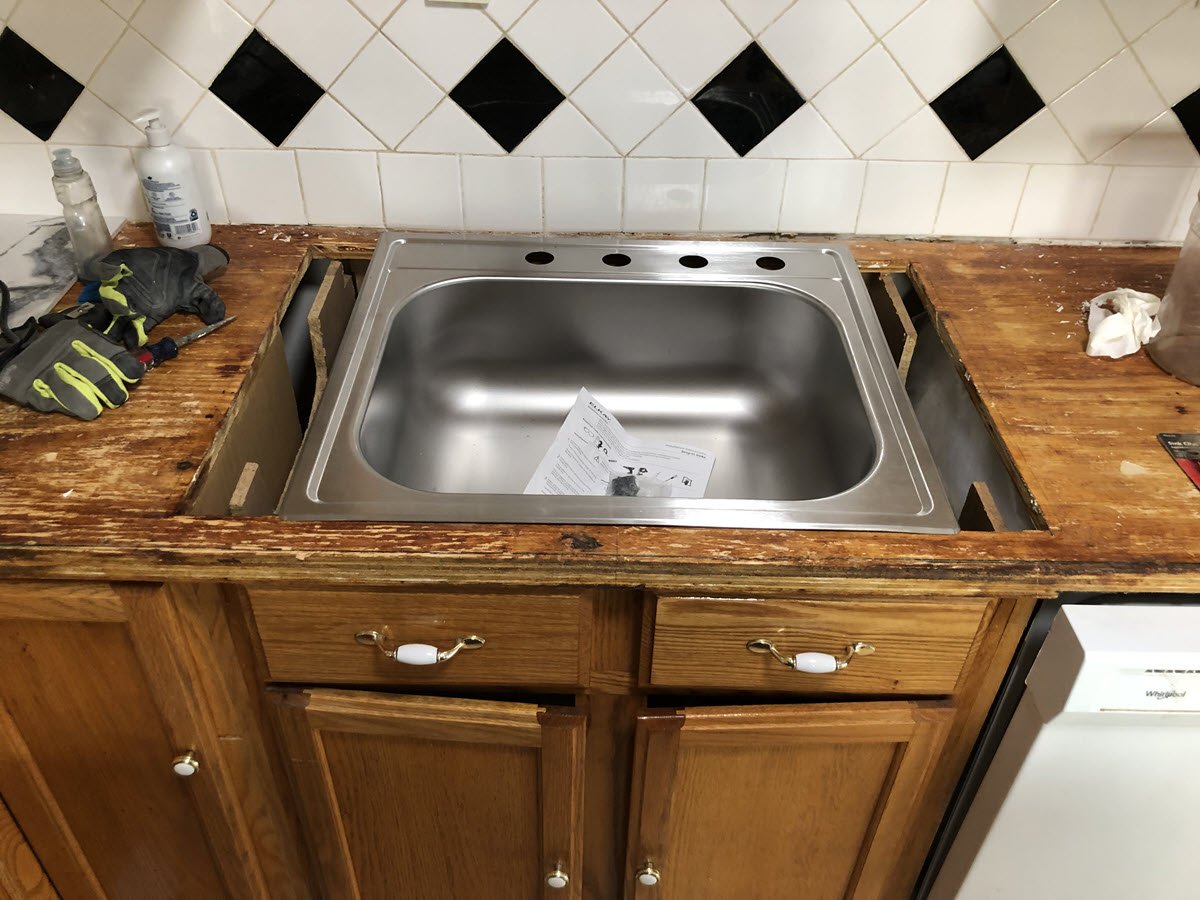

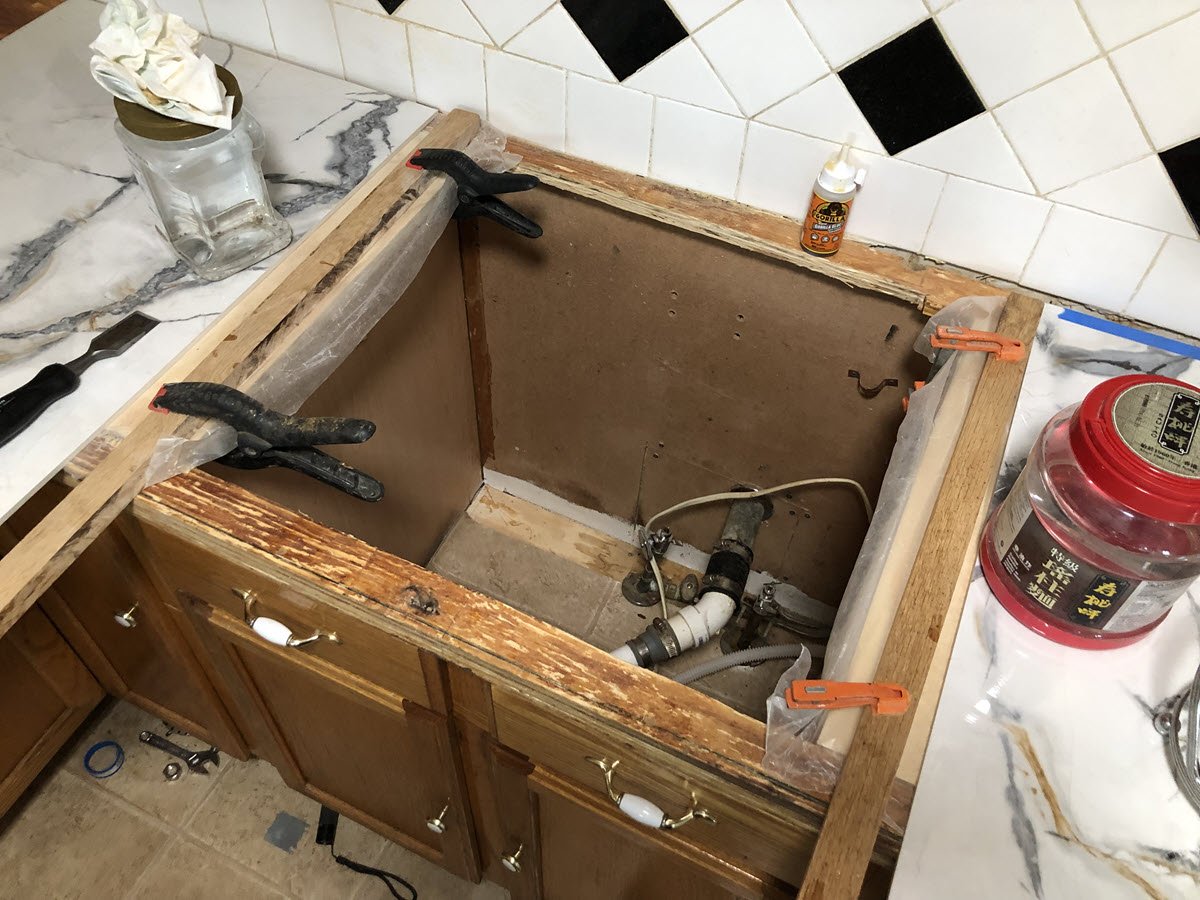

Once the glue on the vertical filler pieces had set, I glued in the two countertop side pieces. The vertical filler pieces gave me a supporting bottom edge that would provide strength needed to support the new sink basin. I used clamps and scrap wood for flush-aligning the pieces while the glue set. I put wax paper between the countertop and scrap wood so they wouldn’t stick to each other.
The left side filler piece ended up just a tiny bit higher than the original countertop. I hit it with my belt sander to level it. Then test fitted the new sink basin and surprised myself that it set perfectly in the opening.
Laying Tile
While I had been closing up the sink opening Winnie was laying out the tile. The peninsular counter is twenty-seven inches wide and six feet two inches long. The countertops along the walls are twenty-five inches deep, and the long piece with sink cutout is eight feet long. As it turned out, the tile was actually three-eighths of an inch per side less than a full two feet by four feet. We did not want any grout lines between tile pieces, another factor to consider when measuring.
The large pieces went down first. From there we could lay out the small strips to fill in where the tile wasn’t quite wide enough.
Cutting Tile
At this point I still wasn’t sure how to cut the tile. We have a small wet tabletop tile saw, but it was way too small to use with this large tile. I had done some YouTube research, which gave me several ideas. The key was to be able to make clean straight cuts in the porcelain tile.
My first try was using a ten-inch wet/dry diamond saw blade in my table saw. I made my first cut with Winnie’s help guiding the tile. It was a disaster. The blade wobbled, jammed the tile, and when I finally finished the cut it was ragged and anything but a straight line. Fortunately, we were able to use it as a smaller piece in another location. I did remind Winnie why I wanted that extra piece of tile.
After more thought and more YouTube research, I opted to go with a four-inch wet/dry continuous diamond saw blade in my hand grinder. I was able to rig a work surface to support the large tile, and used scraps of oak for my straight edge. On my second try, I was able to make a passable straight cut. But, between the minor chipping along the cut, and a less than perfectly smooth edge, we realized we would have to arrange the tile pieces so cut edges were along the outside edges of the counter. Any place where pieces of tiles would meet would need to be the factory edges.
Armed with this newfound knowledge and newly gained tile-cutting skills, Winnie and I cut the remaining tile pieces.
Finding the Perfect Tile Adhesive
Once we had the tile pieces cut and laid out, our next challenge was glueing them down. We looked at a number of tile adhesives, but none were recommended for gluing tile directly to plywood. We talked to several tile people and they all told us we’d need to lay down cement board first, then glue the tile to the cement board.
I was violently opposed to using cement board. We would need to use special screws to hold the cement board down to the countertop, which by design had to extend through the plywood at least one-half inch. This meant screws sticking through inside the cabinets and top drawers. Not good.
Not to mention, this would add an additional one-quarter inch height to the countertops. We were already adding three-sixteenth inch just with tile.
As Winnie and I wandered around a third big-box home improvement store, trying to find a suitable tile adhesive, another customer asked if we needed any help. Winnie started explaining our problem with me helping. The man listened, then said “use construction adhesive.” He explained he used construction adhesive all the time for tiling projects and it worked fine. We thanked him profusely and went off in search of construction adhesive.
Gluing it Down
We started with the peninsular counter, again as the easiest to do. I stapled strips of wood around the edges of the countertops to help align the tile. Then I laid closely spaced beads of adhesive, enough to do one section of tile. Once I laid adhesive over one section, Winnie and I carefully laid down the tile.
We needed to put pressure on the tile to set it into the adhesive. The best way to apply pressure turned out to be a combination of pots of water and Winnie dancing on it.


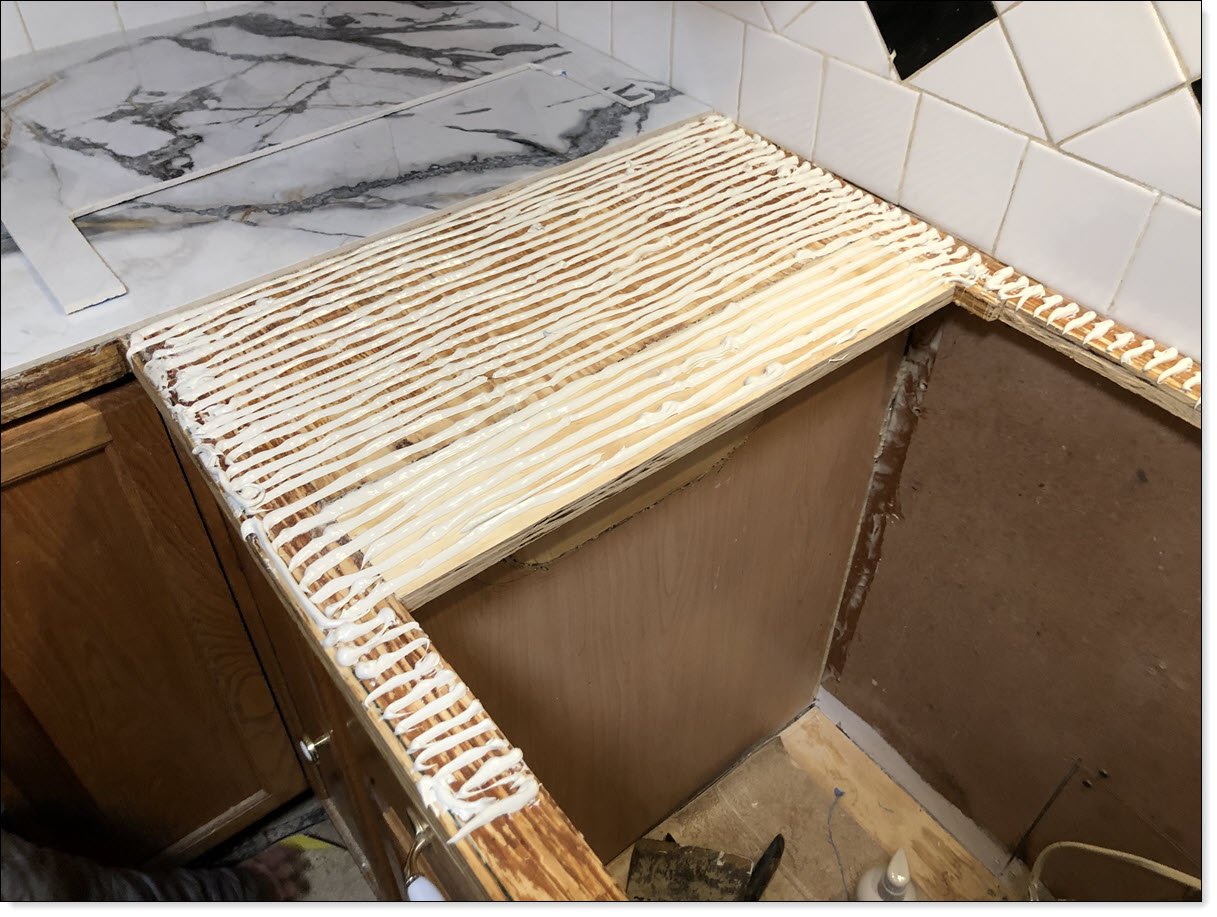

Once we figured out the first piece, the rest went down pretty quick. I used 3M Marine 4200TM adhesive to seal the seams between pieces of tile. I just happened to have most of a tube left from an old boat project. This adhesive allowed us to butt the tile pieces together without worrying about water seeping through. We were careful to put pressure across the seams so the adjacent tile pieces would be smoothly aligned.
We allowed a day for everything to set up, then pulled off all the weights. There were a number of tiny spaces in the tile seams so Winnie spent some quality time squeezing in the rest of my 4200 adhesive. Then she scraped off excess adhesive with a razor blade.
Replacing the Stove and Sink
At this point we’d gone over one week with no working kitchen. Our next step in project replacement countertop was installing the new sink.
Plumbing is not one of my strong points. I would have been perfectly happy calling in a plumber on basis that I shouldn’t be taking work away from a seasoned professional. But, Winnie convinced me I could do it. Armed with her encouragement I set about installing her new sink.
I normally need to make at least one emergency run for parts whenever I’m doing a plumbing project. This time, I was determined to beat my record. So, I carefully purchased everything I could possibly need before starting.
The Sink
I had a stroke of blindingly obvious insight and installed the new faucet and garbage disposal onto the sink basin before setting it into the cabinet. Then, I realized someone would need to get inside the cabinet to set the sink mounting clamps in place. These clamps hook into a track welded on the underside of the sink’s lip and onto the bottom inside edges of the counter.
I spent about two minutes trying to fit inside the sink cabinet, and realized that my senior citizen body just wasn’t as flexible as it was even ten years ago. Winnie volunteered to do this and climbed right inside. I handed her the tools and clamps and explained what she needed to do. She figured it out and got all nine clamps (three on each sink edge) properly set into place. Before she tightened everything down I squeezed caulking under the outside edges of the sink for waterproofing.
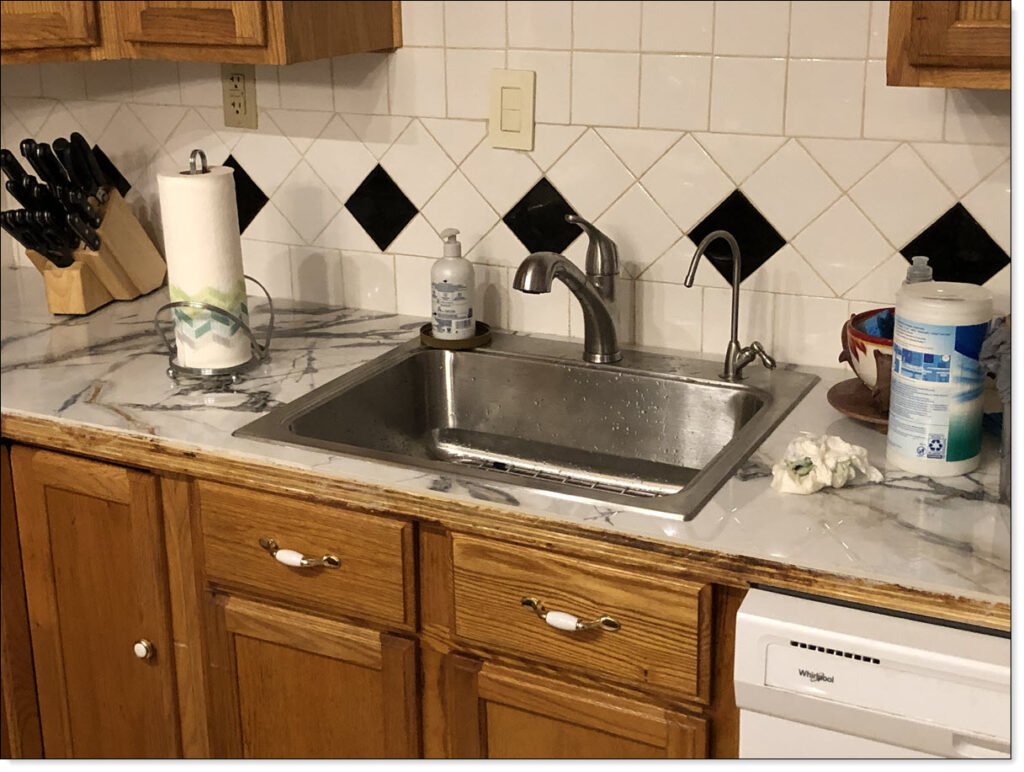
Once Winnie had the sink clamped down I hooked up the water connections. Then, it was time to install the drain piping. Given this sink only had one drain, as opposed to the previous sink with two drains, hooking up drain piping was fairly easy. With drain piping in place, Winnie did a test run of her new sink while I watched for leaks. I had to tighten down a few connections, but everything worked. My final step was hooking up the electrical connection to the garbage disposal, and we had a fully functional kitchen sink.
No emergency plumbing run this time!
The Stove
The stove was the last thing we needed to do. During the time we were installing tile the stove was sitting in the middle of the living room. We moved it into the kitchen into place for hookup. As this is a , the electric cable is hard-wired instead of a plug and outlet.
Once connected, Winnie and I lifted it into place, slid it in, and we had a working stove. All that was left was to put the countertop edging on, and we would be done.
Or so we thought.
Rework
Shortly after we finished putting in the stove, we both heard a loud “SNAP.” We looked around, but didn’t see anything obvious. It wasn’t until the next morning Winnie called me into the kitchen to show me one side of the sink edge had lifted up off the countertop. I poked around under the sink and determined that the mounting track had snapped off. That side of the sink had no mounting clamps.
I took a few minutes to rant, then settled down. After a mostly rational discussion we decided we had to replace the Goddamn sink, again. So that afternoon I pulled the sink out, took off the faucet and garbage disposal, and hauled it back to whence it came.
Customer service did accept it as a return after I showed the lady how the damn thing broke. Winnie and I went to the plumbing section for a replacement. I suggested, and Winnie agreed, that we should try a different sink model this time around. We ended up selecting one that also included a matching faucet, but otherwise same size as the previous.
Back home, the installation went quick as we’d had a lot of recent practice. All the water connections matched up and garbage disposal locked into place right where it was supposed to. Winnie got the mounting clamps tightened down properly after I squirted more caulking under the sink edges. With everything in place, we tested, tested sat. Winnie even decided she liked this sink more than the previous one.
I figure this second sink qualified as my emergency plumbing run. Next time I’ll make it easier on myself.
Finishing Touches
The last thing we needed to do was put a finish edge on the countertops. The plywood top, with the bottom lip, was already one and one-half inches thick. Now, we’d added about one-quarter inch thickness with the tile and adhesive. So, we had a pretty thick edge to cover up. We opted to go with some one-sixteenth inch mahogany veneer plywood.
I cut the plywood sheet into one and seven-eighth inch strips, and glued it along the countertop edge with a few finish nails to hold it in place while the construction adhesive setup. Once set, Winnie filled in the nail holes and seams with wood filling, rubbed on some oak stain, and varnished it. We were done.

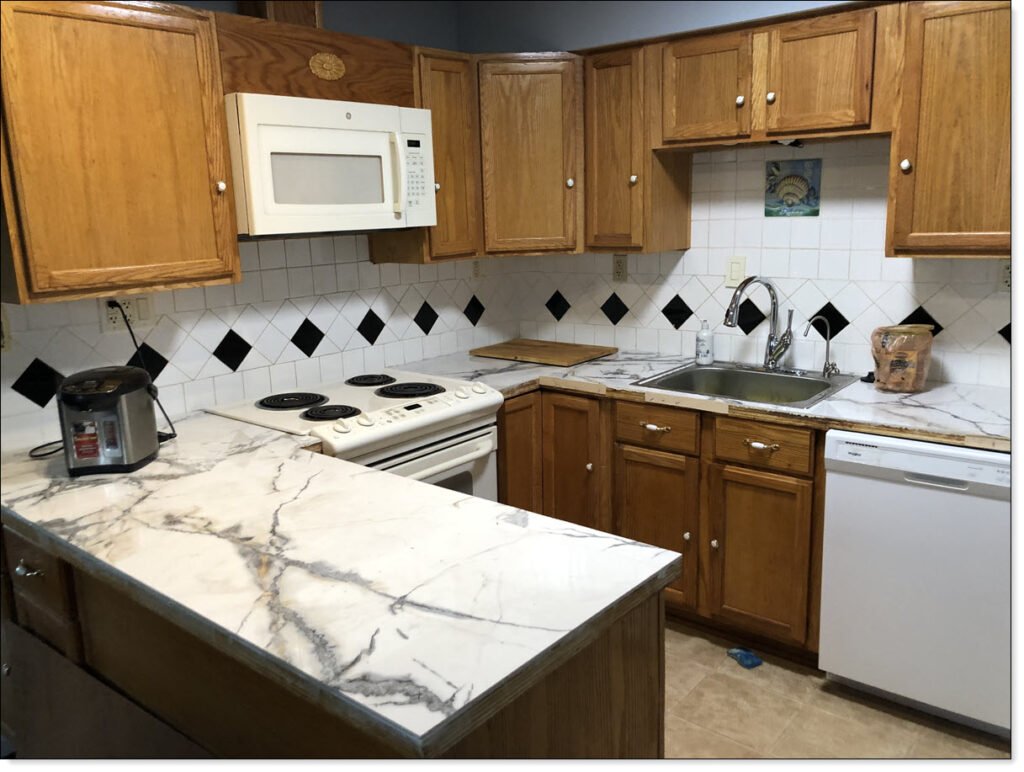
We finished about one week before Christmas, just in time to put up our tiny tree and get ready for guests. Mission accomplished, and Winnie is happy with the new look of her kitchen.